Summer is the perfect time to indulge in refreshing treats, and what better way than with DIY Watermelon Popsicles?
These homemade delights capture the essence of summer with their juicy, vibrant flavor and natural sweetness.
Not only are they a hit with kids, but they also offer a healthy alternative to store-bought snacks.
Imagine biting into a cool, sweet popsicle on a hot day, with the taste of fresh watermelon exploding in your mouth.
This recipe is simple enough for the whole family to enjoy making together, creating both delicious popsicles and lasting memories.
The History and Cultural Significance
• DIY Watermelon Popsicles trace their origins to regions with hot climates, where they were originally created as a way to utilize the abundant summer fruit.
• The dish evolved over decades as freezing techniques improved, eventually becoming the beloved version we know today.
• In many cultures, watermelon is a staple at summer gatherings, symbolizing refreshment and communal enjoyment.
• While many variations exist across different regions, the authentic version maintains a pure, unadulterated watermelon flavor that sets it apart from imitations.
Recipe Overview
Nutritional Information
Essential Equipment Guide
Blender: A powerful blender is crucial for achieving a smooth, lump-free watermelon puree. A food processor can be an alternative, but blenders typically provide a finer texture.
Popsicle Molds: Essential for shaping the popsicles. Look for molds that are BPA-free and come with reusable sticks for sustainability.
Fine-Mesh Strainer: Important for removing pulp and seeds from the watermelon puree, ensuring a smooth texture. Cheesecloth can be an alternative for straining.
Ingredients
For the Base
|
|
| Amount | Ingredient | Notes |
|---|---|---|
| 4 cups | seedless watermelon | cubed, removes seeds for easier blending |
| 2 tablespoons | honey | optional, for added sweetness |
| 1 tablespoon | lime juice | balances sweetness and adds freshness |
Preparation Methods
Pureeing: This technique involves blending the watermelon until it becomes a smooth liquid. It's critical for achieving the ideal texture in the popsicles. Ensure the blender is powerful enough to handle the fruit without leaving chunks.
Straining: Straining the puree through a fine-mesh sieve removes any remaining pulp or seeds. This step is essential for a smooth popsicle texture. Be patient and use a spatula to press the liquid through the strainer.
Pouring Technique: Pouring the strained puree into molds requires steady hands to avoid spills. Use a small funnel for precision if needed.
Step 1: Prepare Ingredients
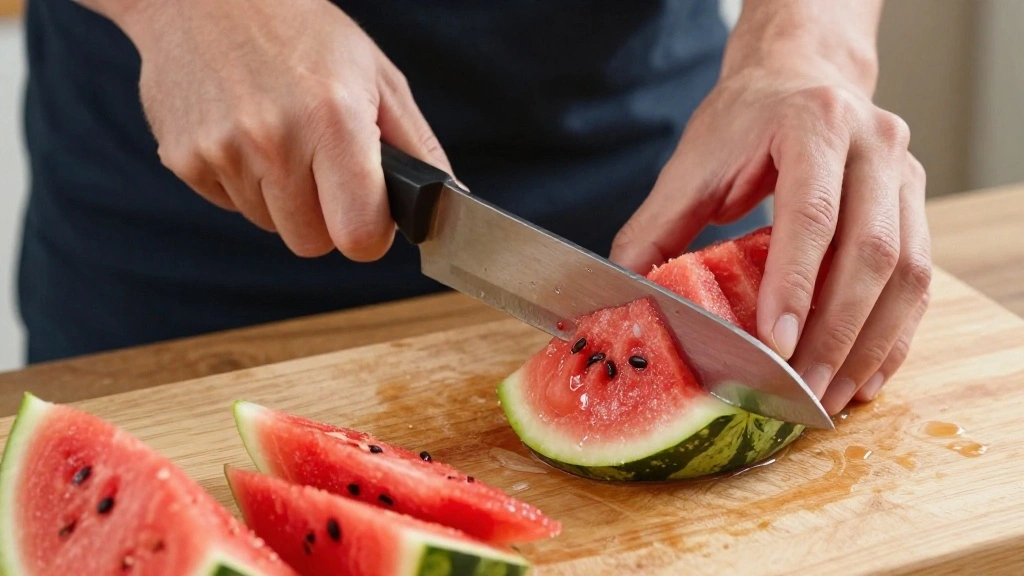
Begin by washing the watermelon thoroughly under cold water.
Cut it into manageable pieces, removing the rind and seeds.
Ensure you have 4 cups of cubed watermelon ready for blending.
This preparation sets the stage for a smooth pureeing process.
Step 2: Blend the Watermelon
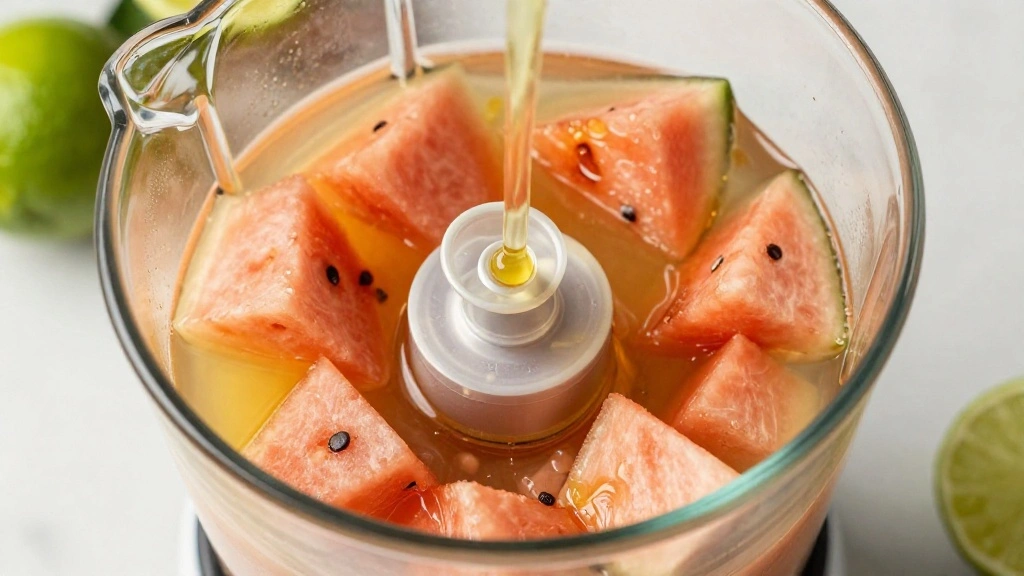
Place the cubed watermelon into the blender.
Add two tablespoons of honey and one tablespoon of lime juice to the blender.
Blend on high speed until the mixture is completely smooth.
Check to ensure no chunks remain for a consistent texture.
Step 3: Strain the Puree
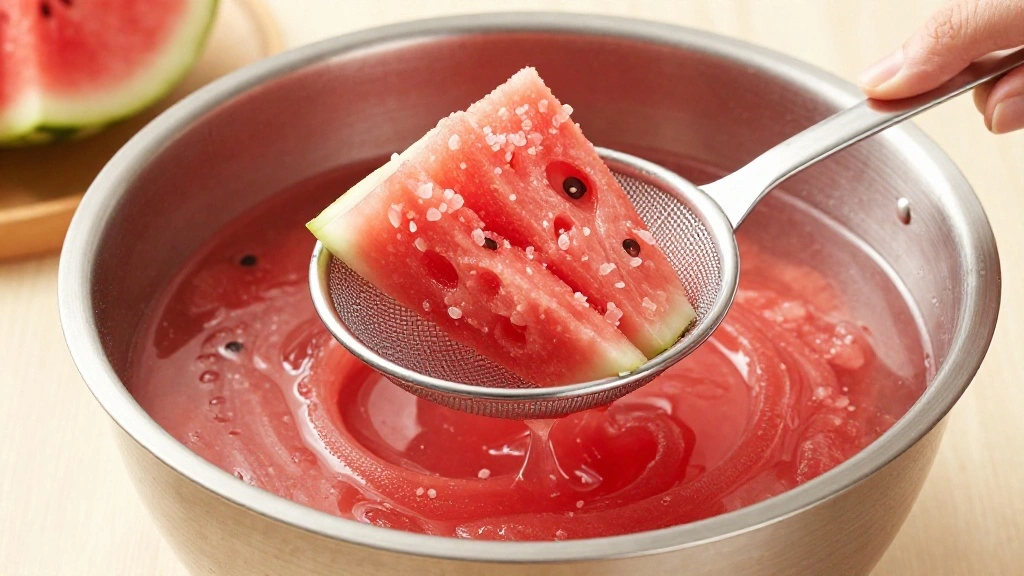
Set a fine-mesh strainer over a large bowl.
Pour the watermelon puree through the strainer to remove any pulp.
Use a spatula to press the liquid through, ensuring all juice is extracted.
This step is crucial for achieving a silky smooth popsicle mixture.
Step 4: Fill the Popsicle Molds
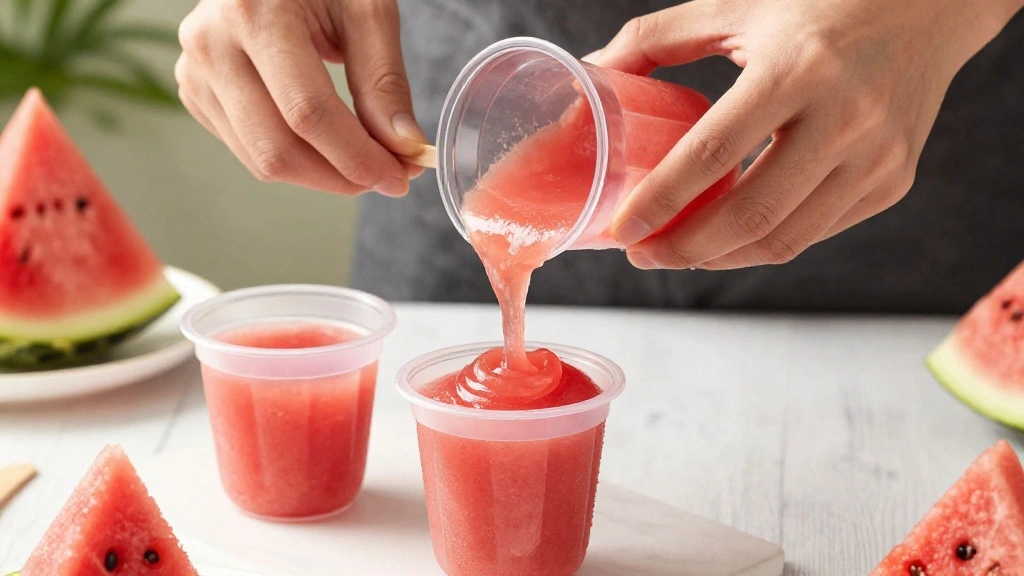
Carefully pour the strained watermelon mixture into popsicle molds.
Fill each mold to about half an inch from the top to allow for expansion.
Wipe any spills from the sides of the molds for a clean finish.
Proper filling ensures even freezing and easy removal later.
Step 5: Insert Popsicle Sticks
Insert the popsicle sticks into the molds, ensuring they are centered.
Make sure the sticks are positioned straight for easy handling later.
Adjust as necessary to maintain an even balance.
This step is important for creating stable, easy-to-eat popsicles.
Step 6: Freeze the Popsicles
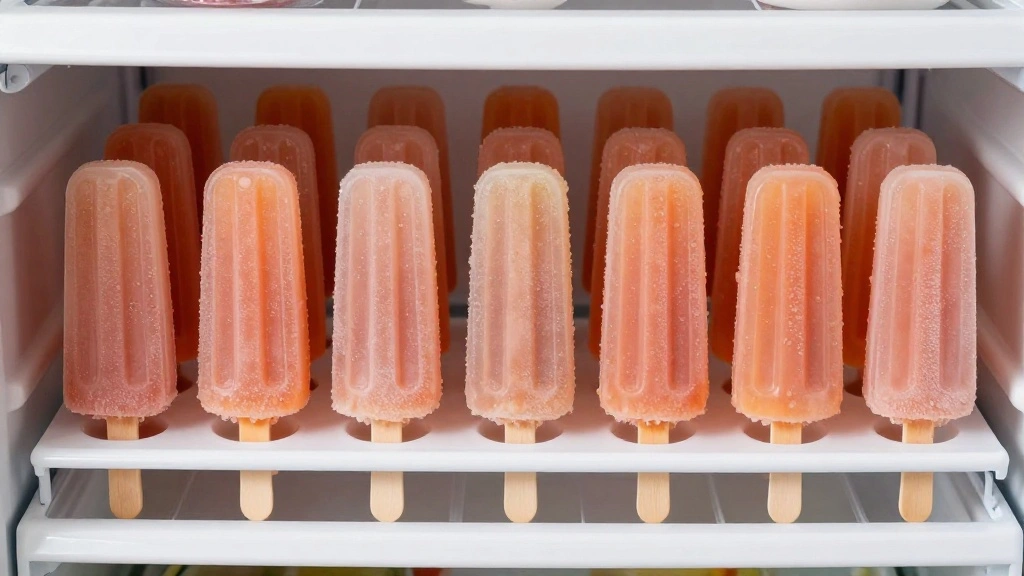
Place the filled molds in the freezer, ensuring they are upright.
Freeze for at least 4 hours or until completely solid.
Avoid opening the freezer frequently to ensure even freezing.
Proper freezing time is crucial for the popsicles to set correctly.
Step 7: Remove Popsicles from Molds
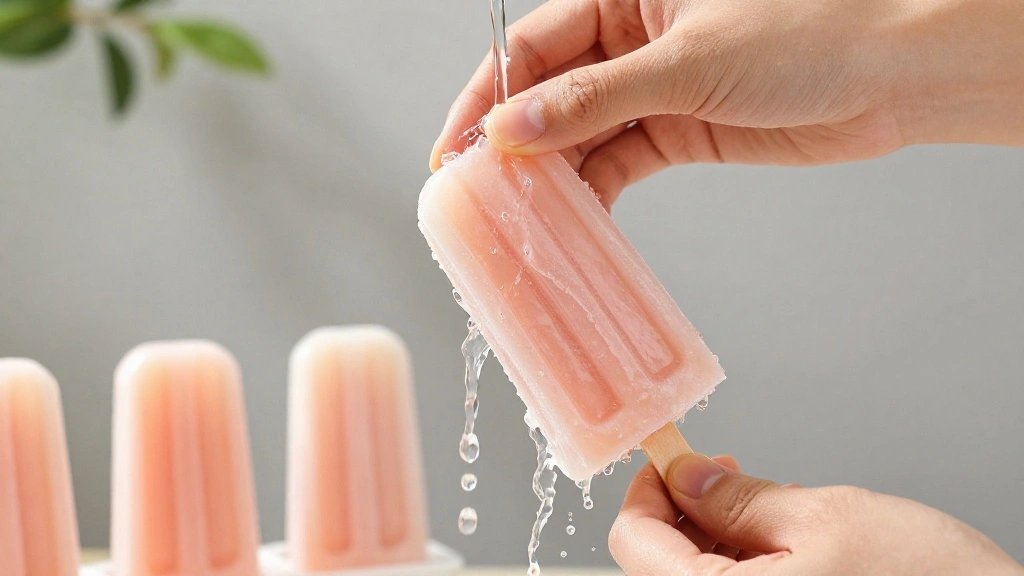
Once frozen, remove the molds from the freezer.
Run warm water over the outside of the molds for a few seconds.
Gently pull on the sticks to release the popsicles.
This technique helps in smooth removal without breaking the popsicles.
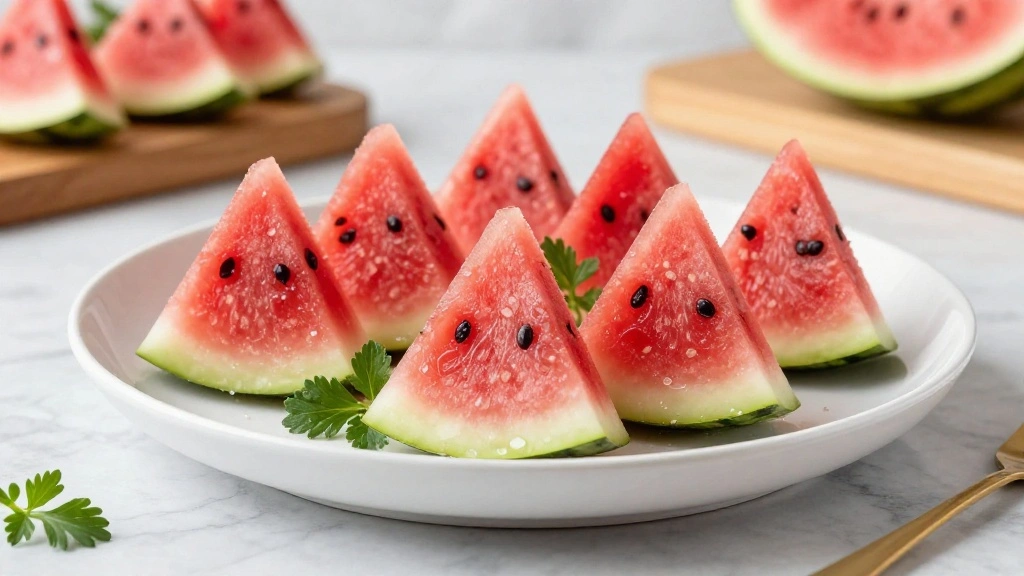
Step 8: Serve and Enjoy
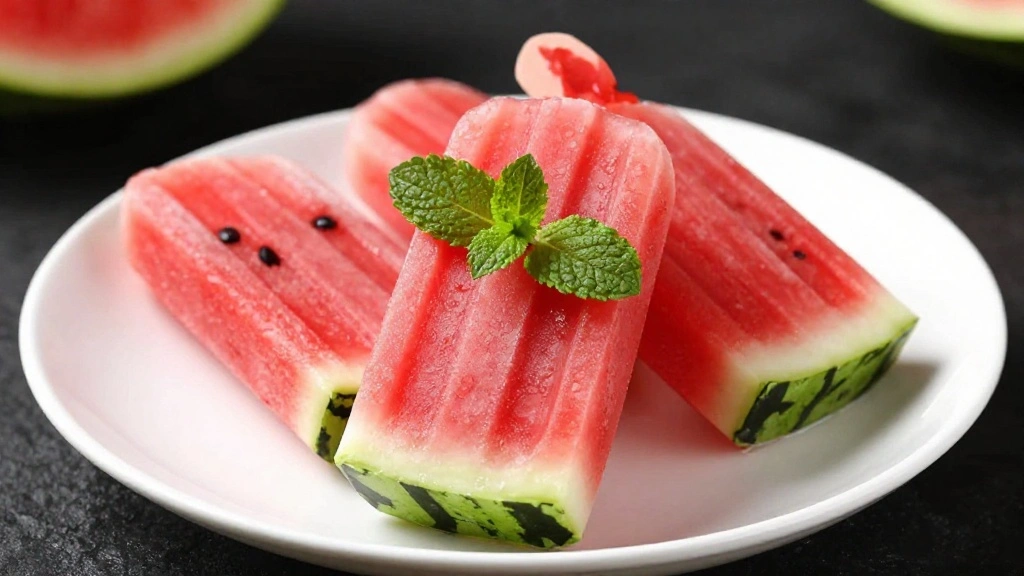
Arrange the popsicles on a serving plate or platter.
Garnish with fresh mint leaves for an extra touch of elegance.
Serve immediately to enjoy the refreshing, icy treat.
Presentation enhances the enjoyment and appeal of the popsicles.
Critical Timing and Temperature Guide
Freezing Process: Allow at least 4 hours for the popsicles to freeze completely. Visual indicators of doneness include a firm texture and solid form. Avoid opening the freezer frequently, as this can cause uneven freezing.
Pureeing: Blend the watermelon for 1-2 minutes until smooth. Check for uniform texture without chunks. Over-blending can cause aeration, affecting the popsicle texture.
Straining: Strain the puree immediately after blending to maintain freshness. Look for a smooth liquid without pulp or seeds. Skipping this step can result in a gritty texture.
Pro Tips for DIY Watermelon Popsicles
• Ingredient Selection: Choose a ripe, seedless watermelon for the sweetest, juiciest flavor. The quality of the watermelon significantly impacts the final taste.
• Preparation Secret: Adding a pinch of salt to the puree enhances the natural sweetness of the watermelon, a surprising yet effective technique.
• Temperature Management: Ensure the freezer is set below -18°C (0°F) for optimal freezing. This prevents any ice crystal formation that can affect texture.
• Texture Enhancement: Straining the puree is key to achieving a creamy, smooth texture. It removes any fibrous pulp that could make the popsicles gritty.
• Flavor Layering: Incorporate a splash of lime juice to add a layer of complexity to the sweetness, balancing the overall flavor profile.
• Make-Ahead Strategies: Prepare the watermelon puree in advance and store it in an airtight container in the fridge for up to 24 hours before freezing.
• Restaurant-Quality Finishing Touches: Garnish with fresh mint leaves or a sprinkle of sea salt just before serving to enhance flavor and visual appeal.
• Equipment Optimization: Use a blender with a pulse function to avoid over-blending and aerating the watermelon, which can affect the popsicles' texture.
Troubleshooting Common Issues
• Texture Too Icy: This occurs if the puree wasn't strained properly. Strain again to remove excess pulp, which can freeze into ice crystals.
• Flavor Too Bland: Often caused by underripe watermelon. Choose a ripe, sweet watermelon and consider adding a bit more lime juice or honey.
• Popsicles Sticking to Molds: Run warm water over the molds for a few seconds to release the popsicles gently without breaking.
• Uneven Freezing: Ensure molds are placed upright in the freezer and avoid opening the freezer frequently to maintain consistent temperatures.
• Popsicles Breaking: If they break during removal, it may be due to insufficient freezing time. Allow more time for complete solidification.
• Overly Sweet Popsicles: Adjust the amount of honey or omit it entirely if the watermelon is naturally very sweet.
Variations and Regional Differences
• Mexican-Style Paletas: Incorporates chili powder or Tajin seasoning for a spicy kick, reflecting the Mexican tradition of combining sweet and spicy flavors.
• Asian-Inspired Version: Adds coconut milk for a creamy texture, offering a tropical twist popular in Southeast Asian desserts.
• Middle Eastern Variation: Uses rose water and pistachios for a floral, nutty profile, aligning with traditional Middle Eastern flavor combinations.
• Italian Granita Style: Instead of popsicles, the watermelon mixture is frozen and then scraped with a fork to create a granita, a popular Italian semi-frozen dessert.
Food Science Behind the Recipe
• Freezing Point Depression: The addition of sugar (from honey) lowers the freezing point of the mixture, resulting in a softer texture that's easier to bite into.
• Emulsification: Lime juice acts as an emulsifier, helping to blend the watermelon and honey evenly, preventing separation during freezing.
• Crystallization: Proper straining removes pulp, which can interfere with ice crystal formation, resulting in a smoother popsicle.
Frequently Asked Questions
What's the most common mistake people make when preparing DIY Watermelon Popsicles? The most common mistake is not straining the puree thoroughly, leading to a gritty texture.
Can I use a different sweetener than honey? Yes, agave syrup or maple syrup can be used as alternatives, but adjust the quantity to taste.
How do I know if my watermelon is ripe enough? Look for a deep yellow spot on the rind and a hollow sound when tapped, indicating ripeness.
Can I add other fruits to the popsicles? Absolutely, adding strawberries or blueberries can complement the watermelon flavor nicely.
Do I need to use seedless watermelon? It's recommended, as it simplifies preparation and ensures a smoother puree.
Why do my popsicles have ice crystals? This typically results from improper straining or fluctuating freezer temperatures.
How long can the popsicles be stored in the freezer? They can be stored for up to one month, but are best enjoyed within two weeks for optimal flavor.
Can I make these popsicles without a blender? A food processor can be used as an alternative, though it may not achieve as smooth a puree.
Serving and Presentation Guide
• Traditional Presentation: Serve the popsicles upright in a glass filled with ice for a refreshing, visually appealing display.
• Kid-Friendly Style: Present on a colorful platter with fun, decorative toothpicks or umbrellas to engage children.
• Elegant Party Setting: Arrange on a silver tray lined with fresh mint leaves for a sophisticated touch suitable for adult gatherings.
• Casual Backyard BBQ: Serve in a large bowl of crushed ice, allowing guests to help themselves easily.
Conclusion
There you have it—a simple, delicious recipe for DIY Watermelon Popsicles that the whole family can enjoy.
These popsicles are not only refreshing but also a healthy treat you can feel good about serving.
Try this recipe today and savor the taste of summer with every bite.
Your kids will love the fun of making and eating these sweet, icy delights!