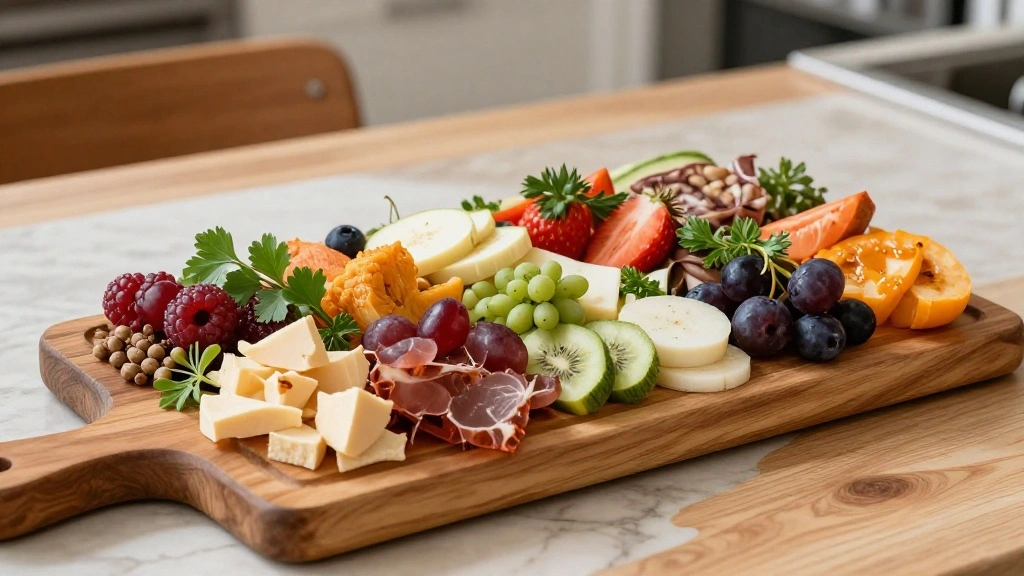
There’s something undeniably captivating about a well-curated grazing board that transforms any gathering into a festive experience.
The vibrant colors and diverse textures offer a feast for the eyes and palate, making it a perfect centerpiece for summer celebrations.
I first fell in love with grazing boards during a picnic at a vineyard, where the simplicity of fresh, flavorful ingredients came together beautifully.
These boards are more than just a meal; they are a celebration of the season’s bounty and communal dining.
Whether you’re hosting a garden party or enjoying a leisurely day at the beach, a grazing board promises to impress without the stress of complex cooking.
Join me as we explore how to create a grazing board that wows, with easy tips and tricks to elevate your summer spread.
The History and Cultural Significance
• Grazing Boards trace their origins to European traditions, where they were originally created by farmers to showcase local produce and artisanal products.
• The dish evolved over decades as global trade introduced new ingredients, eventually becoming the beloved version we know today.
• In Mediterranean cultures, this dish traditionally appears at family gatherings, symbolizing hospitality and abundance.
• While many variations exist across different regions, the authentic version maintains a focus on fresh, high-quality ingredients that set it apart from imitations.
Recipe Overview
Nutritional Information (per serving)
Essential Equipment Guide
Large Wooden Board or Platter: Essential for creating an authentic presentation, providing ample space for arranging ingredients. Alternatives include marble slabs or ceramic platters. Choose a board that is food-safe and easy to clean.
Cheese Knives: Important for cutting and serving various cheeses without crumbling. Look for a set that includes knives for hard and soft cheeses. A paring knife can be a substitute in a pinch.
Small Bowls and Ramekins: Useful for containing olives, dips, or nuts, preventing them from rolling off the board. Opt for a variety of sizes and materials that match the aesthetic of your board.
Ingredients
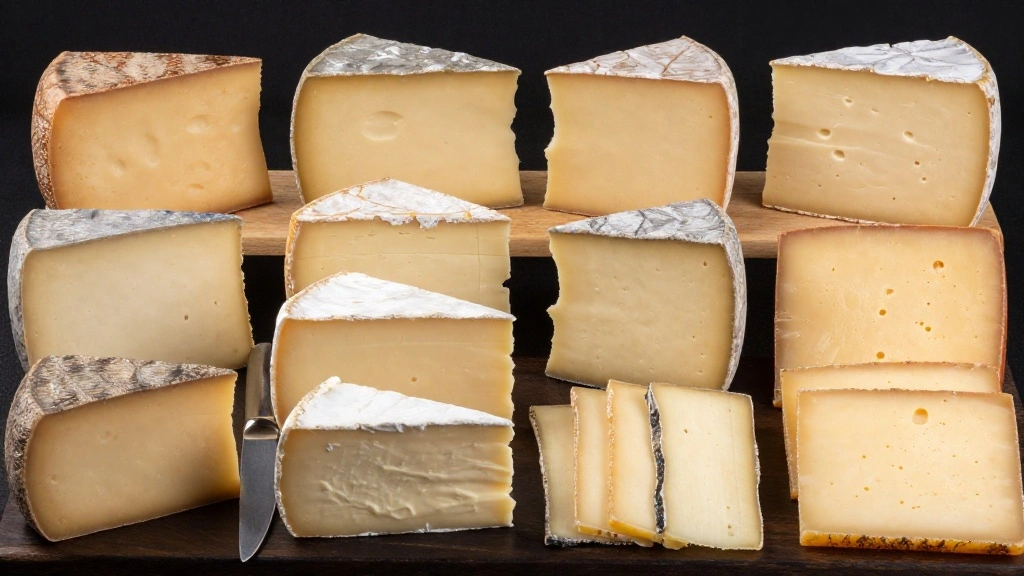
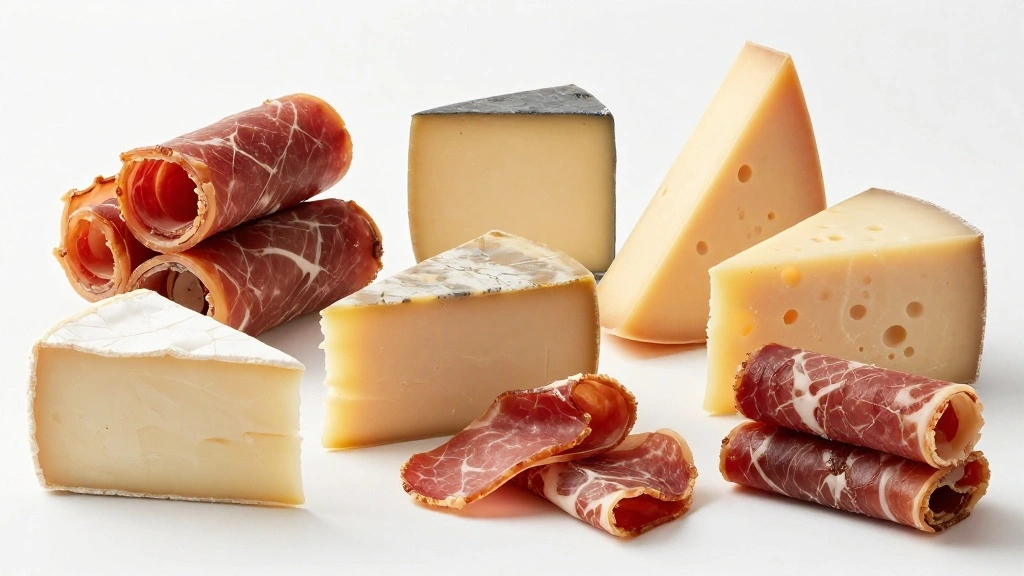
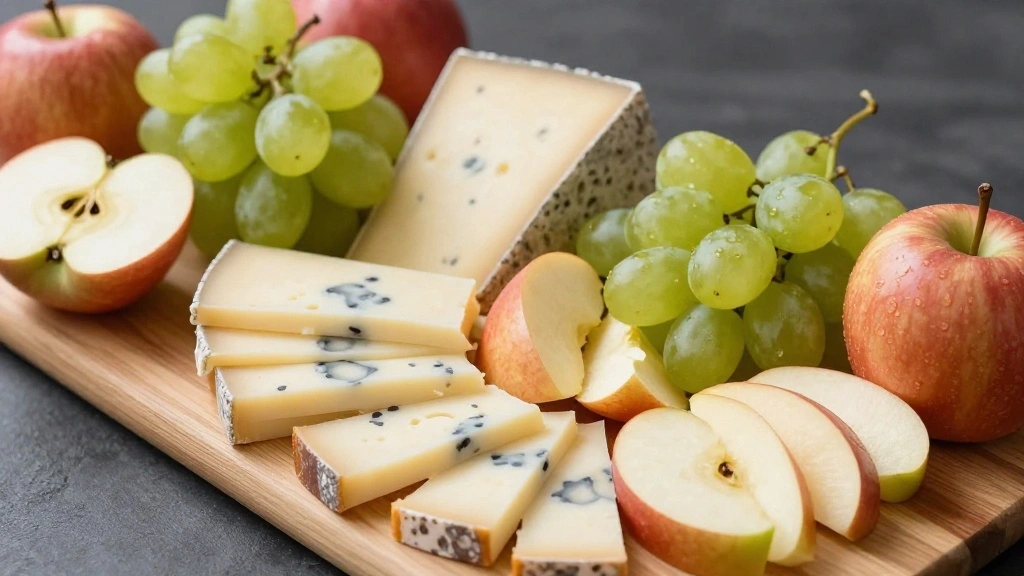
Cheeses
|
|
| Amount | Ingredient | Notes |
|---|---|---|
| 200 grams | brie cheese | creamy and mild |
| 150 grams | aged cheddar | sharp and flavorful |
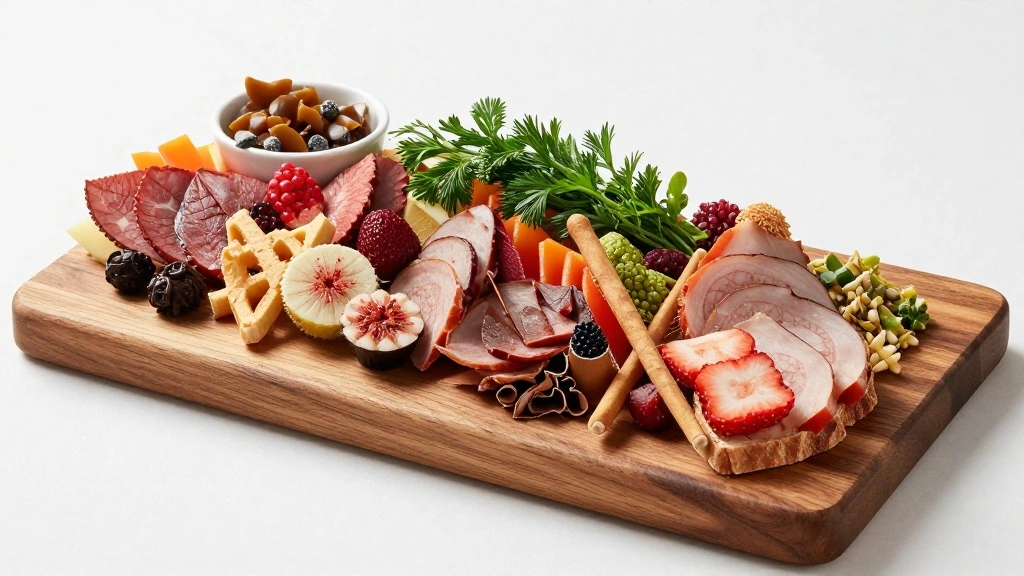
Cured Meats
| Amount | Ingredient | Notes |
|---|---|---|
| 100 grams | prosciutto | thinly sliced, adds saltiness |
| 100 grams | salami | spicy, sliced |
Fruits
| Amount | Ingredient | Notes |
|---|---|---|
| 1 cup | grapes | washed, adds sweetness |
| 1 large | apple | sliced, adds crunch |
Nuts
| Amount | Ingredient | Notes |
|---|---|---|
| 1/2 cup | almonds | toasted, adds texture |
| 1/2 cup | walnuts | raw, adds earthiness |
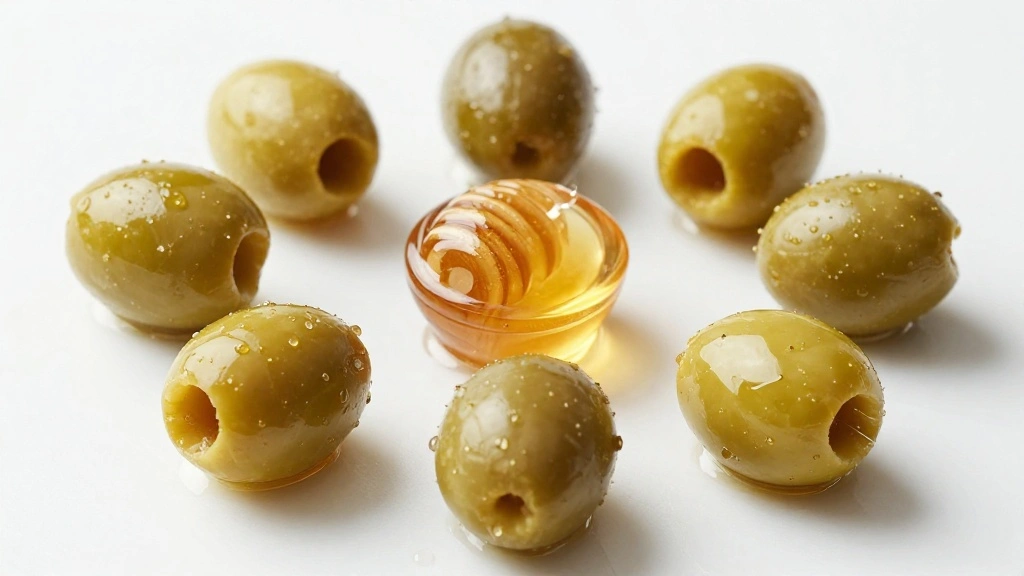
Accompaniments
| Amount | Ingredient | Notes |
|---|---|---|
| 1/2 cup | olives | marinated, adds brininess |
| 1/2 cup | honey | for drizzling |
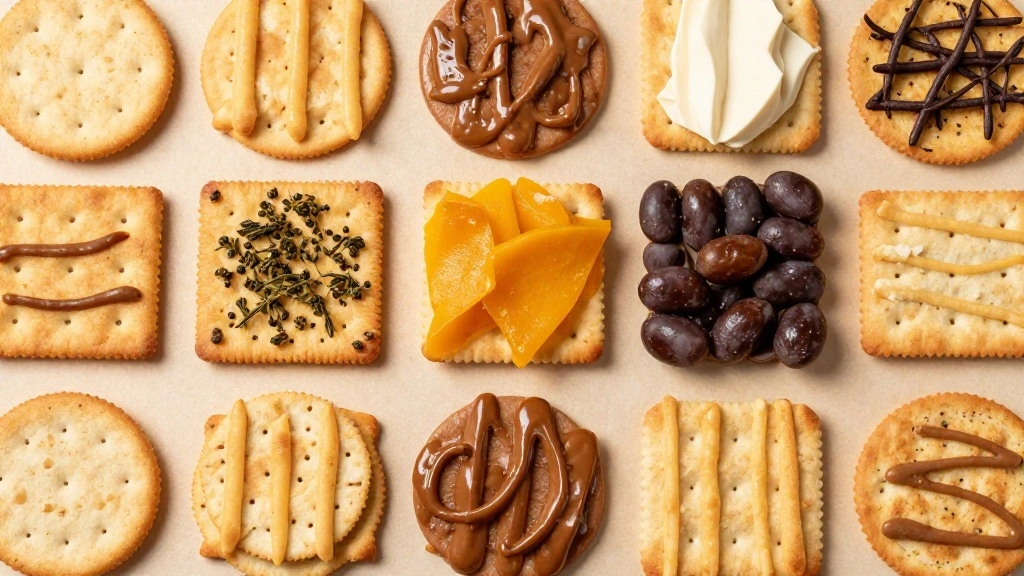
Crackers
| Amount | Ingredient | Notes |
|---|---|---|
| 2 cups | assorted crackers | for serving |
Preparation Methods
Arranging Ingredients: This technique involves thoughtfully placing each ingredient to create a visual balance and accessibility. Start with larger items and fill in gaps with smaller ingredients, ensuring a variety of colors and textures.
Slicing and Cubing: Proper slicing of cheeses and meats is crucial for easy consumption. Use a sharp knife for clean cuts, and try to maintain uniform sizes for a professional look.
Balancing Flavors: Combining sweet, salty, and savory elements is key to a successful grazing board. Taste each component and adjust the quantities to ensure no single flavor dominates.
Step 1: Prepare the Board
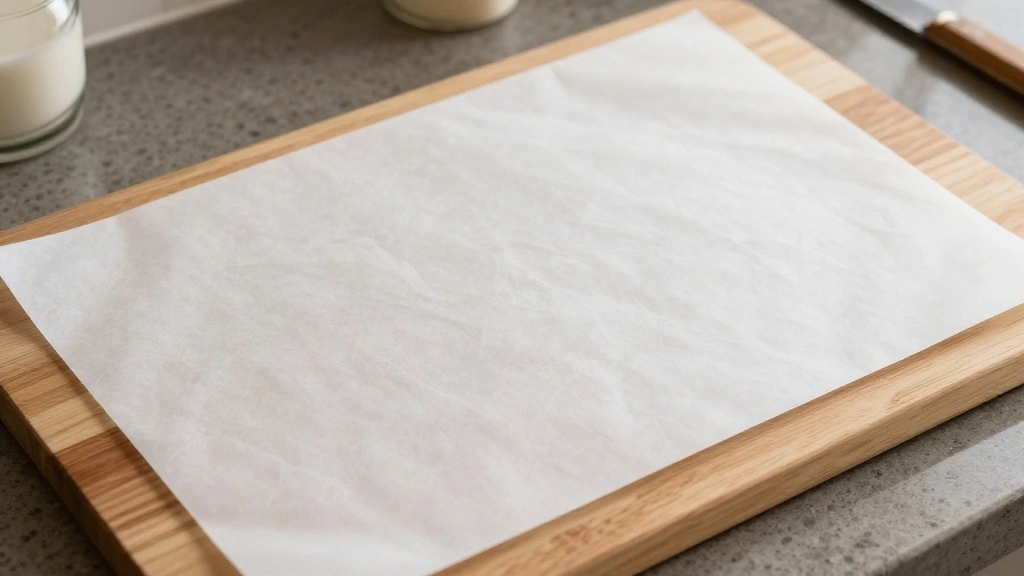
Choose a large wooden board or platter that can hold all the ingredients.
Clean the surface thoroughly to ensure it's ready for food placement.
Lay down parchment paper if you prefer an easy cleanup.
Ensure the board is dry before placing any ingredients.
Step 2: Arrange Cheeses
Start by placing the cheeses on the board, spacing them out evenly.
Cut hard cheeses into cubes or slices for easy access.
Leave soft cheeses whole and provide a cheese knife for serving.
Place each cheese type far enough apart to prevent flavors from mingling.
Step 3: Add Cured Meats
Fold or roll cured meats like prosciutto and salami for an elegant presentation.
Place them near the cheeses they pair well with to guide guests.
Ensure no two types of meat are stacked directly on top of each other.
Adjust the arrangement to maintain visual interest and balance.
Step 4: Incorporate Fruits
Add fruits like grapes and apple slices to the board.
Place them strategically around the cheeses and meats.
Use fruits to fill gaps and add pops of color.
Ensure fruits are fresh and ripe for optimal flavor.
Step 5: Sprinkle Nuts

Scatter almonds and walnuts across the board for texture.
Avoid clustering them too closely together.
Ensure they are easily reachable from different sides of the board.
Adjust their placement to maintain a balanced look.
Step 6: Add Accompaniments
Place small bowls or ramekins on the board for olives and honey.
Fill each ramekin and position them near complementary flavors.
Ensure they are stable and won't spill easily.
Use ramekins to create height and dimensionality on the board.
Step 7: Arrange Crackers
Line the edges of the board with assorted crackers.
Choose a variety of shapes and sizes for visual interest.
Ensure they are easily accessible from all sides of the board.
Keep a small stack of extra crackers nearby for refilling.
Step 8: Finalize the Presentation
Review the board to ensure a balanced distribution of colors and textures.
Make any final adjustments to the arrangement for aesthetics.
Wipe any spills or crumbs to maintain a clean presentation.
Add fresh herbs or edible flowers for an extra touch.
Critical Timing and Temperature Guide
Cheese Preparation: Allow cheeses to come to room temperature for 30 minutes before serving. This enhances flavor and texture. Avoid leaving them out for too long to prevent spoilage.
Fruit Freshness: Slice and prepare fruits just before assembling the board to maintain freshness. Look for vibrant colors and firmness as indicators of quality.
Serving Timing: Plan to serve the board within an hour of assembly for optimal taste and presentation. Cover with a clean cloth if needed to keep ingredients fresh.
Pro Tips for Grazing Boards That Wow
• Ingredient Selection: Opt for high-quality cheeses and meats, as these are the stars of the board. Look for locally sourced products for the freshest flavors.
• Preparation Secret: Add an unexpected element like a flavored honey or unique cracker to surprise and delight guests.
• Temperature Management: Ensure that all ingredients are at the right temperature for serving, especially cheeses and fruits, which can lose flavor when too cold.
• Texture Enhancement: Use a mix of soft, crunchy, and chewy elements to keep each bite interesting. Balance creamy cheeses with crisp fruits and nuts.
• Flavor Layering: Combine sweet, salty, and savory elements by pairing cheeses with fruits and cured meats with nuts.
• Make-Ahead Strategies: Pre-slice cheeses and meats, and store them in airtight containers in the fridge until assembly.
• Restaurant-Quality Finishing Touches: Use fresh herbs or edible flowers for a professional finish that elevates the board.
• Equipment Optimization: Utilize a sharp knife and ramekins to create a clean and organized board even with limited tools.
Troubleshooting Common Issues
• Cheese Melting: If cheeses become too soft, refrigerate briefly to firm them up. Use a cooler board to prevent this issue.
• Flavors Overpowering: If one element dominates, rearrange to separate strong flavors. Pair with mild accompaniments to balance.
• Board Looks Sparse: Fill gaps with additional fruits or nuts. Adjust arrangement to maximize visual impact.
• Ingredients Sliding: Use small bowls or ramekins to contain slippery items. Arrange flat items to create stability.
• Fruit Browning: Dip apple slices in lemon water to prevent browning. Prepare them last to minimize exposure.
• Cracker Sogginess: Keep crackers away from moist ingredients. Serve them on a separate plate if needed.
Variations and Regional Differences
• Italian Style: Incorporates marinated artichokes, fresh mozzarella, and cherry tomatoes. Emphasizes fresh, bold flavors typical of Italian cuisine.
• French Style: Features an array of French cheeses, pâté, and baguette slices. Focuses on rich, buttery textures and flavors.
• Spanish Style: Includes Manchego cheese, chorizo, and olives. Adds piquillo peppers for an authentic Spanish flavor profile.
• Mediterranean Style: Combines feta, hummus, and pita chips. Highlights fresh herbs and olive-based accompaniments.
Food Science Behind the Recipe
• Flavor Pairing: Understanding the science of complementary flavors helps balance sweet, salty, and savory elements, enhancing the overall taste experience.
• Cheese Aging: The aging process affects texture and flavor, with longer aging leading to more complex and robust flavors.
• Preservation Techniques: Curing meats involves salt and time, which both preserve and intensify flavors, crucial for high-quality charcuterie.
Frequently Asked Questions
What's the most common mistake people make when preparing grazing boards? Overcrowding the board, which can make it look cluttered and difficult to serve.
How can I ensure the cheeses don't overpower the other ingredients? Select a mix of mild and strong cheeses, and pair them with neutral accompaniments.
What are the best fruits to include? Opt for seasonal fruits like grapes, berries, and apples for freshness and flavor.
Can I prepare the board in advance? Yes, but keep it covered and refrigerated until just before serving to maintain freshness.
How do I prevent crackers from going stale? Keep them in an airtight container until the last moment before arranging them on the board.
What's a creative way to add variety? Introduce a themed element, such as a spice blend or regional specialty, to differentiate your board.
Are there any must-have accompaniments? Olives, nuts, and a sweet element like honey or jam are essential for balance.
How do I choose the right board size? Base it on the number of guests; a larger board for more people allows for a fuller presentation.
Serving and Presentation Guide
• Traditional Presentation: Arrange ingredients symmetrically on a large wooden board, ensuring a balance of colors and textures.
• Picnic Style: Use individual small boards for each guest, creating personal-sized grazing experiences.
• Rustic Aesthetic: Opt for a natural wood board with irregular edges, enhancing the organic feel of the ingredients.
• Modern Minimalist: Choose a sleek marble slab and focus on precise, neat arrangements for a contemporary look.
Conclusion
Creating a grazing board is an artful way to enjoy the best of summer's bounty.
With thoughtful selection and arrangement of ingredients, you can craft a board that delights all the senses.
Invite friends and family to gather around and share in the joy of delicious, communal dining.
Embrace the creativity and satisfaction of making a grazing board that truly wows.