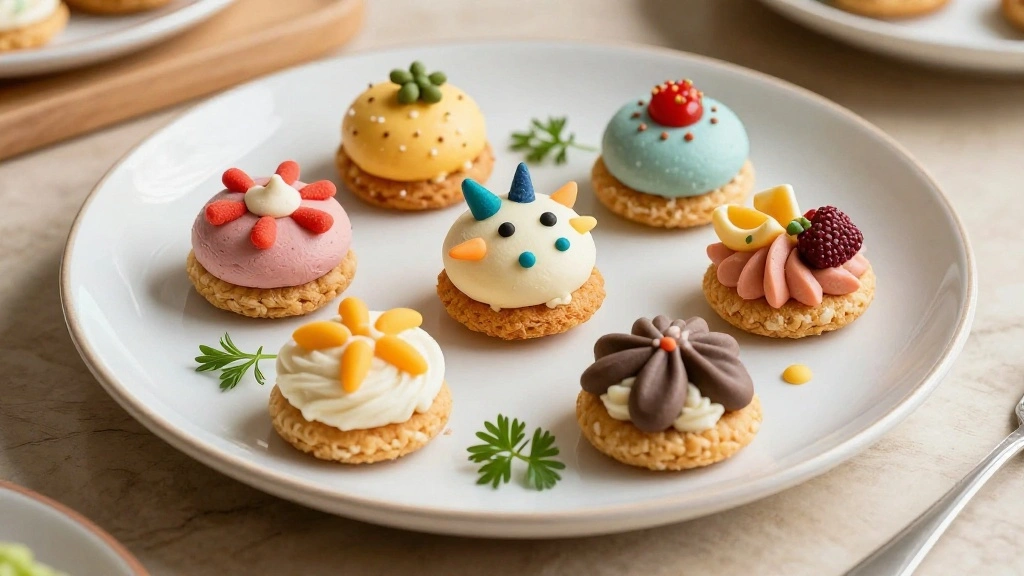
Under the Sea Snacks for Kids brings the ocean’s playful spirit to your summer parties.
These whimsical, ocean-themed treats are both fun to make and delightful to eat.
Inspired by the vibrant colors and textures of marine life, each bite is a burst of flavor and imagination.
Whether you’re hosting a birthday bash or a casual summer gathering, these snacks add a wave of excitement to any table.
Perfect for little hands and adventurous palates, they encourage creativity and culinary exploration.
Dive into making these tasty treats and watch your guests’ faces light up with joy.
The History and Cultural Significance
• Under the Sea traces its origins to coastal Europe, where it was originally created by seaside communities celebrating marine life.
• The dish evolved over decades as new ingredients and vibrant colors were introduced, eventually becoming the beloved version we know today.
• In seaside towns, this dish traditionally appears at summer festivals, symbolizing the bounty of the ocean.
• While many variations exist across different regions, the authentic version maintains its playful presentation that sets it apart from imitations.
Recipe Overview
Nutritional Information (per serving)
Essential Equipment Guide
Cookie Cutters: Essential for shaping the snacks into fun sea-themed shapes like fish, starfish, and shells. Alternatives include using a sharp knife for freehand designs, but cookie cutters offer precision and ease.
Silicone Baking Mat: Important for preventing the snacks from sticking to the baking sheet and ensuring even baking. Parchment paper can be used as an alternative, but silicone mats are reusable and provide better heat distribution.
Food Coloring Gel: Crucial for achieving vibrant colors without altering the snack’s texture. Liquid food coloring can be used, but gels offer more intense hues and require less quantity.
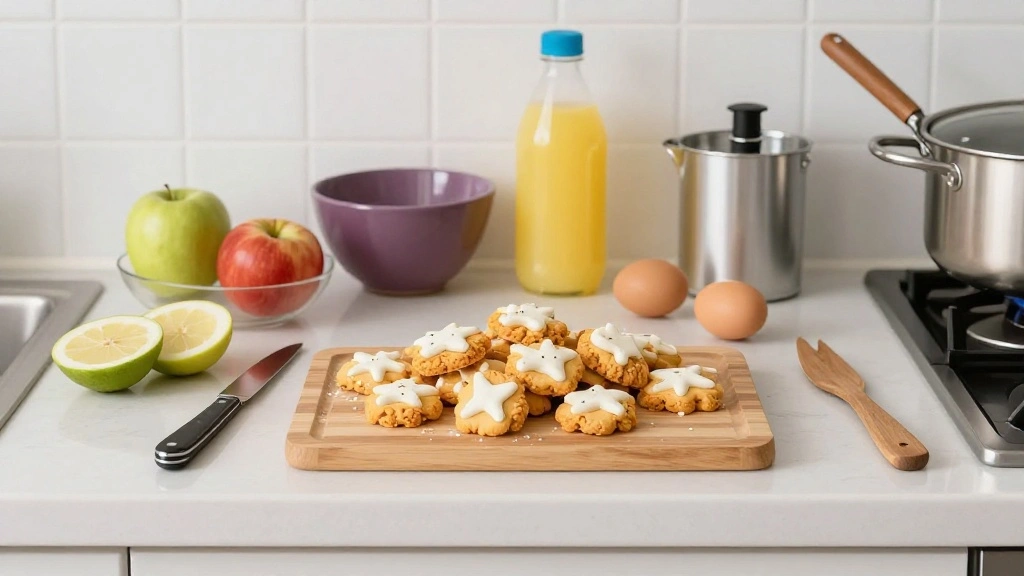
Ingredients
For the Dough
|
|
| Amount | Ingredient | Notes |
|---|---|---|
| 2 cups | all-purpose flour | provides structure |
| 1 teaspoon | baking powder | adds lightness |
| 1/2 teaspoon | salt | enhances flavor |
| 1/2 cup | unsalted butter | softened, adds richness |
For the Decoration
| Amount | Ingredient | Notes |
|---|---|---|
| 1/2 cup | powdered sugar | for dusting |
| 1 tablespoon | milk | helps bind decorations |
| various | food coloring gels | for vibrant colors |
Preparation Methods
Chilling the Dough: Chilling helps firm up the dough, making it easier to handle and shape. It prevents spreading during baking, ensuring precise shapes.
Coloring Dough: Mixing food coloring into the dough is essential for vibrant, even colors. It's best to knead the color in slowly, adding more as needed.
Rolling Evenly: Ensuring the dough is rolled to an even thickness is crucial for consistent baking. Use rolling pin guides or a ruler to maintain uniformity.
Step 1: Prepare Ingredients
Gather all ingredients and equipment.
Ensure butter is softened to room temperature.
Measure flour, baking powder, and salt into a mixing bowl.
Set aside food coloring gels for later use.
Step 2: Mix Dry Ingredients
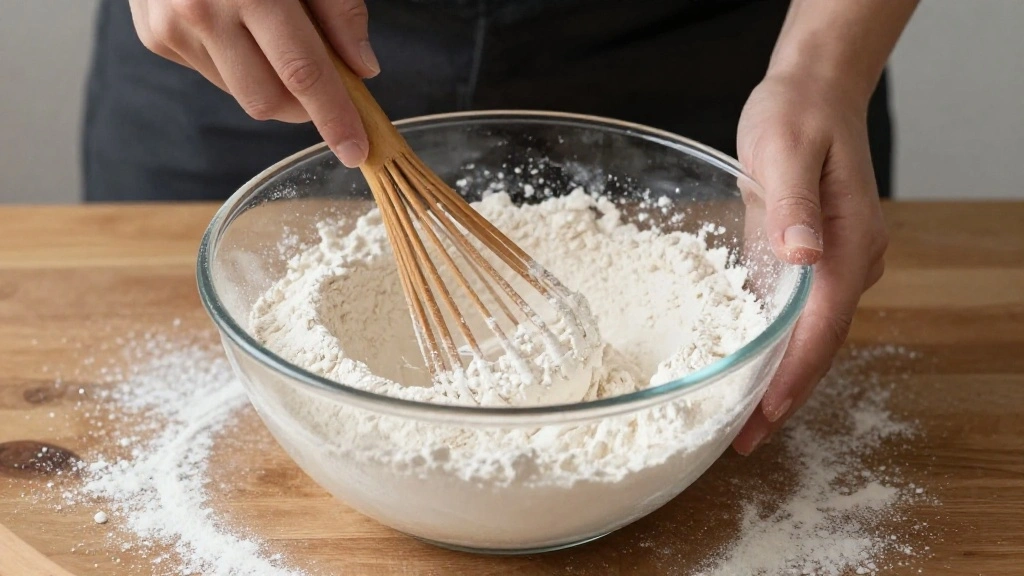
Combine flour, baking powder, and salt in a bowl.
Whisk together until evenly distributed.
Check for any lumps and break them apart.
Set the bowl aside for the next step.
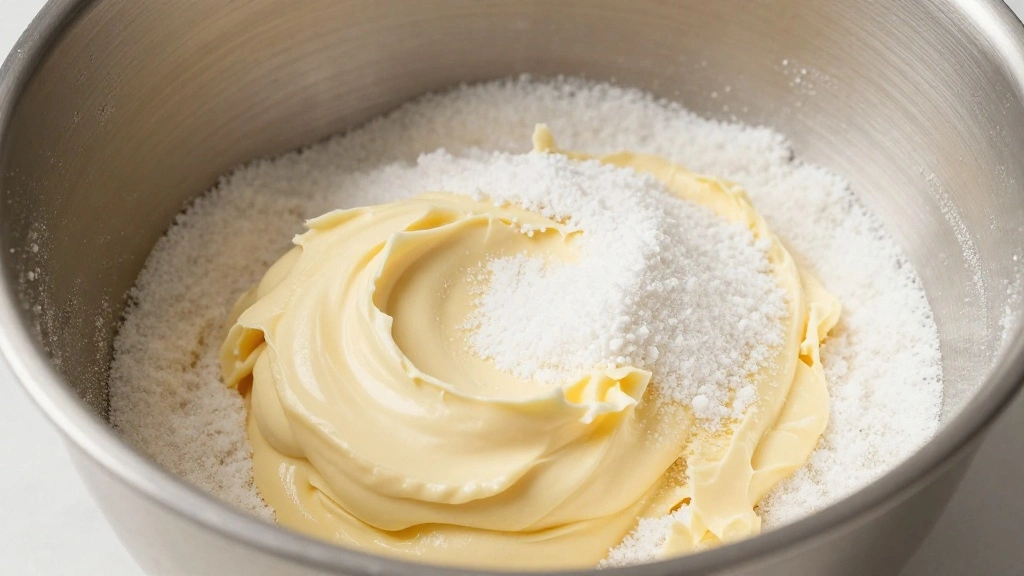
Step 3: Cream Butter and Sugar
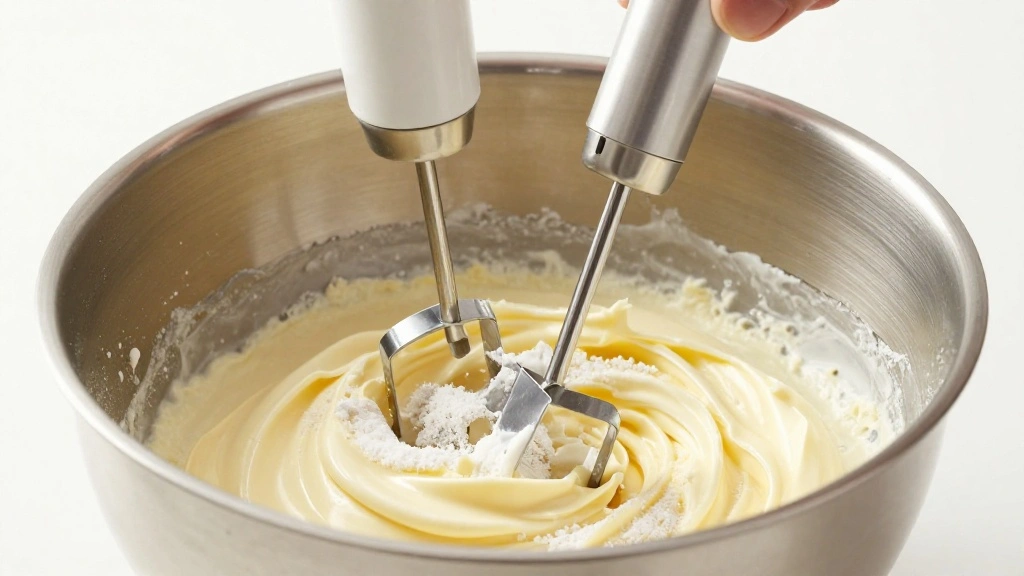
In a separate bowl, cream the softened butter and powdered sugar.
Use a hand mixer on medium speed until fluffy.
Look for a light, airy texture.
This process helps create a tender crumb.
Step 4: Combine Mixtures
Gradually add the dry ingredients to the butter mixture.
Mix on low speed until just combined.
Avoid overmixing to prevent a tough dough.
The dough should come together and be slightly sticky.
Step 5: Chill the Dough
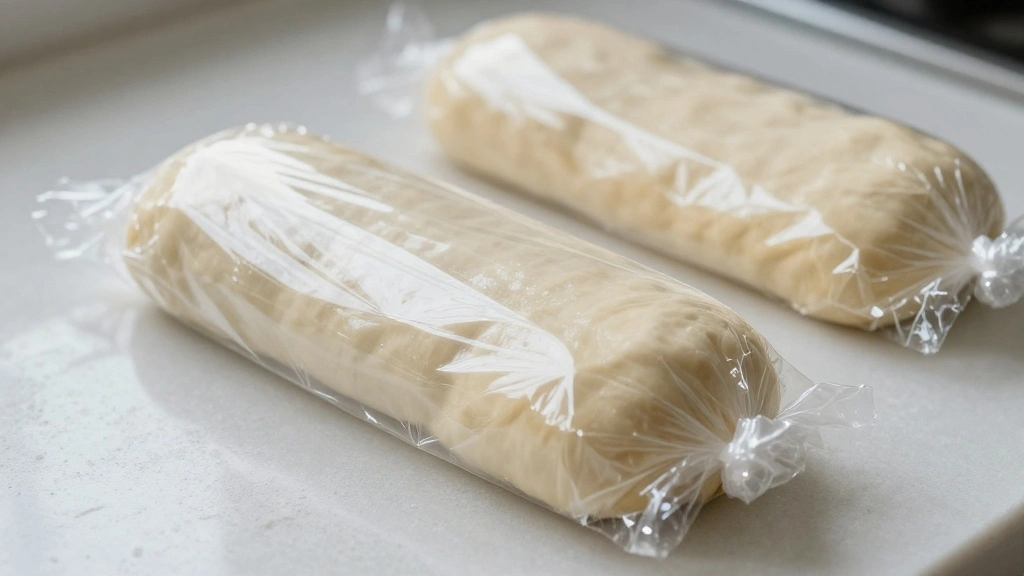
Divide the dough into two portions.
Wrap each portion in plastic wrap.
Chill in the refrigerator for at least 30 minutes.
Chilling firms the dough for easier handling.
Step 6: Preheat Oven
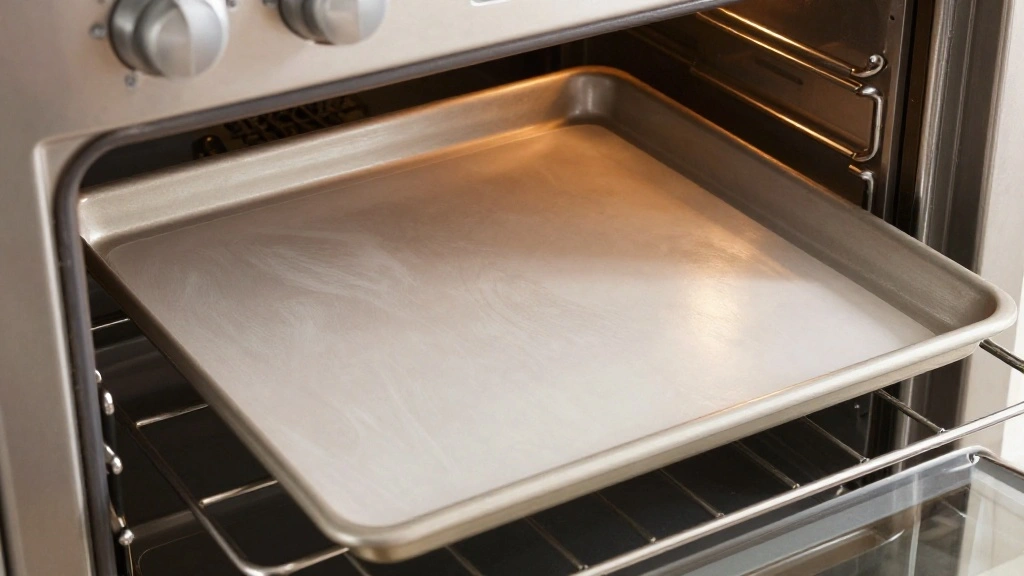
Preheat your oven to 350°F (175°C).
Place a silicone baking mat on a baking sheet.
Ensure even heat distribution in the oven.
Check that the oven rack is in the middle position.
Step 7: Roll and Cut Dough
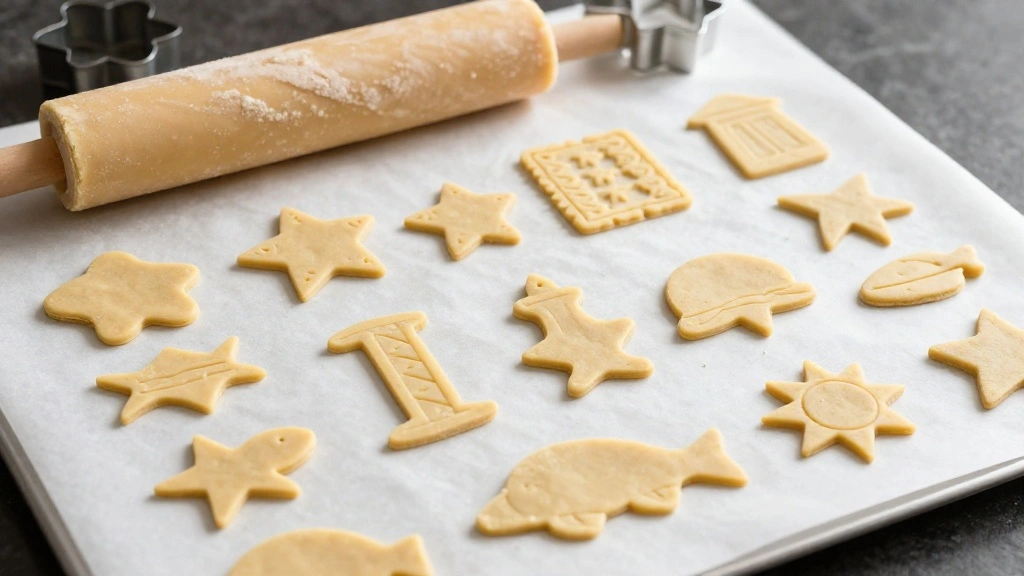
Remove one portion of dough from the refrigerator.
Roll out on a floured surface to 1/4-inch thickness.
Use cookie cutters to create sea-themed shapes.
Transfer shapes to the prepared baking sheet.
Step 8: Bake Snacks
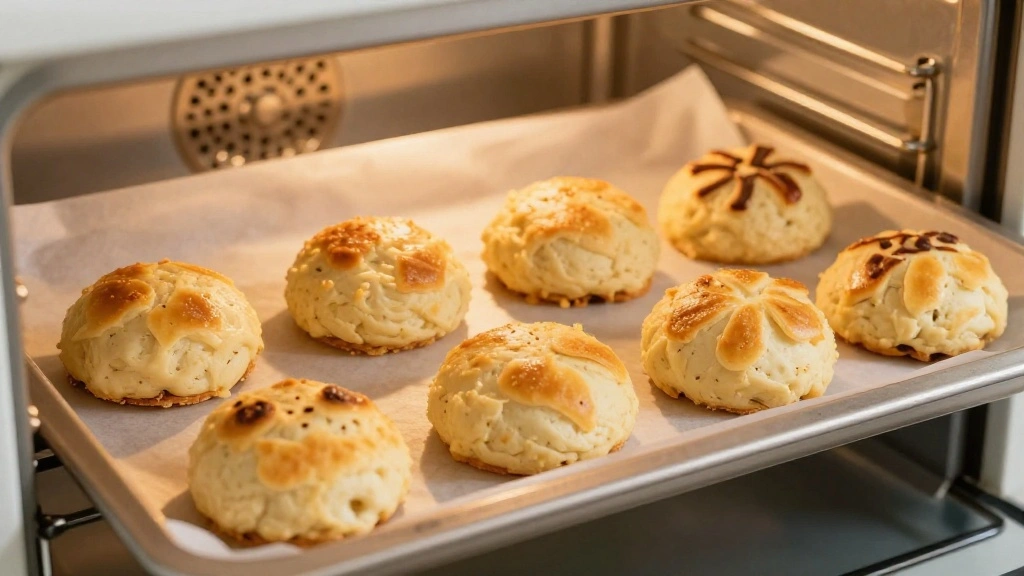
Place the baking sheet in the preheated oven.
Bake for 10-12 minutes until edges are lightly golden.
Watch closely to prevent overbaking.
Remove from oven and let cool on a wire rack.
Step 9: Decorate Snacks
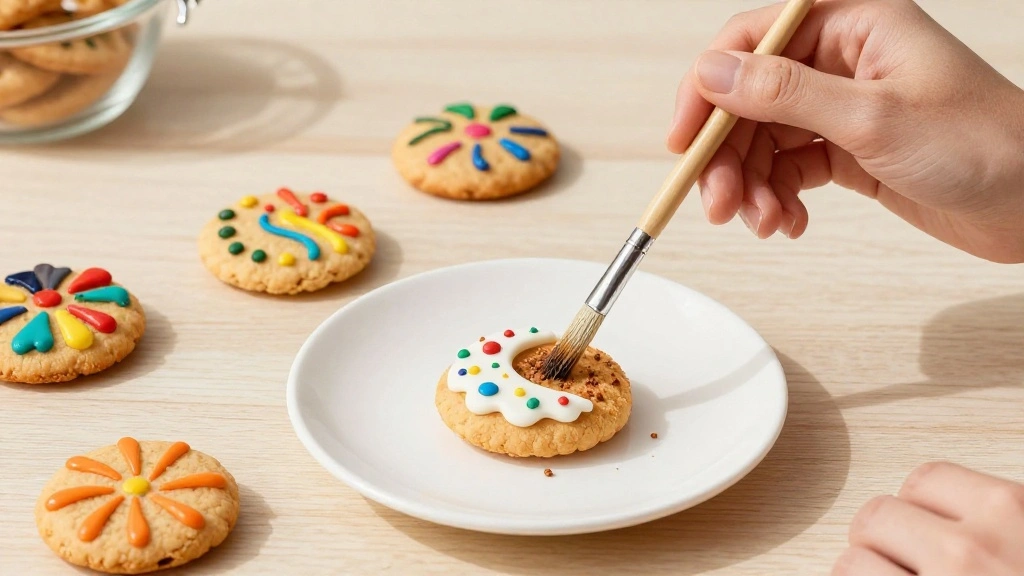
Mix food coloring gels with milk to create edible paint.
Use a small brush to decorate the cooled snacks.
Apply colors in layers for vibrant effects.
Allow painted snacks to dry completely.
Critical Timing and Temperature Guide
Chilling Dough: Chill for at least 30 minutes or up to 1 hour. Dough should be firm before rolling; avoid leaving at room temperature for too long.
Baking Snacks: Bake at 350°F (175°C) for 10-12 minutes. Look for light golden edges; avoid darkening which indicates overbaking.
Decorating Snacks: Allow painted snacks to dry for at least 30 minutes. Ensure colors are set before handling to prevent smudging.
Pro Tips for Under the Sea
• Ingredient Selection: Choose high-quality butter and fresh baking powder for the best texture and flavor.
• Preparation Secret: Always chill the dough adequately to prevent spreading and maintain shape integrity during baking.
• Temperature Management: Keep ingredients at room temperature for easier mixing and better texture.
• Texture Enhancement: Creaming the butter and sugar until fluffy is key to a tender crumb.
• Flavor Layering: Add a pinch of sea salt to enhance the sweetness and depth of the snacks.
• Make-Ahead Strategies: Shape and freeze dough for up to a month. Bake directly from frozen, adding 1-2 minutes to bake time.
• Restaurant-Quality Finishing Touches: Use edible glitter or pearl dust for a magical, oceanic shimmer.
• Equipment Optimization: Use a silicone baking mat for even heat distribution and easy cleanup.
Troubleshooting Common Issues
• Snacks Spread Too Much: This is caused by warm dough. Ensure dough is well-chilled before baking.
• Uneven Baking: Overcrowding the baking sheet can lead to uneven baking. Space snacks evenly with room for air circulation.
• Crumbly Dough: This is often due to incorrect butter temperature. Use softened, not melted, butter for best results.
• Colors Bleed: Applying too much liquid can cause colors to bleed. Use gels sparingly and allow to dry completely.
• Snacks Too Hard: Overbaking can result in hard snacks. Watch closely and remove once edges are lightly golden.
• Decoration Won't Stick: Ensure snacks are completely cool and use just enough milk for the paint consistency.
Variations and Regional Differences
• Italian Biscotti Style: Incorporates almond extract and is twice-baked for a crunchy texture, differing from the softer original.
• Asian Matcha Flavor: Uses matcha powder for a green hue and earthy flavor, reflecting regional tea influences.
• American Sweet Style: Adds vanilla extract and sprinkles for a sweeter, more festive version popular at children's parties.
• Mediterranean Citrus Twist: Infuses lemon zest into the dough for a refreshing, sunny flavor profile.
Food Science Behind the Recipe
• Creaming Method: Incorporates air into the butter and sugar, creating a light and tender texture in the final product.
• Chilling Effects: Chilling dough solidifies fat, preventing excessive spread during baking, and enhancing shape retention.
• Color Chemistry: Gel food coloring provides intense pigmentation by binding well to fats, resulting in vibrant, stable colors.
Frequently Asked Questions
What's the most common mistake people make when preparing Under the Sea Snacks? The most common mistake is not chilling the dough long enough, which leads to spreading and loss of shape.
Can I use whole wheat flour instead of all-purpose? Yes, but the texture will be denser. You might need to adjust the liquid slightly.
How can I store these snacks? Store in an airtight container at room temperature for up to a week or freeze for longer storage.
Can I add nuts or chocolate chips? Yes, finely chopped nuts or mini chocolate chips can be added for texture and flavor.
Is it okay to use liquid food coloring? Liquid food coloring can be used, but gel is preferred for more vibrant colors without altering the dough's consistency.
How can I make these snacks gluten-free? Use a gluten-free flour blend, but keep in mind the texture may vary.
What's the best way to prevent colors from bleeding? Allow the base layer to dry completely before adding additional colors or decorations.
Serving and Presentation Guide
• Traditional Presentation: Arrange snacks on a large platter with a blue cloth or paper underneath to mimic the ocean.
• Party Display: Use tiered stands to add height and variety to your presentation, resembling an underwater scene.
• Individual Servings: Place snacks in small, themed bags or boxes for easy takeaway favors at parties.
• Themed Decor: Add edible seaweed (green-colored sugar strips) and candy pearls for a complete undersea experience.
Conclusion
Creating Under the Sea Snacks is a delightful way to bring the ocean to your summer gatherings.
These treats are not only visually appealing but also delicious, making them a hit with kids and adults alike.
Dive into this recipe, and you'll find a world of flavor and fun waiting for you.
Your creativity and culinary skills will surely make waves at your next event.