As the summer sun reaches its peak, nothing beats the heat like a refreshing no-bake dessert.
These easy-to-make treats are perfect for those sweltering days when turning on the oven feels like a chore.
Packed with vibrant flavors and cool textures, no-bake desserts offer a delightful way to indulge without the fuss.
Whether you’re hosting a backyard BBQ or a casual family gathering, these recipes promise to impress without breaking a sweat.
Join me as we explore a variety of no-bake summer sweets that are as simple as they are delicious.
Prepare to discover your new favorite dessert that requires minimal effort for maximum enjoyment.
The History and Cultural Significance
• No-Bake Summer Dessert traces its origins to the early 20th century in America, where it was originally created by homemakers looking for quick and cool desserts.
• The dish evolved over decades as refrigeration became more common, allowing for the inclusion of dairy and fruit-based ingredients, eventually becoming the beloved versions we know today.
• In American culture, this dish traditionally appears at summer picnics and potlucks, symbolizing ease and comfort.
• While many variations exist across different regions, the authentic version maintains a focus on fresh seasonal ingredients that sets it apart from imitations.
Recipe Overview
Nutritional Information (per serving)
Essential Equipment Guide
Mixing Bowls: Essential for combining ingredients evenly, look for bowls with non-slip bases for stability during mixing. Alternatives like any sturdy bowl will work as long as it’s large enough to accommodate the ingredients.
Rubber Spatula: Important for scraping down the sides of the bowl and ensuring all ingredients are well mixed. Look for a spatula with a flexible head to reach corners easily.
Springform Pan: Ideal for setting the dessert without sticking, look for one with a non-stick coating and a secure latch. Alternatives include any shallow dish lined with parchment for easy removal.
Ingredients
For the Base
|
|
| Amount | Ingredient | Notes |
|---|---|---|
| 1 cup | graham cracker crumbs | provides a crunchy foundation |
| 4 tablespoons | butter | melted, adds richness |
For the Filling
| Amount | Ingredient | Notes |
|---|---|---|
| 1 cup | cream cheese | softened, creates a creamy texture |
| 1/2 cup | granulated sugar | adds sweetness |
| 1 teaspoon | vanilla extract | enhances flavor |
| 1 cup | heavy cream | whipped, lightens the filling |
For the Topping
| Amount | Ingredient | Notes |
|---|---|---|
| 1 cup | fresh berries | washed and dried, adds freshness |
| 2 tablespoons | honey | drizzled, adds a touch of sweetness |
Preparation Methods
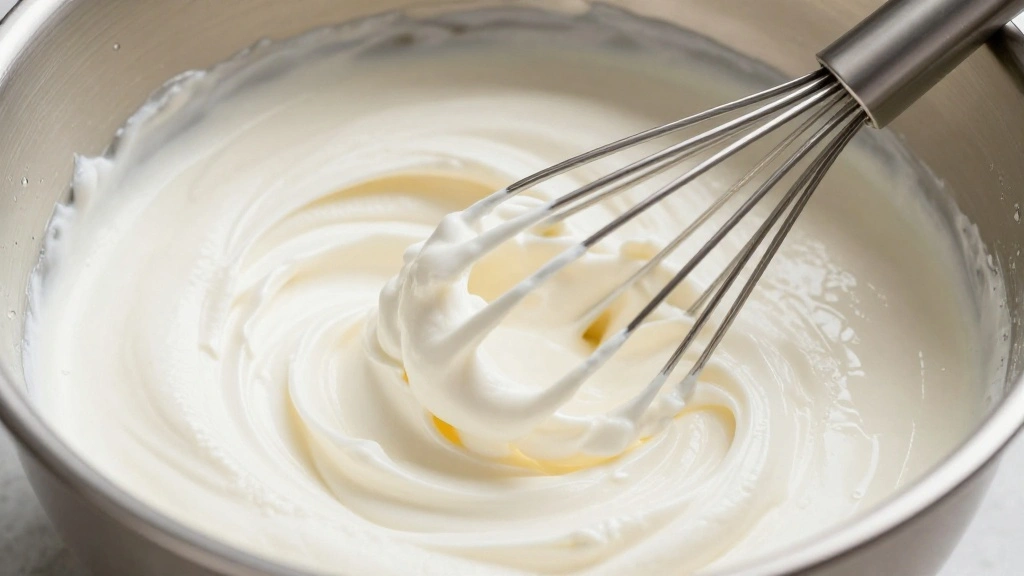
Whipping Cream: Whipping cream to stiff peaks is crucial for achieving the light, airy texture of the filling. It involves beating the cream until it holds its shape and doesn't collapse. Use a chilled bowl for best results.
Folding: This technique gently incorporates whipped cream into the cream cheese mixture without deflating it. Use a spatula to lift and fold the mixture from the bottom, ensuring an even blend.
Chilling: Essential for setting the dessert, chilling allows the flavors to meld and the base to firm up. Ensure the dessert is covered to prevent unwanted flavors from the fridge.
Step 1: Prepare the Base
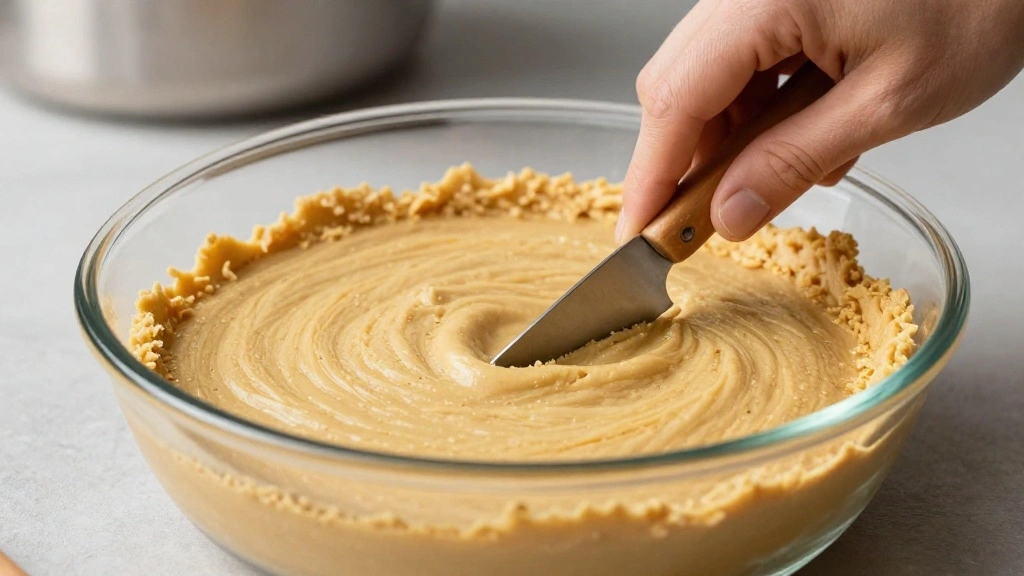
Combine the graham cracker crumbs and melted butter in a mixing bowl.
Stir until the crumbs are evenly coated and resemble wet sand.
Press the mixture into the bottom of a springform pan.
Ensure an even layer by using a flat-bottomed glass to press the crumbs firmly.
Step 2: Soften the Cream Cheese
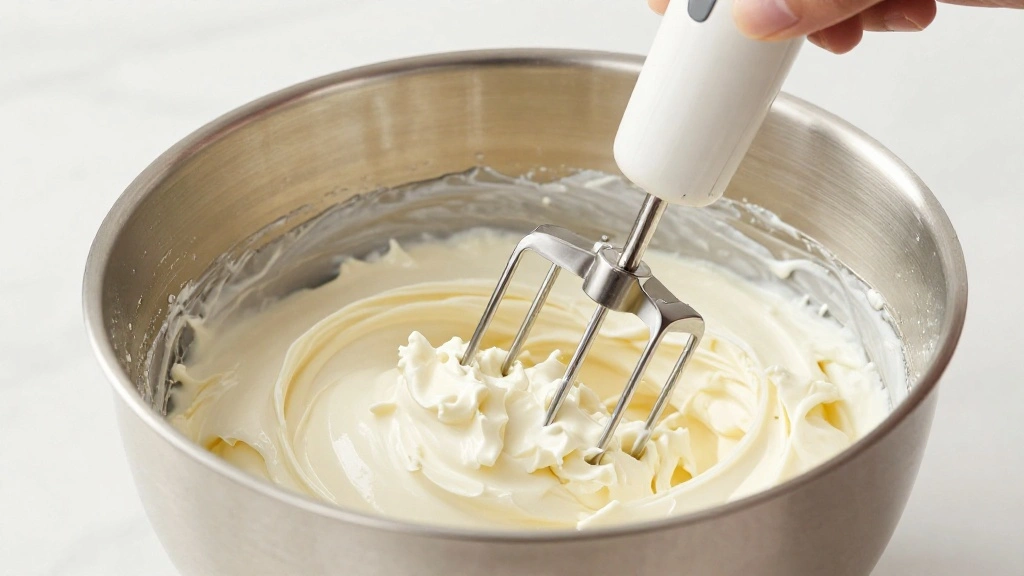
Place the cream cheese in a large mixing bowl.
Allow it to sit at room temperature for about 10 minutes to soften.
Using a hand mixer, beat the cream cheese until smooth and creamy.
Scrape down the sides of the bowl to ensure even mixing.
Step 3: Add Sugar and Vanilla
Add the granulated sugar and vanilla extract to the cream cheese.
Continue mixing on medium speed until fully combined.
The mixture should be smooth and slightly fluffy.
Taste and adjust sweetness if necessary.
Step 4: Whip the Cream
In a separate chilled bowl, pour the heavy cream.
Using a clean whisk or mixer, whip the cream until stiff peaks form.
Be careful not to over-whip, as it can turn into butter.
Chill the whipped cream until ready to use.
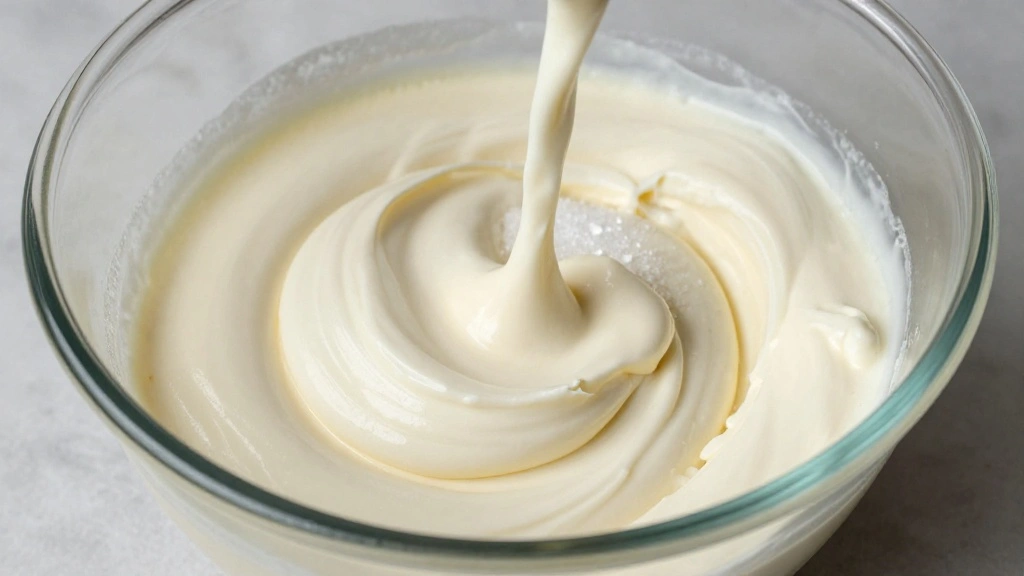
Step 5: Fold the Cream into the Cheese

Gently fold the whipped cream into the cream cheese mixture.
Use a spatula to lift from the bottom and fold over the top.
Continue folding until the mixture is uniform and light.
Avoid over-mixing to maintain the airy texture.
Step 6: Assemble the Dessert
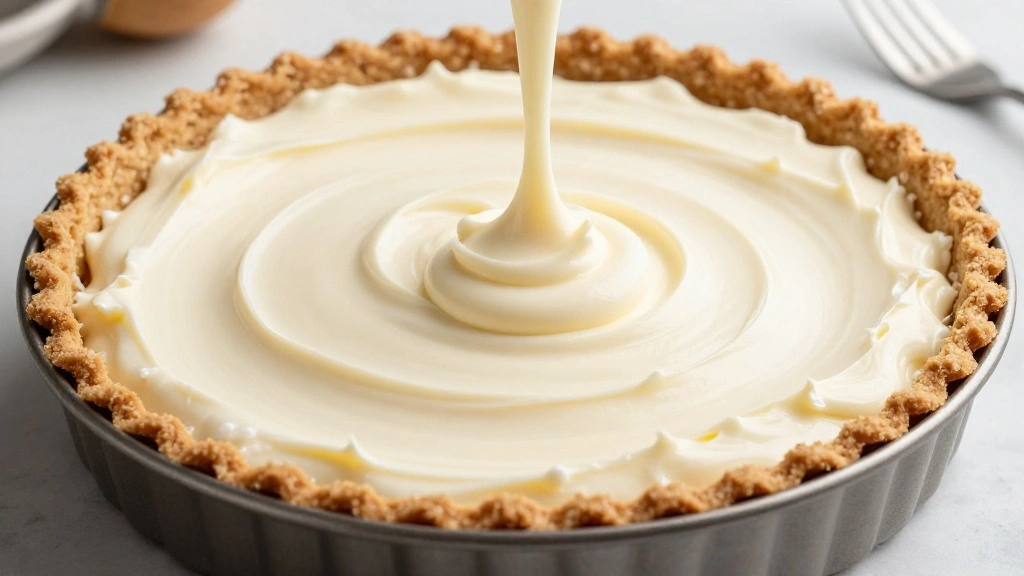
Spoon the cream cheese filling over the prepared crust in the pan.
Spread it evenly with a spatula, smoothing the top.
Ensure there are no air bubbles trapped in the filling.
Cover with plastic wrap and refrigerate for at least 4 hours.
Step 7: Prepare the Topping
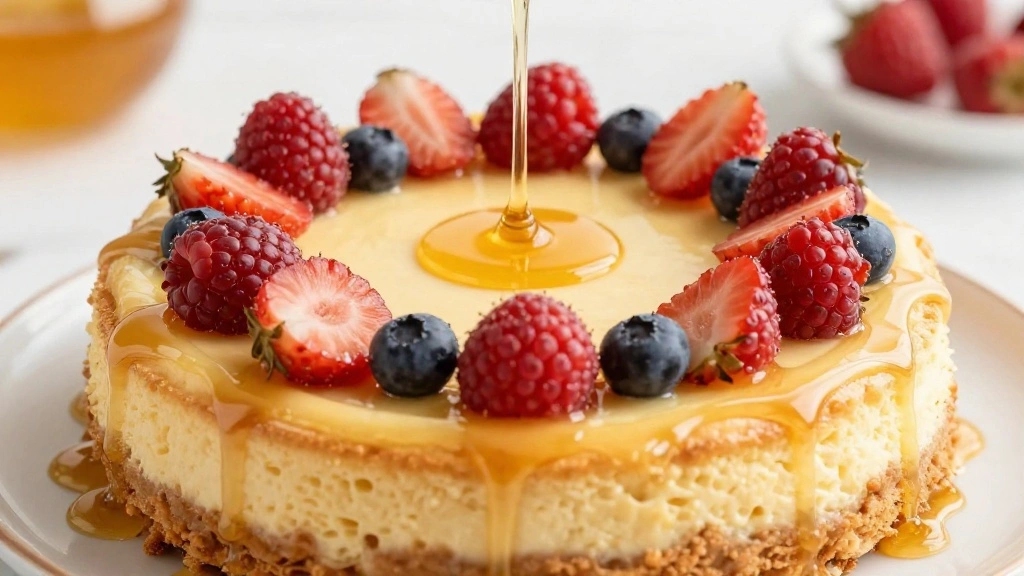
Wash and dry the fresh berries thoroughly.
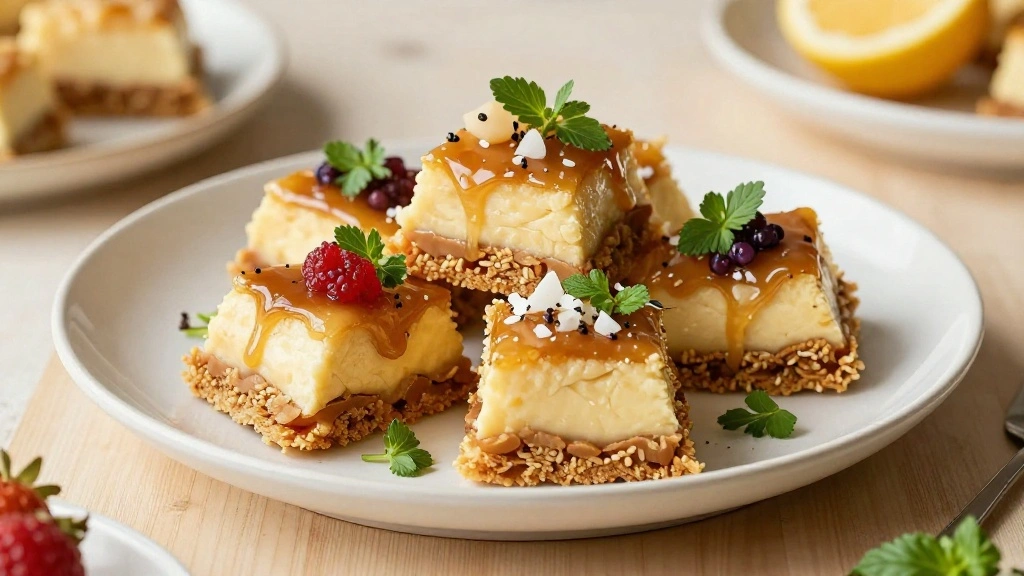
Arrange the berries on top of the chilled cheesecake in an even layer.
Drizzle honey over the berries for added sweetness.
Use a pattern or scatter randomly for a natural look.
Step 8: Serve and Enjoy
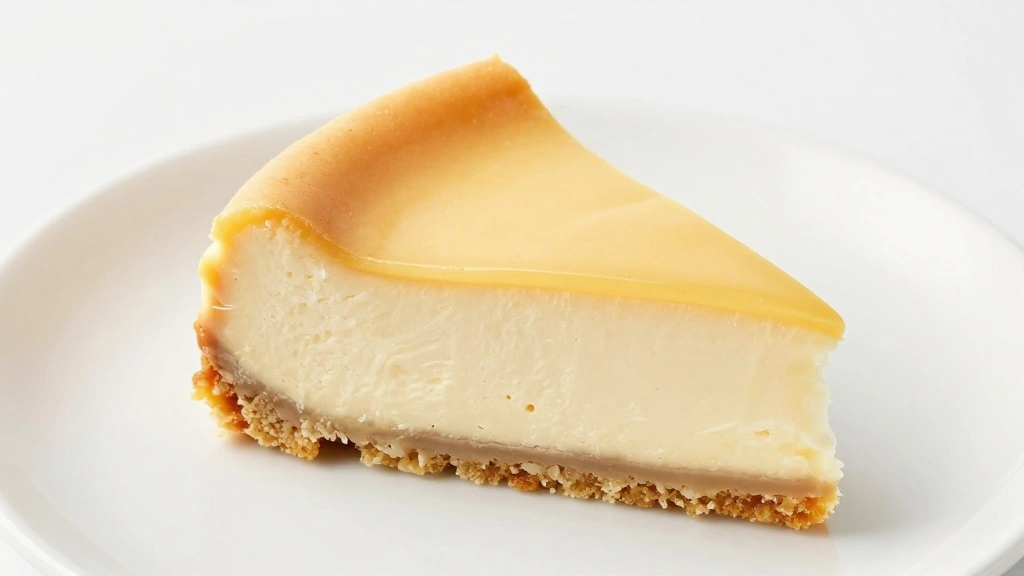
Release the cheesecake from the springform pan carefully.
Transfer to a serving platter without disturbing the topping.
Slice with a sharp knife, wiping between cuts for clean slices.
Serve chilled and enjoy the refreshing flavors.
Critical Timing and Temperature Guide
Base Setting: Allow the crust to chill for at least 30 minutes before adding the filling, ensuring it sets firmly. Avoid rushing this step to prevent a crumbly base.
Filling Chilling: Chill the assembled dessert for a minimum of 4 hours to allow the filling to set completely; overnight is ideal for best results.
Serving Temperature: Serve the dessert directly from the fridge to maintain its structure and refreshing quality. Avoid letting it sit out for too long as the filling may soften excessively.
Pro Tips for No-Bake Summer Dessert
• Ingredient Selection: Opt for full-fat cream cheese and heavy cream for the creamiest texture and richest flavor.
• Preparation Secret: Let the cream cheese and whipped cream come to room temperature for smoother blending and increased volume.
• Temperature Management: Always work with chilled bowls and utensils when whipping cream to achieve the best peaks.
• Texture Enhancement: Use a gentle folding technique to incorporate air into the filling without deflating it.
• Flavor Layering: Add a hint of lemon zest to the filling for a subtle tang that complements the sweetness.
• Make-Ahead Strategies: Prepare the base and filling a day in advance, storing them separately, and combine just before serving.
• Restaurant-Quality Finishing Touches: Garnish with a sprig of mint or edible flowers for an elegant presentation.
• Equipment Optimization: Use a piping bag to add decorative swirls of filling on top for a professional touch.
Troubleshooting Common Issues
• Filling Too Runny: This can occur if the cream cheese isn't fully softened before mixing. Ensure ingredients are at the right temperature and consider adding gelatin as a stabilizer in future attempts.
• Crust Falls Apart: If the crust isn't firm enough, it may not have been pressed adequately or chilled long enough. Use a glass to press firmly and extend chilling time.
• Filling Not Setting: This often happens if ratios are incorrect or it hasn't chilled long enough. Double-check measurements and ensure adequate refrigeration time.
• Bitter Aftertaste: This might result from over-whipping the cream, which can turn it bitter. Whip until just stiff peaks form and no further.
• Uneven Layers: If the filling isn't evenly spread, use a spatula to level it and tap the pan gently to remove air pockets.
Variations and Regional Differences
• Italian Tiramisu Style: This version incorporates coffee-soaked ladyfingers and mascarpone cheese, offering a rich, aromatic flavor profile.
• French Fruit Tart Style: Uses a buttery biscuit crust with a cream cheese filling topped with a variety of glazed fruits, emphasizing freshness.
• Asian Mango and Sticky Rice Style: Combines coconut-flavored sticky rice as the base with a mango cream cheese filling, highlighting tropical flavors.
• Latin American Tres Leches Style: Features a milky cream filling with a hint of cinnamon, poured over a cookie crust, offering a moist, sweet experience.
Food Science Behind the Recipe
• Emulsification: The process of mixing cream cheese and whipped cream relies on emulsification to create a smooth, uniform texture, where fat and water phases are stabilized.
• Aeration: Whipping cream incorporates air, increasing volume and lightness, crucial for the airy texture of the filling.
• Chilling: The cooling process allows fats to solidify and the filling to set, showcasing the science of phase transition from soft to firm.
Frequently Asked Questions
What's the most common mistake people make when preparing no-bake desserts? Over-whipping the cream or not chilling it adequately, which affects texture and structure.
Can I use low-fat ingredients? Yes, but it may affect the texture and richness. Full-fat versions are recommended for best results.
How long can I store this dessert? It can be stored in the refrigerator for up to 3 days, covered tightly to prevent drying out.
Can I freeze the no-bake cheesecake? Yes, freezing is possible, but it might alter the creamy texture slightly. Thaw in the fridge before serving.
What fruits work best for the topping? Berries, mangoes, and kiwis are great choices for their vibrant colors and refreshing taste.
How do I prevent the crust from sticking? Line the pan with parchment paper or use a non-stick springform pan for easy removal.
Can I make this dessert vegan? Yes, substitute cream cheese and cream with vegan alternatives and ensure all other ingredients are plant-based.
Serving and Presentation Guide
• Traditional Presentation: Serve the cheesecake directly from the springform pan on a decorative platter, showcasing the layers.
• Individual Servings: Prepare in small mason jars or ramekins for personalized portions that are easy to serve.
• Layered Parfaits: Create parfaits by layering the crust, filling, and topping in clear glasses for a visually appealing presentation.
• Garnished Elegance: Top with a mint sprig, edible flowers, or a dusting of powdered sugar for a refined finish.
Conclusion
Cool, creamy, and bursting with flavor, these no-bake summer desserts are a delightful way to beat the heat.
With simple ingredients and minimal preparation, they offer a stress-free indulgence.
Try these recipes and experience the refreshing taste of summer in every bite.
Invite family and friends to join in the enjoyment, and make these treats a staple of your summer gatherings.