
As the holiday season approaches, the desire for sweet indulgences becomes an irresistible temptation.
Yet, many of us are trying to maintain low-carb diets without sacrificing the joys of celebratory treats.
This delectable collection of low-carb holiday desserts brings the best of both worlds — rich flavors and dietary mindfulness.
From velvety chocolates to nutty confections, these desserts mimic the taste and texture of traditional recipes.
Join me on a culinary journey that ensures the festive spirit remains unspoiled by dietary concerns.
The History and Cultural Significance
• Indulge in Low-Carb traces its origins to the early 21st century, where it was originally created by health-conscious chefs seeking alternatives to sugary treats.
• The dish evolved over decades as innovative low-carb ingredients and techniques became more accessible, eventually becoming the beloved versions we know today.
• In Western cultures, these dishes traditionally appear at holiday gatherings, symbolizing the balance between indulgence and health.
• While many variations exist across different regions, the authentic version maintains the flavor and texture that sets it apart from imitations.
Recipe Overview
Nutritional Information (per serving)
Essential Equipment Guide
Stand Mixer: A stand mixer is crucial for thoroughly combining ingredients, especially when working with low-carb flours, which may require more thorough mixing to achieve the desired consistency. Alternatives like a hand mixer can work, but ensure it’s powerful enough for dense mixtures.
Silicone Baking Mat: This is essential for ensuring even baking and preventing sticking without adding excess oil or butter. Look for mats that are heat-resistant and fit your baking sheets perfectly.
Food Processor: Important for finely grinding nuts or other low-carb ingredients into flours or pastes. A powerful motor and sharp blades make a difference in achieving the right texture, so invest in a quality model.
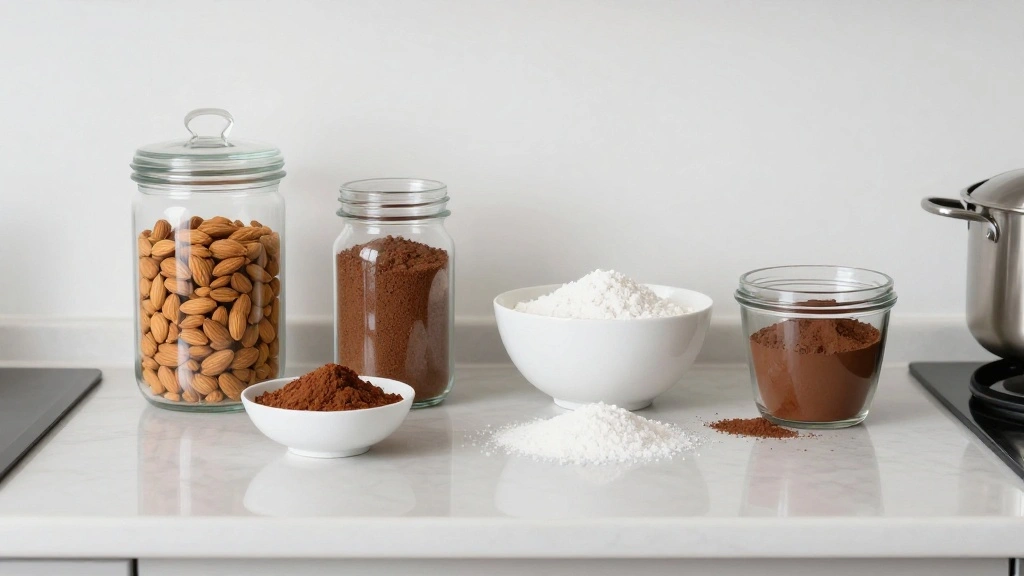
Ingredients
For the Base
|
|
| Amount | Ingredient | Notes |
|---|---|---|
| 2 cups | almond flour | provides a nutty, low-carb base |
| 1 teaspoon | baking powder | helps the dessert rise |
| 1/4 teaspoon | salt | enhances flavor |
For the Filling
| Amount | Ingredient | Notes |
|---|---|---|
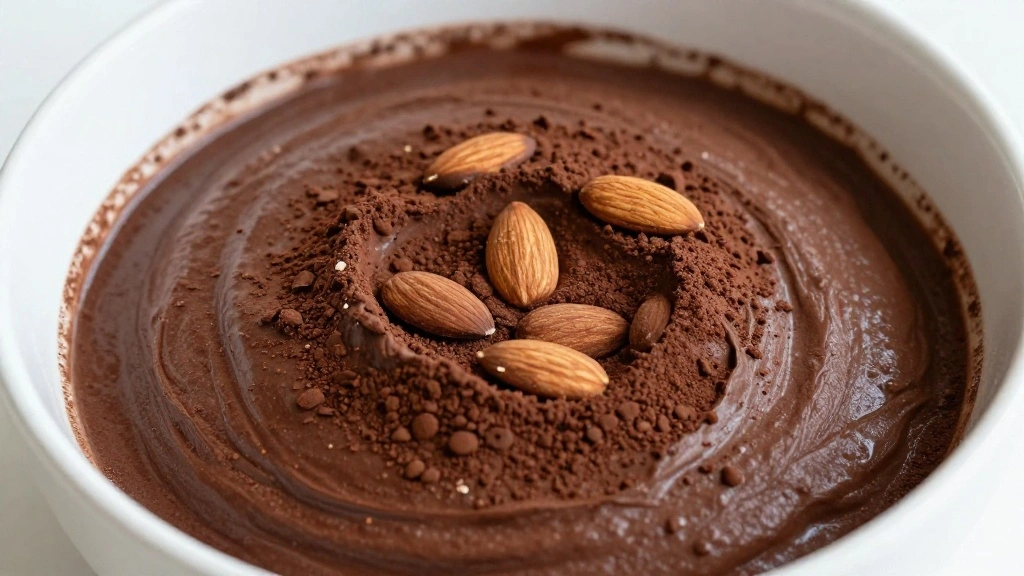
| 1 cup | unsweetened cocoa powder | adds rich chocolate flavor |
| 1 cup | erythritol | natural sweetener |
| 1/2 cup | heavy cream | adds creaminess and richness |
Preparation Methods
Whipping Cream to Soft Peaks: This technique involves whipping heavy cream until it forms peaks that gently fold over when the beaters are lifted. It matters because it creates a light, airy texture that is essential for the dessert's mouthfeel. Use a chilled bowl and beaters for best results.
Almond Flour Sifting: Sifting almond flour breaks up clumps and adds air, resulting in a finer texture. This step is crucial for light and fluffy baked goods. Use a fine-mesh sieve and tap gently to sift.
Folding Ingredients: Folding involves gently incorporating ingredients without deflating the whipped cream. This technique is important for maintaining the dessert's airy texture. Use a spatula and a gentle hand to fold ingredients in a figure-eight motion.
Step 1: Prepare Ingredients
Gather all ingredients and ensure they are at room temperature.
Measure out each ingredient accurately to maintain consistency.
Sift the almond flour into a large mixing bowl.
Set aside ingredients in separate bowls for easy access.
Step 2: Preheat Oven

Set your oven to 350°F (175°C) to preheat.
Ensure the oven rack is in the middle position for even baking.
Use an oven thermometer to verify the correct temperature.
Allow the oven to fully preheat before baking.
Step 3: Mix Dry Ingredients
In a large bowl, combine almond flour, baking powder, salt, and cocoa powder.
Stir the ingredients together until evenly mixed.
Use a whisk to break up any clumps in the cocoa powder.
Ensure a uniform mixture for consistent flavor and texture.
Step 4: Whip Cream
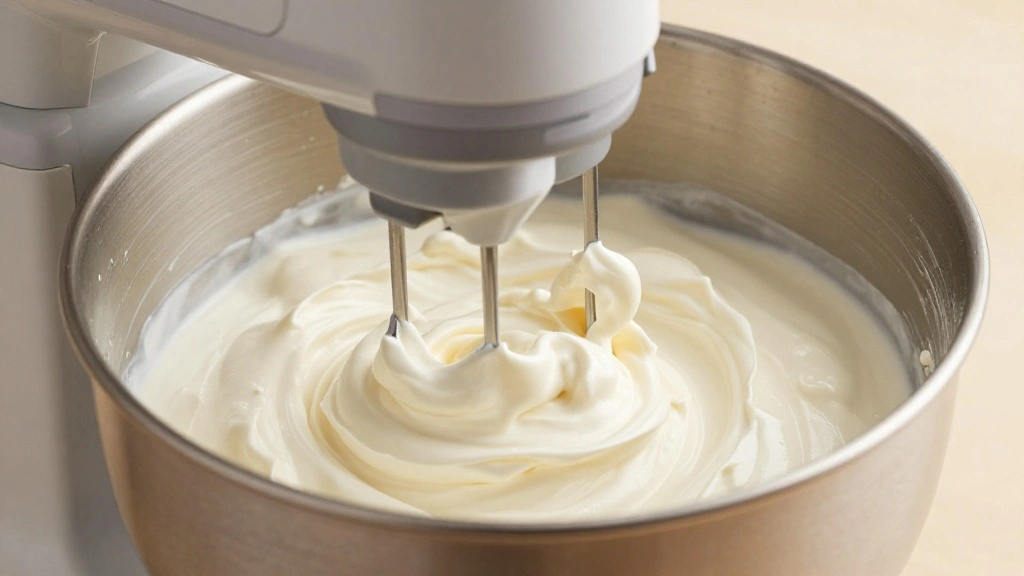
Pour heavy cream into the bowl of a stand mixer.
Beat on medium-high speed until soft peaks form.
Stop occasionally to scrape down the sides of the bowl.
Avoid over-whipping to prevent butter formation.
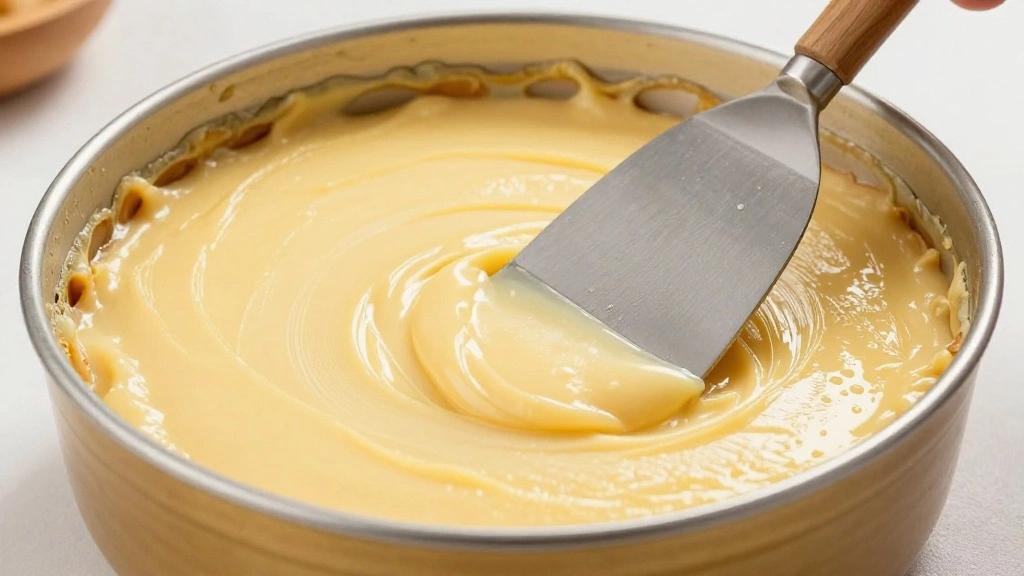
Step 5: Combine Wet and Dry Ingredients
Gently fold the whipped cream into the dry ingredients.
Use a spatula to incorporate ingredients without deflating the mixture.
Fold until no streaks of dry ingredients remain.
Ensure the mixture is smooth and uniform.
Step 6: Pour Mixture into Baking Dish
Grease a baking dish with a light coat of oil or line it with a silicone mat.
Pour the prepared batter evenly into the dish.
Smooth the top with a spatula for even baking.
Tap the dish gently on the counter to remove air bubbles.
Step 7: Bake
Place the baking dish in the preheated oven on the middle rack.
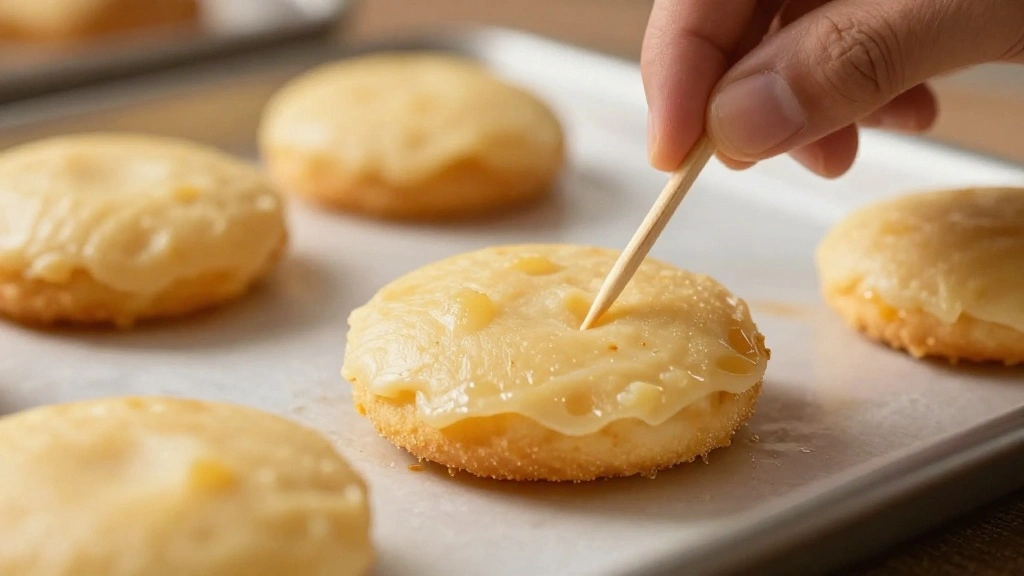
Bake for 25-30 minutes, checking for doneness with a toothpick.
The toothpick should come out clean or with a few moist crumbs.
Avoid opening the oven door frequently to maintain temperature.
Step 8: Cool and Serve
Remove the baking dish from the oven and place it on a cooling rack.
Allow the dessert to cool for at least 15 minutes before serving.
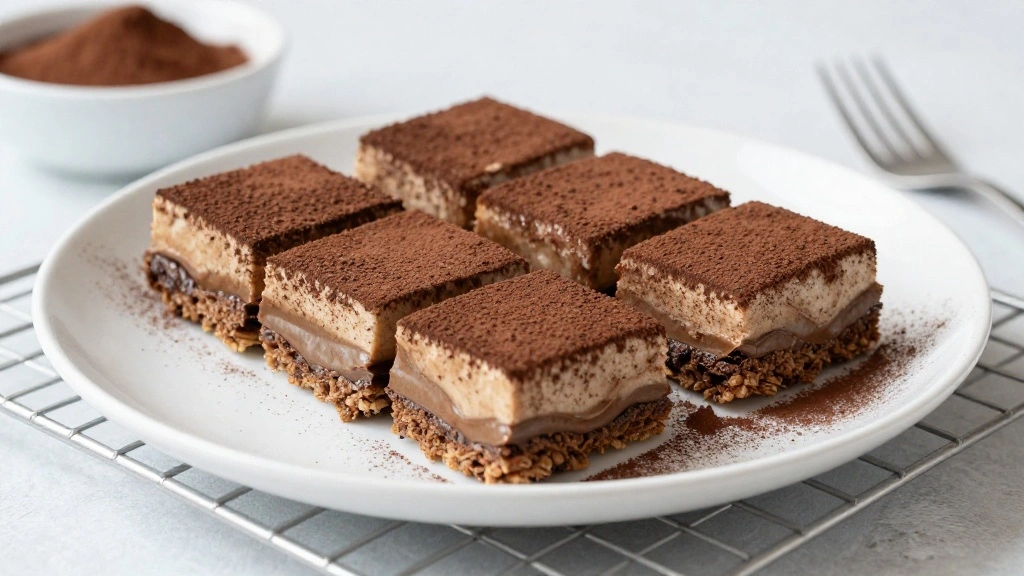
Cut into squares or desired shapes for individual servings.
Garnish with a dusting of cocoa powder or a dollop of whipped cream if desired.
Critical Timing and Temperature Guide
Baking: Bake at 350°F (175°C) for 25-30 minutes. Look for edges pulling away from the dish and a clean toothpick test. Avoid opening the oven door often.
Whipping Cream: Whip cream in a chilled bowl to soft peaks, taking 3-5 minutes. Watch closely to prevent turning it into butter.
Cooling: Cool on a wire rack for at least 15 minutes. The dessert should feel firm to the touch and release easily from the dish.
Pro Tips for Indulge in Low-Carb
• Ingredient Selection: Choose high-quality almond flour and unsweetened cocoa powder for the best flavor and texture, as these are the backbone of your dessert.
• Preparation Secret: Toasting almond flour before use can enhance its nutty flavor and improve the dessert's overall taste.
• Temperature Management: Ensure all ingredients are at room temperature before mixing to prevent clumping and ensure smooth incorporation.
• Texture Enhancement: Use a stand mixer for even and consistent whipping of cream to achieve a perfect light texture.
• Flavor Layering: Add a pinch of espresso powder to the cocoa powder to deepen the chocolate flavor without adding carbs.
• Make-Ahead Strategies: Prepare the base a day ahead and store it tightly wrapped in the fridge. Assemble and bake fresh for the best results.
• Restaurant-Quality Finishing Touches: Sift a small amount of erythritol mixed with cocoa powder over the top before serving for a professional look.
• Equipment Optimization: Use a silicone baking mat to ensure even baking and easy release of the final product.
Troubleshooting Common Issues
• Texture Too Dense: This may be caused by overmixing. Fold ingredients gently and avoid deflating the whipped cream.
• Flavors Unbalanced: If the dessert is too sweet, reduce the erythritol by 1/4 cup. Taste the batter before baking to adjust.
• Cake Not Rising: Ensure baking powder is fresh. Expired leavening agents can lead to dense textures.
• Grainy Texture: Sift almond flour thoroughly to remove clumps and ensure a smooth batter.
• Chocolate Flavor Too Bitter: Balance with a pinch more sweetener or a dash of vanilla extract to mellow the bitterness.
Variations and Regional Differences
• Italian Style: Incorporates mascarpone cheese into the filling for a rich, creamy texture similar to tiramisu, often served during festive family gatherings.
• French Variation: Adds a touch of almond extract and uses finely ground hazelnuts in place of almond flour for a nutty, praline-like flavor.
• American Twist: Infuses pumpkin spice into the dessert for a seasonal flavor, perfect for Thanksgiving celebrations.
• Asian Influence: Uses matcha powder for a unique green tea flavor, creating a striking visual contrast and a delicate, earthy taste.
Food Science Behind the Recipe
• Role of Whipping Cream: Air incorporation through whipping creates a creamy, light texture, crucial for low-carb desserts that lack gluten's structural support.
• Almond Flour's Effect: Provides a gluten-free structure with a natural sweetness and fat content that mimics traditional baking textures without adding carbs.
• Sweetener Impact: Erythritol is used as a sugar substitute; it doesn't caramelize like sugar but provides sweetness without raising blood sugar levels.
Frequently Asked Questions
What's the most common mistake people make when preparing low-carb desserts? Overmixing the batter, which can lead to a dense texture. Always fold ingredients gently.
Can I substitute almond flour with coconut flour? Yes, but coconut flour absorbs more moisture. Use 1/4 of the amount and increase the liquid ingredients.
How do I store these desserts? Store in an airtight container at room temperature for up to 3 days, or refrigerate for up to a week.
Can I freeze the dessert? Yes, wrap individual portions in plastic wrap and store in a freezer-safe bag for up to 2 months.
Is there a way to make this dessert vegan? Substitute the cream with coconut cream and use a flaxseed meal as an egg replacer.
Why is my dessert not sweet enough? Erythritol's sweetness can vary, so taste the batter and adjust as needed before baking.
What can I use instead of erythritol? Stevia or monk fruit sweeteners are good alternatives, but adjust the quantity as they are sweeter than erythritol.
Serving and Presentation Guide
• Traditional Presentation: Serve on a white porcelain dessert plate, garnished with a light dusting of cocoa powder and a sprig of mint.
• Modern Approach: Layer the dessert in a clear glass trifle dish for a visual appeal, showing off the layers and textures.
• Family Style: Present on a rustic wooden board, with individual portions pre-cut and placed with small serving utensils.
• Festive Flair: Top each serving with a swirl of whipped cream and edible gold leaf for a luxurious touch.
Conclusion
These low-carb holiday desserts offer a delightful balance of indulgence and health.
With rich flavors and satisfying textures, they are sure to impress your guests.
Don't hesitate to experiment with the variations and presentation styles to make them your own.
Enjoy the festive season with these guilt-free treats that don't compromise on taste.