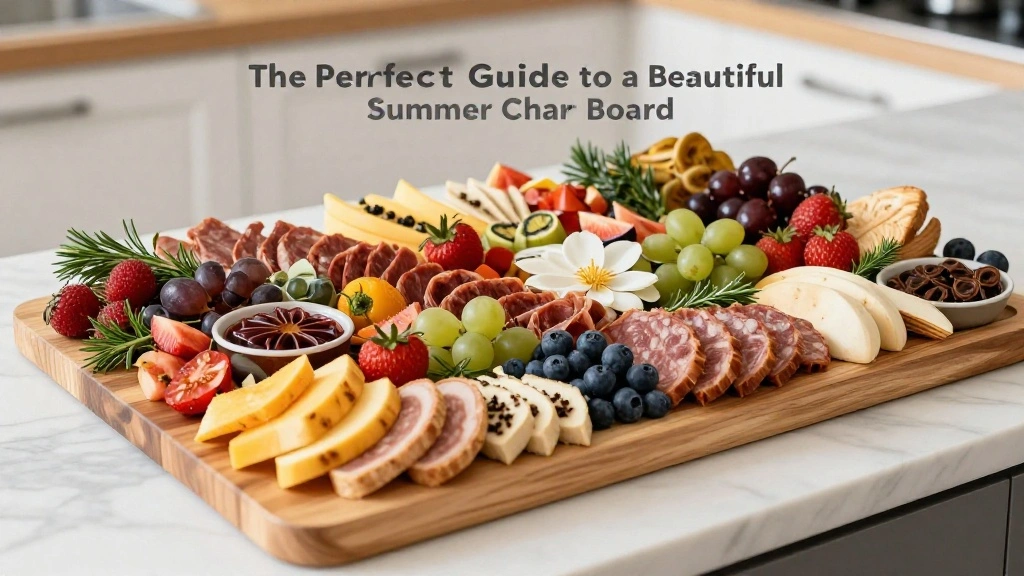
Summer is the perfect season to indulge in the vibrant and colorful world of charcuterie boards.
The harmonious blend of fresh fruits, artisanal cheeses, and cured meats creates a feast for both the eyes and the palate.
I first discovered the art of crafting a charcuterie board during a summer picnic with friends, where the mix of textures and flavors was nothing short of delightful.
Whether you’re hosting a garden party or enjoying a cozy evening on the patio, a beautifully arranged summer charcuterie board is sure to impress your guests.
The History and Cultural Significance
• The Perfect Guide traces its origins to 15th century France, where it was originally created by charcutiers, or pork butchers.
• The dish evolved over decades as it incorporated a variety of meats, cheeses, and other accompaniments, eventually becoming the beloved version we know today.
• In French culture, this dish traditionally appears at gatherings and celebrations, symbolizing abundance and hospitality.
• While many variations exist across different regions, the authentic version maintains a balance of flavors and textures that sets it apart from imitations.
Recipe Overview
Nutritional Information (per serving)
Essential Equipment Guide
Large Wooden Board: A sturdy wooden board is essential for displaying your charcuterie beautifully and naturally. Alternatives like slate or marble are also effective, but wood provides a warm, rustic feel that’s perfect for summer gatherings.
Cheese Knives: These tools allow for the easy cutting and serving of various cheese textures. Look for a set that includes different shapes for soft, hard, and crumbly cheeses.
Small Bowls: Small bowls are crucial for holding items like olives, nuts, and jams, keeping them from mingling with other ingredients and ensuring each flavor stands out.
Ingredients
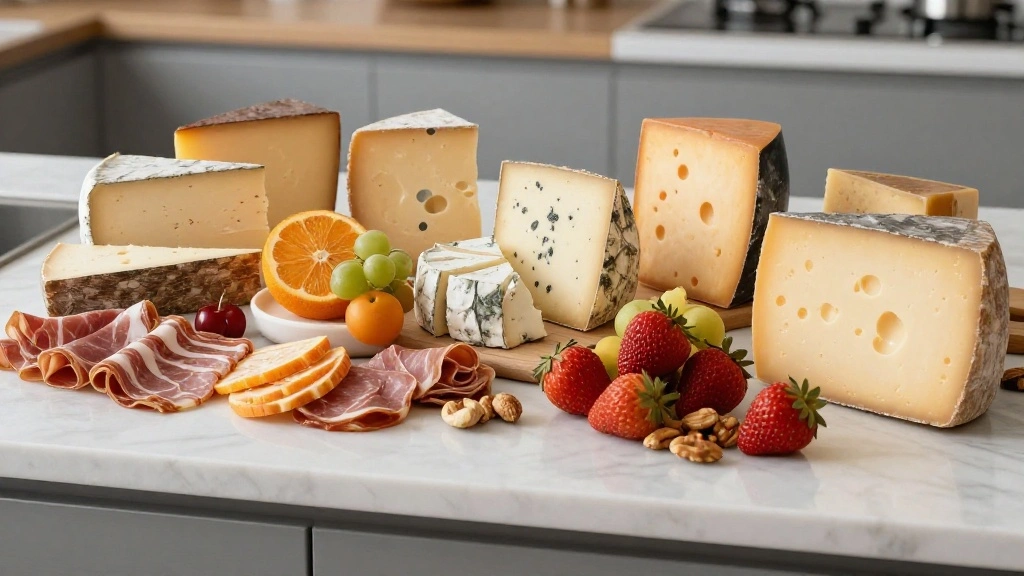
For the Meats
|
|
| Amount | Ingredient | Notes |
|---|---|---|
| 100 grams | prosciutto | thinly sliced for delicate savoriness |
| 100 grams | salami | adds a spicy kick |
For the Cheeses
| Amount | Ingredient | Notes |
|---|---|---|
| 150 grams | brie | creamy, mild cheese |
| 150 grams | aged cheddar | sharp, bold flavor |
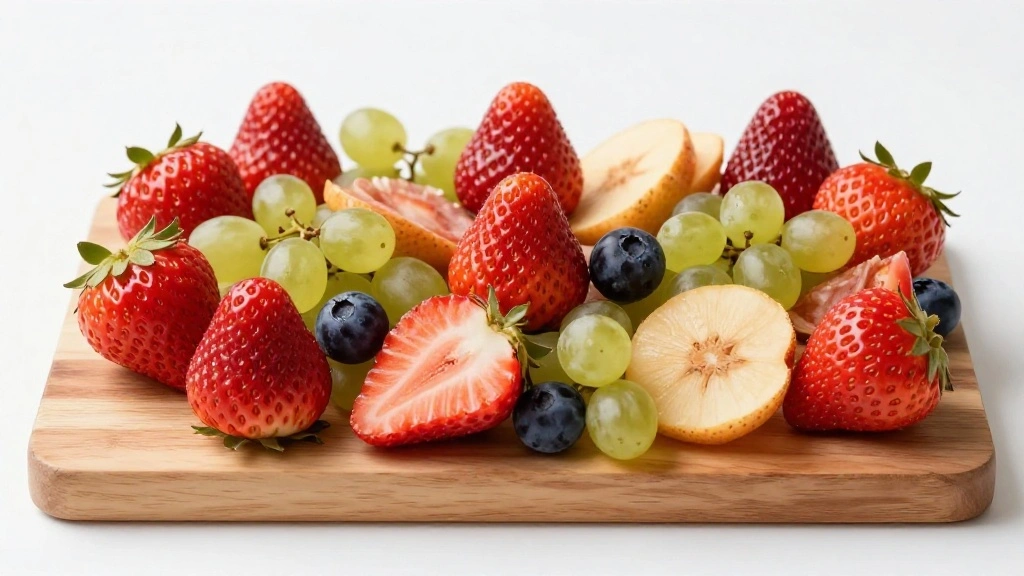
Fruits
| Amount | Ingredient | Notes |
|---|---|---|
| 1 cup | green grapes | washed and pulled from stems |
| 1 cup | strawberries | hulled and halved |
Accompaniments
| Amount | Ingredient | Notes |
|---|---|---|
| 1 jar | honey | for drizzling over cheeses |
| 1 cup | mixed nuts | adds crunch and variety |
Preparation Methods
Layering Technique: Proper layering involves arranging items in a way that creates visual appeal and easy access. Layer meats and cheeses in a fan-like pattern to showcase them beautifully.
Balancing Flavors: This technique ensures a perfect mix of sweet, salty, and savory flavors. Pair sweet fruits with salty meats and mild cheeses for a balanced bite every time.
Consistent Sizing: Keeping ingredients in consistent sizes ensures that each bite is harmonious. Slice fruits and cheeses evenly to maintain a uniform look.
Step 1: Gather Your Ingredients
Begin by gathering all your selected meats, cheeses, fruits, and accompaniments.
Ensure everything is fresh and ready to use.
Lay out your ingredients on a clean surface.
This will make the assembly process smoother and more organized.
Step 2: Prepare the Board
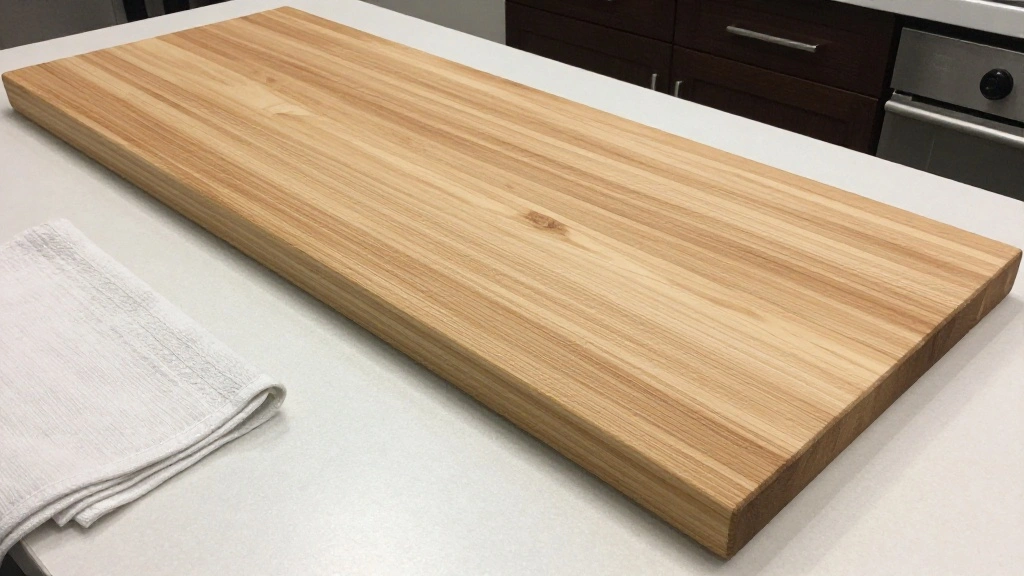
Select a large, sturdy wooden board as your base.
Clean it thoroughly to ensure it's free of any residues.
Place the board on a flat surface where you plan to serve it.
This will be the foundation of your charcuterie masterpiece.
Step 3: Arrange the Cheeses

Start by placing the cheeses on the board.
Position them at different corners to anchor the layout.
Cut some slices and leave others whole for visual variety.
Ensure that cheese knives are placed alongside each cheese.
Step 4: Add the Meats
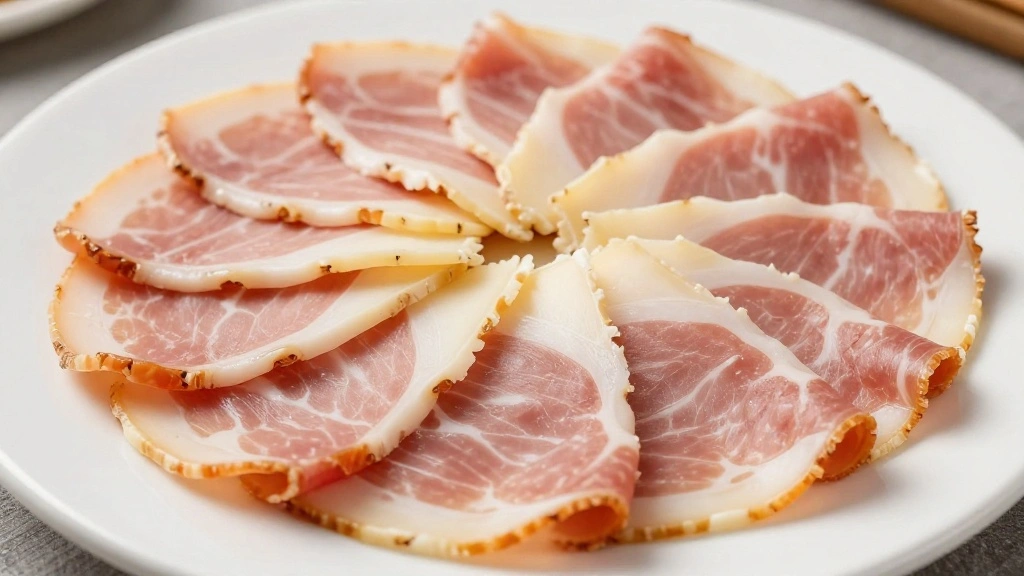
Next, layer the meats around the cheeses.
Fold or roll the meats to create height and texture.
Position them in a way that they are easily accessible.
This creates a dynamic look that draws the eye.
Step 5: Incorporate the Fruits
Add fruits to the board, utilizing gaps between meats and cheeses.
Place grapes in small bunches and strawberries in clusters.
Balance colors and textures for visual appeal.
Fruits should complement the flavors of the meats and cheeses.
Step 6: Place the Accompaniments

Fill small bowls with nuts and olives.
Distribute these bowls evenly across the board.
Add honey in a small jar or bowl with a dipper.
This ensures guests can add these elements as they prefer.
Step 7: Final Touches
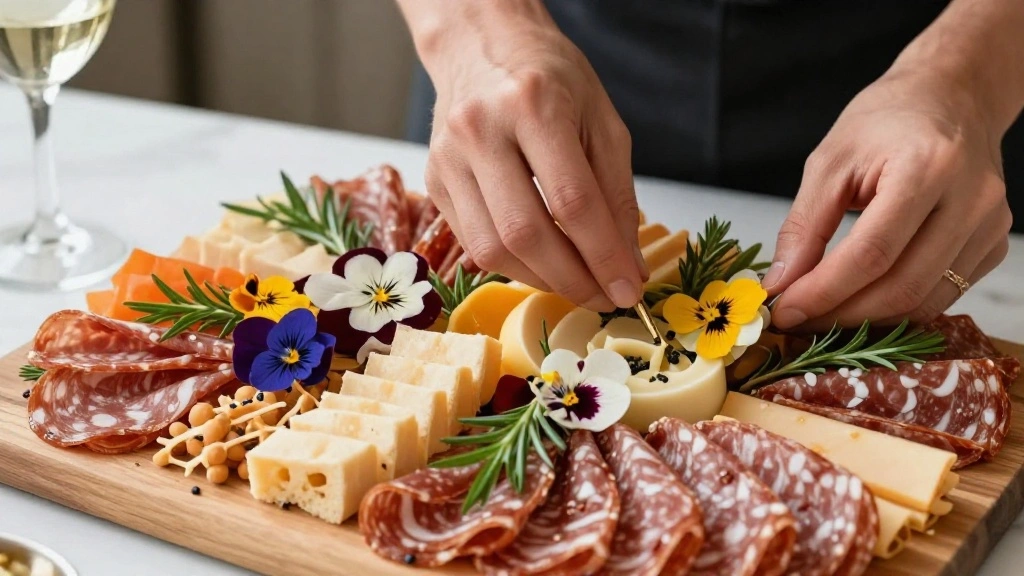
Add fresh herbs like rosemary for a fragrant touch.
Scatter a few edible flowers for added color and elegance.
Ensure all elements are balanced and accessible.
This adds a professional finish to your board.
Step 8: Serve and Enjoy
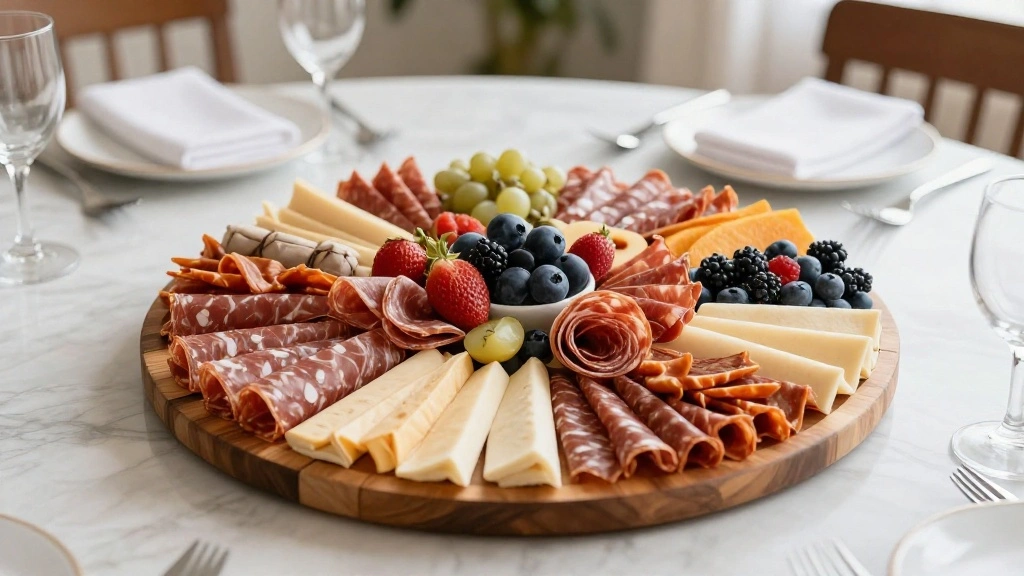
Position the board in the center of your serving area.
Provide small plates and napkins for guests.
Encourage guests to mix and match flavors.
Enjoy the beautiful and delicious creation you've assembled!
Critical Timing and Temperature Guide
Meat and Cheese Placement: Ensure meats and cheeses are at room temperature (about 20 minutes out of the fridge) for optimal flavor and texture.
Fruit Freshness: Use fruits that are ripe but firm; avoid mushy textures that can spoil the presentation.
Serving Timing: Assemble and serve the board within an hour of preparation to maintain freshness and quality.
Pro Tips for The Perfect Guide
• Ingredient Selection: Choose high-quality, artisanal cheeses and meats to elevate the board's overall taste and presentation.
• Preparation Secret: Slightly chill the board before serving to keep ingredients fresh longer, especially in warm weather.
• Temperature Management: Allow cheeses to sit at room temperature for 20 minutes before serving to enhance flavors.
• Texture Enhancement: Include a mix of soft, hard, and crumbly cheeses to provide a variety of textures.
• Flavor Layering: Pair sweet fruits with salty meats and sharp cheeses for a balanced flavor profile.
• Make-Ahead Strategies: Prep ingredients in advance but assemble the board just before serving to maintain freshness.
• Restaurant-Quality Finishing Touches: Add a sprinkle of flaky sea salt over fruits and nuts for a professional finish.
• Equipment Optimization: Use the largest board you have to give ample space for all elements without overcrowding.
Troubleshooting Common Issues
• Board Looks Overcrowded: Remove a few items and space out the remaining ingredients for a cleaner, more appealing presentation.
• Flavors Unbalanced: Ensure a mix of sweet, salty, and savory elements by adding or removing components as needed.
• Cheese Too Hard: Allow hard cheeses more time at room temperature to soften before serving.
• Meats Drying Out: Keep meats covered with a damp cloth until just before serving to maintain moisture.
• Fruits Browning: Brush cut fruits with lemon juice to prevent oxidation and browning.
Variations and Regional Differences
• Italian Style: Focus on Italian cured meats like prosciutto and mortadella, paired with Italian cheeses such as Parmigiano-Reggiano and Gorgonzola.
• Spanish Tapas Board: Incorporate Spanish chorizo, Manchego cheese, and marinated olives for a tapas-style experience.
• French Elegance: Feature French cheeses like Camembert and Roquefort, with a selection of French baguette slices and cornichons.
• Vegetarian Option: Replace meats with roasted vegetables or marinated tofu for a plant-based alternative.
Food Science Behind the Recipe
• Flavor Pairing Theory: Understanding complementary flavors enhances the board's overall taste, ensuring a harmonious bite with each combination.
• Cheese Aging Process: Knowing the aging process of cheeses helps in selecting varieties that offer depth and complexity in flavor.
• Preservation Techniques: Cured meats are preserved using salt and time, which intensifies flavor and ensures safety when left at room temperature for serving.
Frequently Asked Questions
What's the most common mistake people make when preparing a charcuterie board? Overcrowding the board, which can make it look messy and unappealing.
Can I prepare the board ahead of time? You can prepare ingredients ahead but assemble the board just before serving to maintain freshness.
How do I select the best cheeses? Choose a variety of textures and flavors, including soft, hard, and sharp cheeses for balance.
What's the ideal number of items to include on the board? Aim for a mix of 3-4 cheeses, 2-3 meats, and a variety of fruits and accompaniments for diversity.
How do I keep fruits from browning? Use lemon juice to lightly coat fruits like apples and pears to prevent oxidation.
What should I serve with the charcuterie board? Offer crusty bread or crackers as a base for meats and cheeses.
How do I make the board look more appealing? Use a mix of colors and textures, arranging items in an overlapping pattern for visual interest.
Serving and Presentation Guide
• Traditional Presentation: Present the board on a large wooden or slate board, with ingredients arranged in a flowing, natural pattern.
• Modern Minimalist: Use a sleek marble slab and focus on symmetry and clean lines for a contemporary look.
• Rustic Picnic: Incorporate wicker baskets and wooden crates for an outdoor, rustic feel.
• Elegant Buffet: Elevate the board on a stand or tiered tray for a buffet-style presentation.
Conclusion
Crafting a summer charcuterie board is an art that combines flavor, texture, and presentation.
With this guide, you'll be able to create a board that is as beautiful as it is delicious.
Invite friends and family to savor this delightful culinary experience, and enjoy the compliments that are sure to come your way.