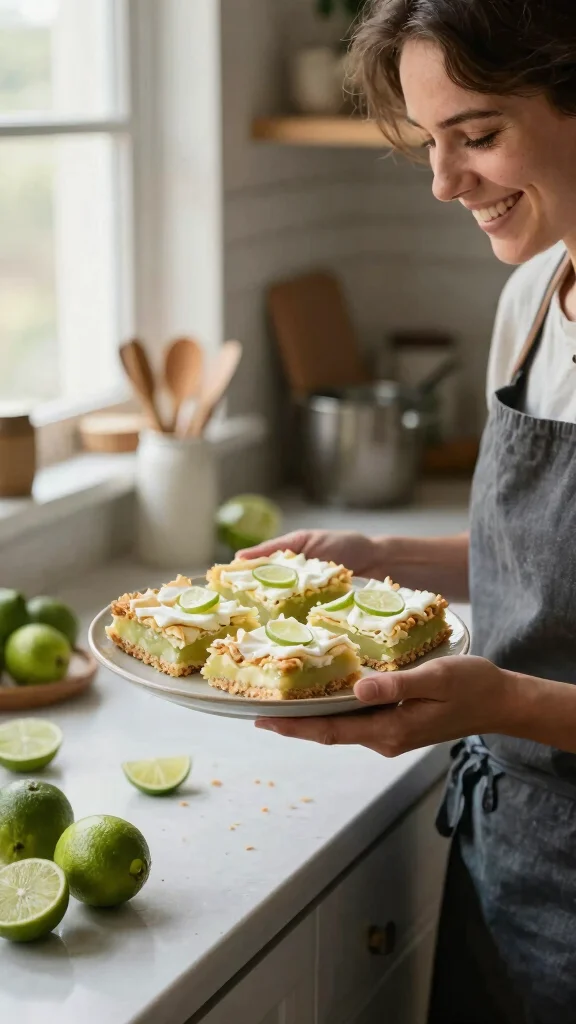
There’s just something about key lime pie bars that can take you on a flavor adventure. The tangy and sweet combination creates a burst of sunshine in every bite. I put this post together because I want to share easy ways to whip up these delightful treats ahead of time. Whether you’re gearing up for a summer gathering or a cozy get-together, planning ahead helps alleviate stress and lets you enjoy hosting more.
If you’re someone who loves fun treats and entertaining guests, this guide is for you. You’ll find a variety of recipes and tips that cater to everyone, from classic desserts to unique spins like vegan or mini versions. You’ll learn how to make these bars ahead of time, ensuring your dessert table shines with delicious options.
Get ready to discover all the creative ways to serve key lime pie bars and impress your guests with minimal effort. From the classic recipe to exciting variations, you’ll be equipped with everything needed to create a dessert that’s not only tasty but also a breeze to prepare in advance.
Key Takeaways
– Classic Recipe: Start with the classic key lime pie bar recipe that combines graham cracker crust and zesty lime filling for a traditional taste everyone loves.
– Mini Versions: Consider making mini key lime pie bars for individual servings, which are perfect for portion control and easy to serve at parties.
– Tropical Twist: Try coconut key lime pie bars for a tropical flavor, adding shredded coconut to the crust or filling for an extra layer of deliciousness.
– No-Bake Option: Explore no-bake key lime pie bars for an easy prep option, ensuring a creamy, cool treat without turning on the oven.
– Storage Tips: Learn how to properly store key lime pie bars to keep them fresh longer, ensuring you can enjoy your hard work days after making them.
Contents
- 1. The Classic Key Lime Pie Bar Recipe
- 2. Mini Key Lime Pie Bars for Individual Servings
- 3. Coconut Key Lime Pie Bars for a Tropical Twist
- 4. No-Bake Key Lime Pie Bars for Easy Prep
- 5. Vegan Key Lime Pie Bars for Dairy-Free Options
- 6. Flavor Variations: Berry Key Lime Pie Bars
- 7. Tips for the Perfect Key Lime Pie Bars
- 8. Common Mistakes to Avoid When Making Key Lime Pie Bars
- 9. How to Properly Store Key Lime Pie Bars
- 10. Creative Ways to Serve Key Lime Pie Bars
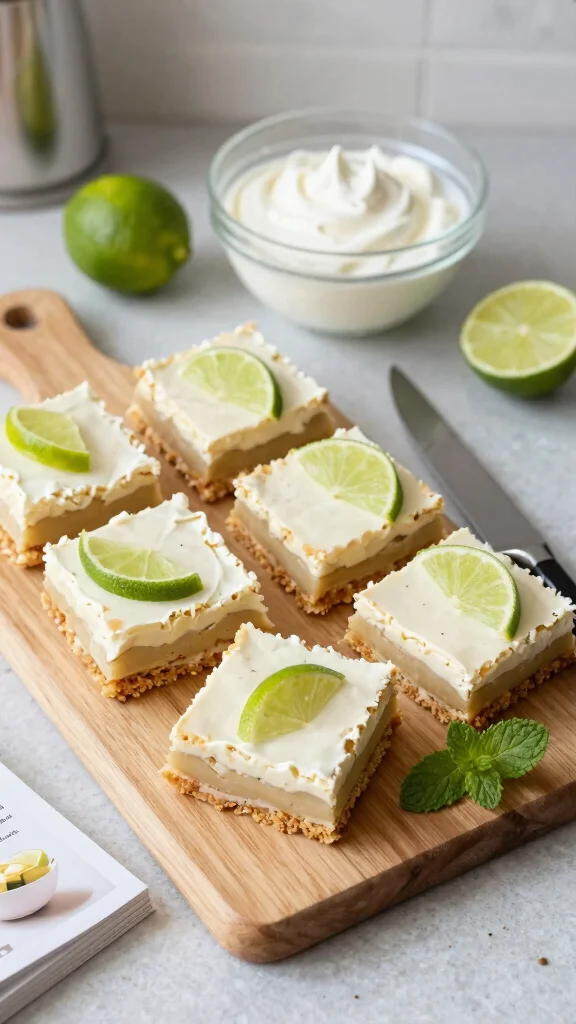
1. The Classic Key Lime Pie Bar Recipe
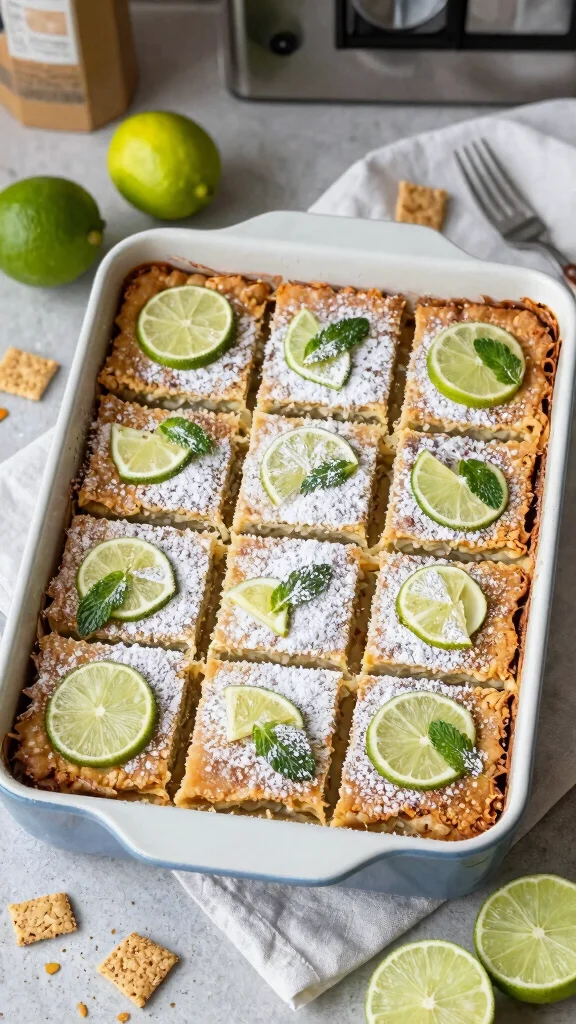
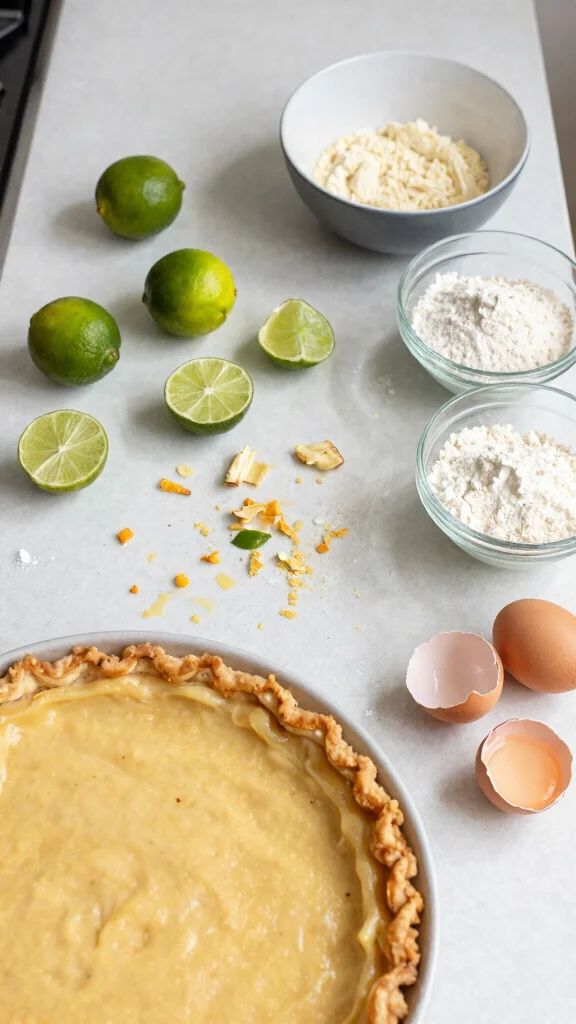
Craving a sweet and tangy treat? Key lime pie bars deliver all the flavors of the classic dessert in a convenient form. With a buttery graham cracker crust and a creamy filling of sweetened condensed milk and fresh lime juice, these bars are both refreshing and satisfying. They’re quick to prepare, making them perfect for any occasion!
Ingredients:
– 1 ½ cups graham cracker crumbs
– ½ cup granulated sugar
– ½ cup unsalted butter, melted
– 1 can (14 ounces) sweetened condensed milk
– ½ cup fresh lime juice (about 4 limes)
– Zest of 2 limes
– 2 large eggs
Instructions:
1. Preheat your oven to 350°F (175°C).
2. In a bowl, mix graham cracker crumbs, sugar, and melted butter until well combined.
3. Press the mixture firmly into the bottom of an 8×8-inch baking dish to create the crust.
4. Bake for 10 minutes, then remove and let cool slightly.
5. In a separate bowl, whisk together the sweetened condensed milk, lime juice, lime zest, and eggs until smooth.
6. Pour the filling over the cooled crust and bake for an additional 20 minutes.
7. Let it cool completely, then refrigerate until set.
8. Slice into bars and serve chilled.
These key lime pie bars are a delightful treat that will bring smiles to everyone at your gathering!
2. Mini Key Lime Pie Bars for Individual Servings
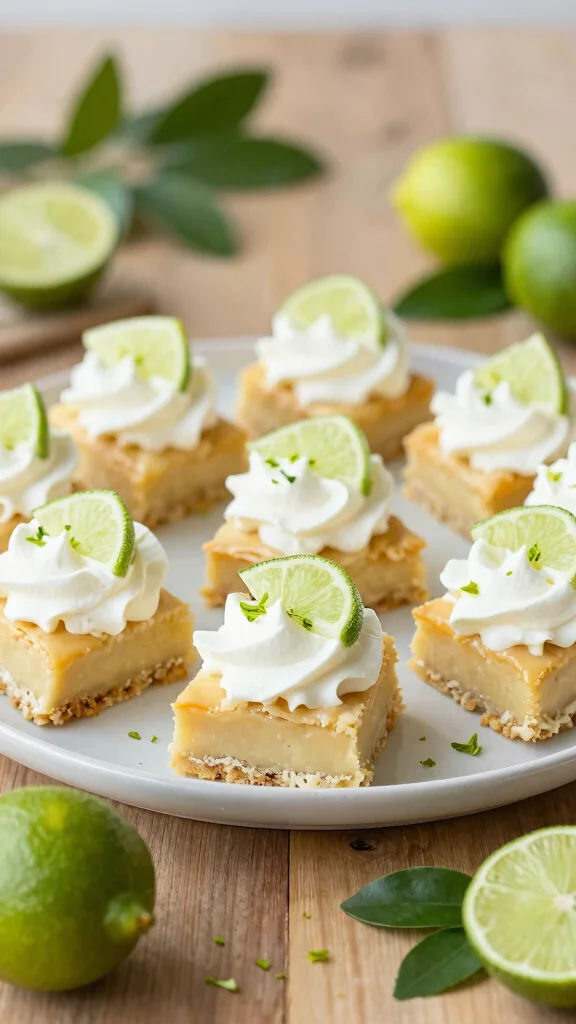
Looking for a fun way to serve dessert? Mini key lime pie bars are the perfect solution! These bite-sized treats allow guests to enjoy the classic flavors without the guilt of a full slice. Using a mini muffin tin, you can create these adorable desserts that are great for parties or casual gatherings.
Topped with a fluffy dollop of whipped cream and a tiny lime wedge, they pack a flavorful punch in a small package. Easy to make ahead, these mini bars simplify your party prep!
Ingredients:
– 1 cup graham cracker crumbs
– ¼ cup sugar
– 4 tablespoons melted butter
– 1 can (14 ounces) sweetened condensed milk
– ¼ cup fresh lime juice
– 1 egg
– Whipped cream and lime wedges for topping
Instructions:
1. Preheat your oven to 350°F (175°C).
2. Combine graham cracker crumbs, sugar, and melted butter in a bowl.
3. Press the mixture into the bottoms of a greased mini muffin tin.
4. Mix condensed milk, lime juice, and egg until combined, then pour into each mini crust.
5. Bake for 15 minutes, then let them cool before removing from the tin.
6. Top with whipped cream and a lime wedge before serving.
These mini key lime pie bars will charm your guests and make dessert time even more delightful!
3. Coconut Key Lime Pie Bars for a Tropical Twist
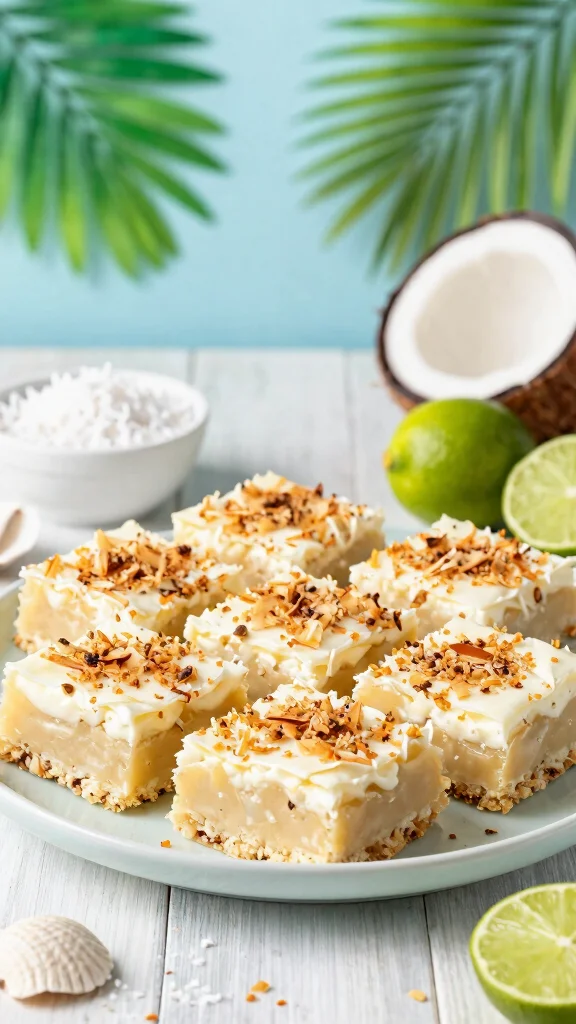
Dreaming of a tropical escape? Coconut key lime pie bars transport you to paradise with every bite! The combination of creamy coconut and tangy lime creates a delightful balance that’s refreshing and indulgent. These bars are a perfect addition to summer gatherings or beach-themed parties.
You can enhance the coconut flavor by mixing shredded coconut into the crust or filling, or even toasting it for extra richness. These bars are not just tasty; they’re sure to impress your guests!
Ingredients:
– 1 cup graham cracker crumbs
– ½ cup sweetened shredded coconut
– ½ cup granulated sugar
– ½ cup unsalted butter, melted
– 1 can (14 ounces) sweetened condensed milk
– ¾ cup fresh lime juice
– 2 large eggs
– Toasted coconut for garnish
Instructions:
1. Preheat your oven to 350°F (175°C).
2. Combine the graham cracker crumbs, shredded coconut, sugar, and melted butter in a bowl.
3. Press the mixture into the bottom of an 8×8-inch baking dish.
4. Bake for 10 minutes; allow to cool slightly.
5. In another bowl, whisk together the sweetened condensed milk, lime juice, and eggs until smooth.
6. Pour filling over the cooled crust and bake for an additional 20 minutes.
7. Cool completely, refrigerate, and top with toasted coconut before serving.
These coconut key lime pie bars will satisfy your tropical cravings and bring sunshine to your dessert table!
4. No-Bake Key Lime Pie Bars for Easy Prep
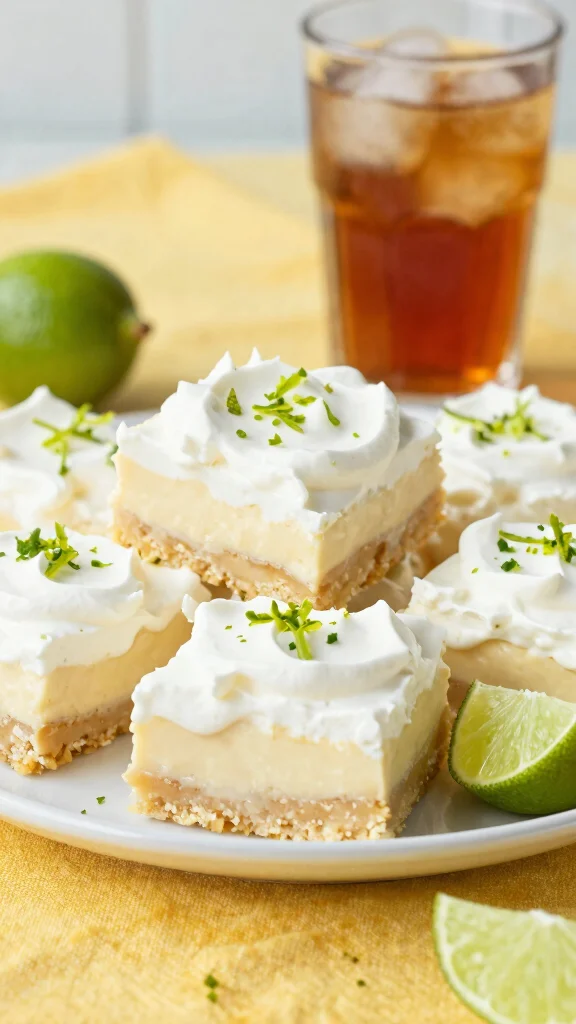
Want a refreshing dessert without turning on the oven? No-bake key lime pie bars are your answer! Perfect for hot summer days, these bars are quick and require minimal ingredients. They set beautifully in the fridge, providing a cool treat that everyone will love.
This version maintains the zesty flavor of the classic dessert while offering a lighter, more refreshing experience. It’s a great option when you’re short on time or want a simple yet impressive recipe!
Ingredients:
– 1 ½ cups graham cracker crumbs
– ½ cup unsalted butter, melted
– 1 can (14 ounces) sweetened condensed milk
– ½ cup fresh lime juice
– Zest of 1 lime
– 1 cup heavy whipping cream
– ¼ cup powdered sugar
Instructions:
1. Combine graham cracker crumbs and melted butter, then press firmly into the bottom of an 8×8-inch pan.
2. In a mixing bowl, whisk sweetened condensed milk, lime juice, and lime zest.
3. In another bowl, whip the cream and powdered sugar until soft peaks form.
4. Gently fold the whipped cream into the lime mixture until fully combined.
5. Pour the filling over the crust and smooth it out.
6. Cover and refrigerate for at least four hours before slicing.
These no-bake key lime pie bars are a fantastic way to enjoy a sweet treat without the fuss!
5. Vegan Key Lime Pie Bars for Dairy-Free Options
Craving a dessert that everyone can enjoy? Vegan key lime pie bars are a delicious option that even non-vegans will love! Using cashews or coconut cream, you can create a creamy filling that delivers the indulgent texture we all crave, while a nut-based crust keeps everything together.
These bars not only satisfy your sweet tooth, but they’re also guilt-free, making them perfect for health-conscious dessert lovers. Top with fresh fruit or coconut whipped cream for an extra special touch!
Ingredients:
– 1 ½ cups almond flour
– ½ cup pitted dates
– 1 can (14 ounces) coconut cream, chilled
– ½ cup fresh lime juice
– Zest of 2 limes
– 2 tablespoons maple syrup
Instructions:
1. In a food processor, blend almond flour and pitted dates until crumbly but combined.
2. Press the mixture into the base of an 8×8-inch dish.
3. In another bowl, mix coconut cream, lime juice, lime zest, and maple syrup until smooth.
4. Pour the filling over the crust and smooth it out evenly.
5. Refrigerate for at least four hours to set.
These vegan key lime pie bars are a flavorful treat that everyone can enjoy, making them perfect for any occasion!
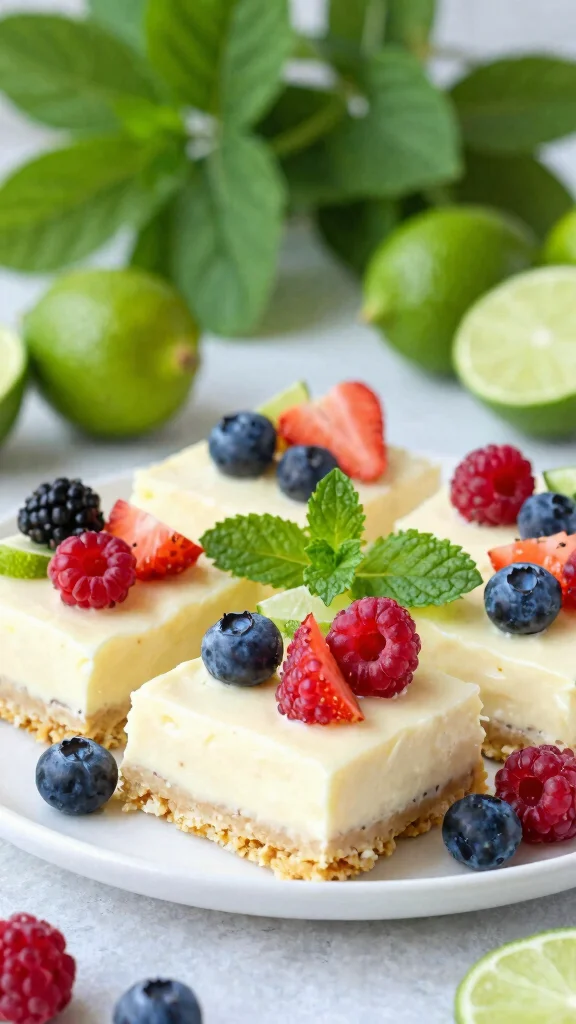
6. Flavor Variations: Berry Key Lime Pie Bars
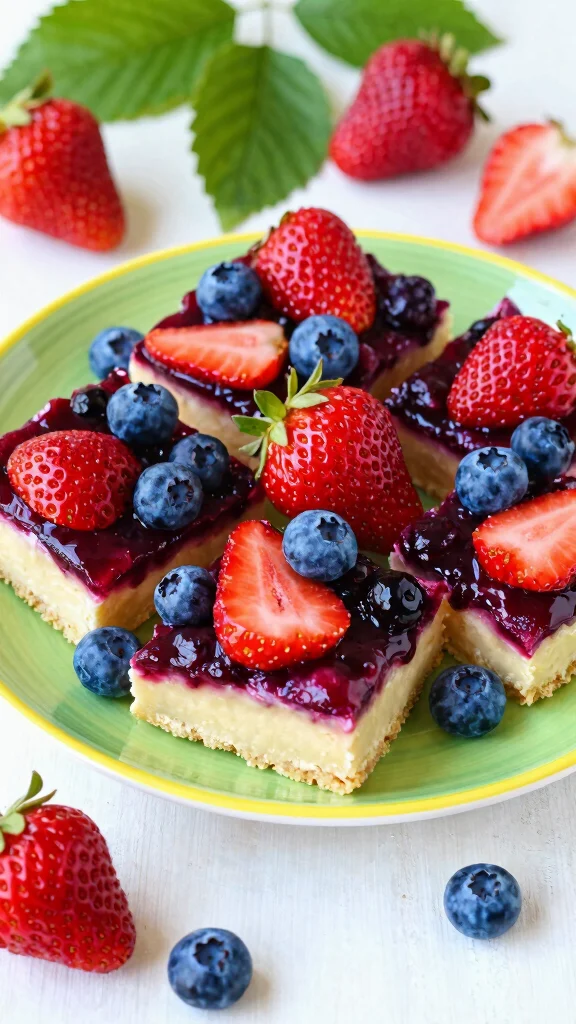
Looking to add a twist to your key lime pie bars? Try incorporating berries! The bright colors and flavors of strawberries, blueberries, or raspberries not only enhance the visual appeal but also add a delightful sweetness that beautifully balances the tangy lime.
Making berry key lime pie bars is simple—just fold fresh berries into the filling or layer them on top before serving. This not only looks stunning but also introduces a healthy element, making it a great way to use up fresh fruit!
Ingredients:
– 1 ½ cups graham cracker crumbs
– ½ cup sugar
– ½ cup unsalted butter, melted
– 1 can (14 ounces) sweetened condensed milk
– ½ cup fresh lime juice
– 1 cup mixed fresh berries (strawberries, blueberries, raspberries)
Instructions:
1. Preheat your oven to 350°F (175°C).
2. Mix graham cracker crumbs, sugar, and melted butter, then press into an 8×8-inch baking dish.
3. In a bowl, combine sweetened condensed milk, lime juice, and if desired, some of the berries, mixing until smooth.
4. Pour the filling over the crust and top with remaining berries.
5. Bake for 20 minutes, let cool, then refrigerate to set.
These berry key lime pie bars will not only impress your guests but also create a colorful and delicious dessert that’s sure to be a hit!
7. Tips for the Perfect Key Lime Pie Bars
Want to master the art of key lime pie bars? It’s all in the details! Always use fresh lime juice to achieve that authentic zesty flavor; bottled juice just doesn’t compare. Ensure your cream filling is smooth by mixing it well, and avoid overbaking your bars to keep them from becoming rubbery.
Let them cool completely before chilling to set the filling better. For even cooking, consider using a water bath while baking. Finally, slice them with a sharp knife for a beautiful presentation.
Additional Tips:
– Chill bars overnight for enhanced flavors.
– Top with fresh whipped cream and lime zest before serving for added flair.
– Keep them in an airtight container in the fridge to maintain freshness.
With these tips, you’ll elevate your key lime pie bars to a whole new level of deliciousness!
8. Common Mistakes to Avoid When Making Key Lime Pie Bars
Even seasoned bakers can run into trouble when making key lime pie bars. Avoiding common mistakes can be crucial for achieving that perfect creamy texture and flavor. One common pitfall is not letting the filling cool before refrigerating, which can result in a soggy crust! Be careful not to overmix your filling, as this can introduce too much air and alter the texture.
Also, ensure your ingredients are at room temperature—especially eggs and cream—so they blend smoothly. Remember, quality ingredients matter, so opt for fresh limes over pre-packaged products!
Avoid These Mistakes:
– Forgetting to pre-bake the crust can lead to a soggy bottom.
– Not paying attention to baking times can result in overcooked bars.
– Skipping the chilling step can compromise the texture and flavor.
By being mindful of these pitfalls, you’re one step closer to key lime bar success!
9. How to Properly Store Key Lime Pie Bars
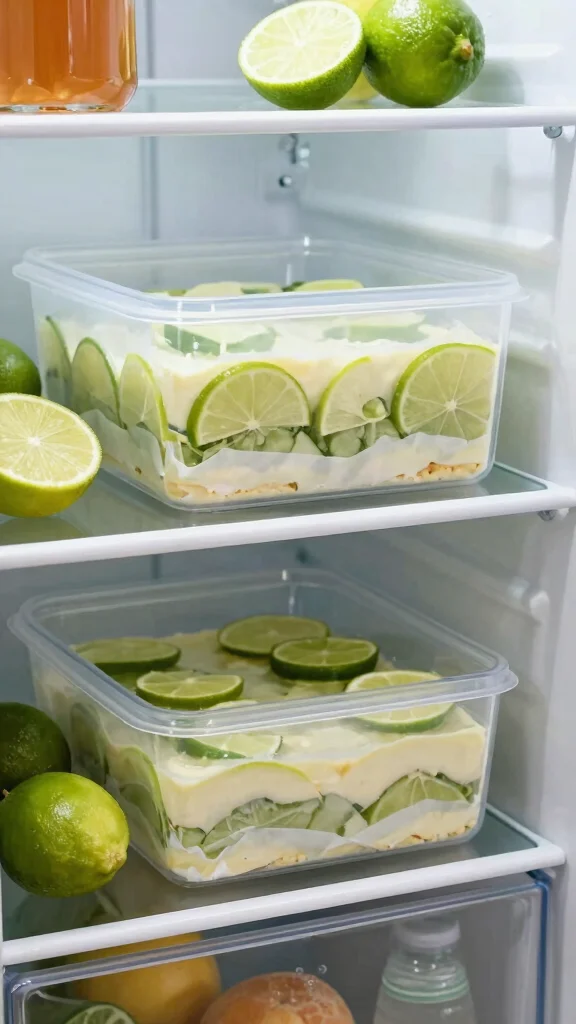
Want to keep your key lime pie bars fresh and delicious? Once cooled, slice them into neat squares and store them in an airtight container in the fridge. These bars can last up to a week, but they’re best enjoyed within the first few days. Alternatively, you can freeze them for longer storage—just wrap them tightly to avoid freezer burn.
When you’re ready to enjoy, simply thaw in the fridge overnight and rediscover their refreshing flavor! Here’s a quick guide for proper storage:
– Store in an airtight container to keep moisture out.
– Use parchment paper between layers to prevent sticking.
– Label your container with the date for freshness tracking.
Following these storage tips will allow you to savor your key lime pie bars over multiple days without compromising their delightful taste!
10. Creative Ways to Serve Key Lime Pie Bars
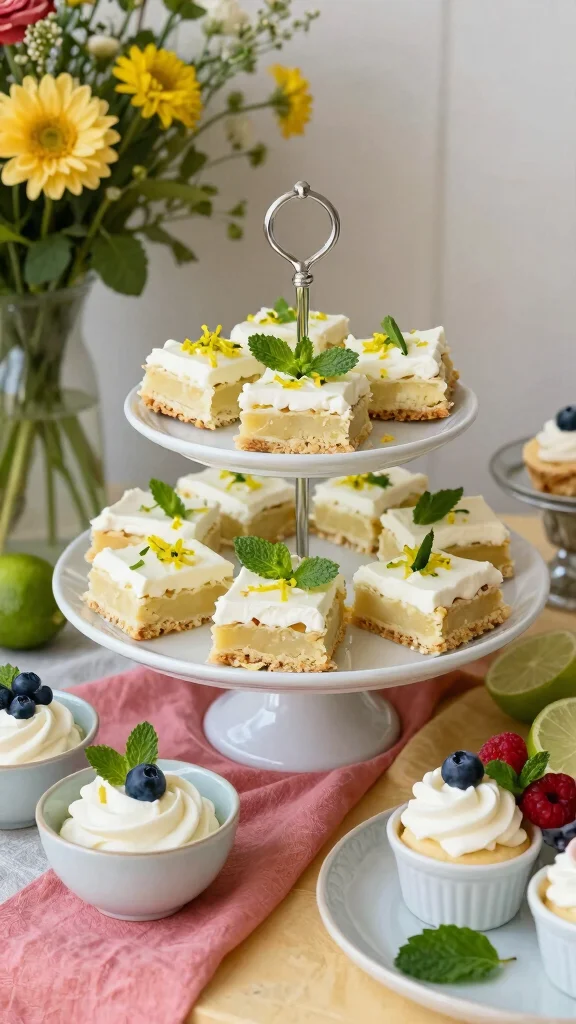
Want to elevate your key lime pie bars from simple to spectacular? Presentation is key! Serve them on a colorful platter lined with parchment paper, or stack them in a tiered dessert stand for a stunning effect. For added flair, drizzle coconut cream or a berry coulis on the plate.
Pairing them with fresh fruit salads or a scoop of lime sorbet creates a refreshing dessert experience. Don’t forget to garnish with mint leaves or extra lime zest for that finishing touch.
Serving Ideas:
– Serve with a side of whipped cream for an extra treat.
– Stack them high for a stunning presentation at parties.
– Consider a DIY dessert bar where guests can customize their toppings!
These creative serving ideas will make your key lime pie bars irresistibly appealing on any dessert table!
Conclusion
Key lime pie bars are the epitome of a perfect dessert: easy to make, easy to serve, and oh-so-delicious! Whether you choose the classic version or experiment with fun variations, these bars are sure to dazzle your guests. Their vibrant flavor and refreshing taste make them a must-have for any occasion. Don’t forget to share your creations and enjoy the delightful responses from your friends and family. Happy baking!
Frequently Asked Questions
What makes key lime pie bars a great make-ahead dessert for hosting?
Key lime pie bars are ideal for hosting because you can bake ahead, chill, and serve without fuss.
Make-ahead steps: bake the crust, let it cool completely; whisk the filling, pour it over the crust, and bake until just set.
Storage and serving: keep the bars in an airtight container in the fridge for up to 4 days, or freeze for longer. When ready to serve, cut into neat squares for your dessert table and top with whipped cream and a little zest.
These bars travel well and look stunning on any dessert table, making key lime pie bars a crowd-pleaser.
How can I customize key lime pie bars for a crowd (flavors, toppings, and size)?
You can tailor key lime pie bars to match your theme and crowd.
Crust options: graham cracker, digestive biscuit, or a crushed cookie blend.
Fillings and toppings: mix in coconut, mango swirls, or a berry ripple; for toppings, try whipped cream, extra lime zest, toasted coconut, or crushed cookies.
Sizes: cut into mini squares for a dessert-table sampler or into larger bars for an easier slice.
Practical tip: label each variation to help guests choose and keep your dessert table looking organized.
Can I freeze key lime pie bars, and how do I thaw them for a party?
Absolutely — key lime pie bars freeze well for make-ahead hosting.
Freeze instructions: wrap individual bars or freeze in a single layer in an airtight container with parchment between layers. Freeze up to 2–3 months.
Thawing: move to the fridge overnight or set on the counter for 30–60 minutes before serving. If the crust looks a bit soft after thawing, chill again and add a decorative dollop of whipped cream right before guests arrive.
What ratios and tips help the key lime pie bars set perfectly every time?
For a smooth, sliceable filling, start with softened cream cheese, then blend with a sweetened condensed milk until silky.
Tips: add fresh lime juice and zest to taste, but avoid overmixing to keep the texture light and creamy. Bake just until the center is set, then cool completely and chill for several hours.
Crust: press firmly into the pan and bake until golden.
Outcome: you’ll get key lime pie bars that hold their shape on a dessert table and deliver the bright, tart finish guests love.
What are the best ways to transport and display key lime pie bars on a dessert table?
Transport with confidence by keeping key lime pie bars in the pan with a tight lid or transferring to a sturdy tray.
Display tips: line the tray with parchment for easy removal, cut bars into uniform squares, and garnish with whipped cream and lime zest just before serving.
Practical setup: label flavors if you have variations, keep them chilled until time to display, and arrange them with some height and color to catch eyes at the dessert table. These bars are one of the easiest and most crowd-pleasing fun treats for entertaining.