This time of year always reminds me of the cozy nights spent in the kitchen, whisking up something sweet. The aroma of freshly baked desserts fills the air, and I find myself daydreaming about elegant treats that look like they came straight from a bakery. But let’s be real—who has the time for complicated recipes when all you want is a quick fix for that sweet tooth? If you’re someone who craves delightful desserts without the fuss, this one’s for you.
I’ve put together a collection of 19 easy dessert recipes that will impress your friends and family, all while keeping your stress levels low. These recipes are perfect for anyone who loves to bake but might shy away from intricate techniques. Whether you have a dinner party to prepare for or just want to treat yourself after a long day, these desserts will bring that special touch to your table.
You’ll discover that these recipes only look complicated. From tempting tarts to luscious puddings, each dessert is designed to be simple yet stunning. Imagine serving a beautiful chocolate mousse that took less than thirty minutes to whip up. Why not wow your guests with a layered cake that appears far more difficult than it really is?
By the end of this post, you’ll feel empowered to tackle these treats with ease. You won’t just get a list of recipes; you’ll gain confidence in your baking skills. Plus, you’ll learn how to turn everyday ingredients into extraordinary desserts. So grab your apron, and let’s dive into a world of sweet satisfaction that looks as good as it tastes!
Contents
- 1. Chocolate Mousse Cups
- 2. No-Bake Strawberry Cheesecake
- 3. Lemon Panna Cotta
- 4. Mini Fruit Tarts
- 5. Chocolate Lava Cake
- 6. Tiramisu in a Cup
- 7. Raspberry Sorbet
- 8. Coconut Macaroons
- 9. Almond Joy Bars
- 10. Berry Pavlova
- 11. Peanut Butter Pie
- 12. Churros with Chocolate Sauce
- 13. S’mores Dip
- 14. Chocolate-Dipped Pretzels
- 15. Ice Cream Sandwiches
- 16. Pumpkin Spice Cheesecake Bars
- 17. Apple Crisp
- 18. Brownie Sundae
- 19. Mocha Cupcakes
1. Chocolate Mousse Cups
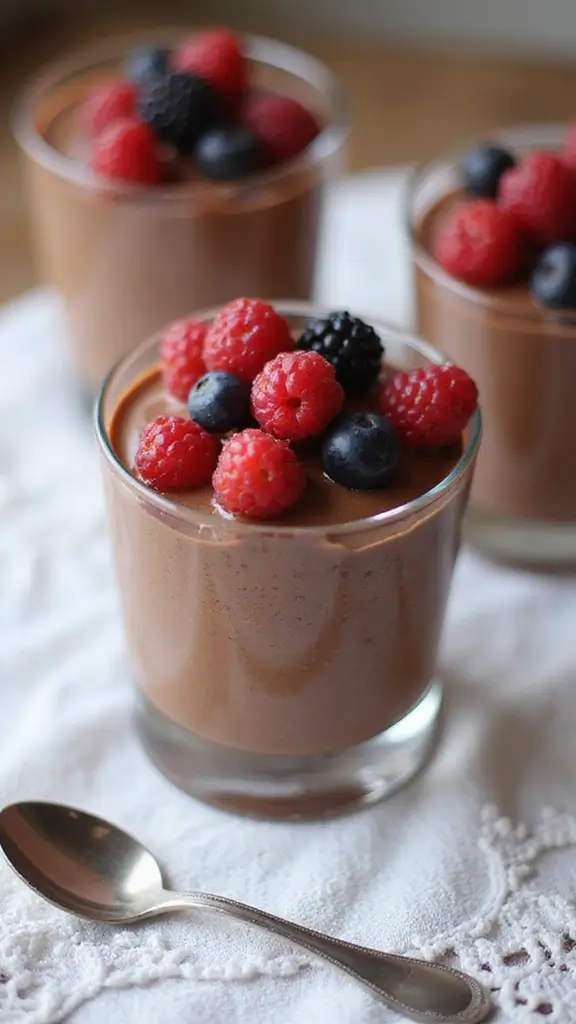
Indulge in the light and creamy delight of chocolate mousse cups. These elegant desserts might look fancy, but they are surprisingly simple to whip up. With just a handful of ingredients, you can create a treat that dazzles your guests and satisfies your sweet tooth. Picture these rich, chocolatey cups topped with fresh berries or a dollop of whipped cream. It’s a dessert that’s perfect for any gathering, from birthdays to casual dinners.
Ready to make your own? Here’s how to do it! Start with high-quality chocolate to really make those flavors pop. Remember to keep your mixing bowls clean and dry when whipping egg whites, as this will help them achieve their maximum volume.
Recipe Overview:
– Servings: 4
– Prep Time: 15 minutes
– Cook Time: 0 minutes
– Total Time: 15 minutes
– Calories: Approximately 250 per serving
Ingredients:
– 1 cup heavy cream
– 1/2 cup semi-sweet chocolate chips
– 2 large egg whites
– 1/4 cup powdered sugar
– 1 teaspoon vanilla extract
Instructions:
1. Melt the chocolate chips in the microwave or a double boiler until smooth. Let it cool slightly.
2. In a mixing bowl, whip the heavy cream until soft peaks form.
3. In another bowl, beat the egg whites until stiff peaks form, then slowly add the powdered sugar.
4. Gently fold the melted chocolate into the whipped cream, then carefully mix in the egg whites.
5. Spoon the mousse into cups and refrigerate for at least 2 hours before serving.
Tips for the Best Mousse:
– Use high-quality chocolate for better flavor.
– Make sure your bowls are clean and dry when whipping egg whites.
Frequently Asked Questions:
– Can I make this ahead of time? Yes! You can prepare it a day early and keep it in the fridge.
– Can I use milk chocolate? Sure! Just reduce the sugar since milk chocolate is sweeter than semi-sweet.
Enjoy this easy yet impressive dessert that brings joy to every table!
2. No-Bake Strawberry Cheesecake

Indulge in the ultimate summer delight with this no-bake strawberry cheesecake! It combines a creamy filling with a crunchy crust, offering a refreshing dessert that’s simple to make. Perfect for warm days and gatherings, this cheesecake looks impressive but requires no baking skills. Just mix, chill, and serve!
The bright red strawberries on top not only enhance the visual appeal but also add a delicious sweet-tart flavor, balancing the richness of the cheesecake. You’ll be proud to serve this showstopper at any event.
Recipe Overview:
– Servings: 8
– Prep Time: 20 minutes
– Cook Time: 0 minutes
– Total Time: 2 hours chilling time
– Calories: Approximately 300 per slice
Ingredients List:
– 1 1/2 cups graham cracker crumbs
– 1/2 cup butter, melted
– 2 cups cream cheese, softened
– 1 cup powdered sugar
– 1 teaspoon vanilla extract
– 2 cups fresh strawberries, sliced
– 1 cup whipped cream (for topping)
Step-by-Step Instructions:
1. In a bowl, mix graham cracker crumbs and melted butter until combined.
2. Press this mixture into the bottom of a springform pan to form your crust.
3. In another bowl, beat cream cheese, powdered sugar, and vanilla until smooth.
4. Gently fold in the whipped cream, then pour the mixture into the crust.
5. Top with sliced strawberries and refrigerate for at least 2 hours, or until set.
Tips for Making the Best Cheesecake:
– Use room temperature cream cheese for a creamier texture.
– Chill overnight for the best flavor and texture.
Frequently Asked Questions:
– Can I use frozen strawberries? Yes! Just thaw and drain them before using.
– Can I make this gluten-free? Substitute graham crackers with gluten-free cookies.
This no-bake strawberry cheesecake is not just delicious; it’s the perfect dessert to impress your friends without the fuss! Enjoy every creamy bite.
3. Lemon Panna Cotta
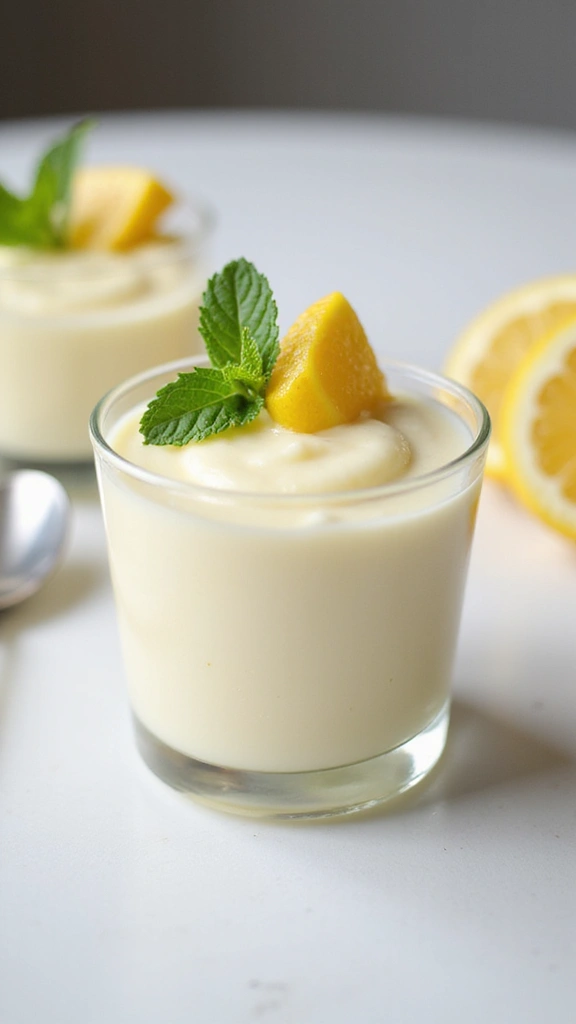
Lemon panna cotta is the ultimate light dessert that delights your taste buds and looks stunning on any table. This Italian treat has a creamy texture and a bright lemon flavor that refreshes after a heavy meal. You might think it’s complicated, but it’s surprisingly simple to make. The zesty lemon zest and juice elevate every bite, making it a perfect way to impress your guests.
Serve it in elegant cups and top it with fresh mint or colorful berries for a beautiful finish. Your friends will be asking how you created such a gourmet dessert!
Recipe Overview:
– Servings: 6
– Prep Time: 15 minutes
– Cook Time: 5 minutes
– Total Time: 4 hours chilling time
– Calories: Approximately 150 per serving
Nutrition Information:
– Protein: 3g
– Carbohydrates: 14g
– Fat: 10g
– Sugar: 8g
Ingredients List:
– 2 cups heavy cream
– 1/2 cup sugar
– 1 tablespoon gelatin
– 1/4 cup cold water
– 1 tablespoon lemon zest
– 1/4 cup lemon juice
– Fresh mint for garnish
Step-by-Step Instructions:
1. In a small bowl, sprinkle the gelatin over the cold water. Let it sit for about 5 minutes.
2. In a saucepan, heat the heavy cream and sugar until the sugar dissolves and the mixture is just below boiling.
3. Remove the saucepan from heat. Add the gelatin mixture, lemon zest, and lemon juice. Stir until everything is well combined.
4. Pour the mixture into individual cups and refrigerate for at least 4 hours to set.
5. Serve chilled and garnish with mint leaves.
Tips for the Best Panna Cotta:
– Keep the cream from boiling to maintain a smooth texture.
– For a richer flavor, chill overnight for the best consistency.
Frequently Asked Questions:
– Can I use other flavors? Yes! You can swap lemon for any citrus or fruit puree.
– How do I unmold panna cotta? Simply run a knife around the edge and dip the bottom of the cup in warm water for a few seconds.
Enjoy making this delightful dessert that’s sure to impress everyone at your table!
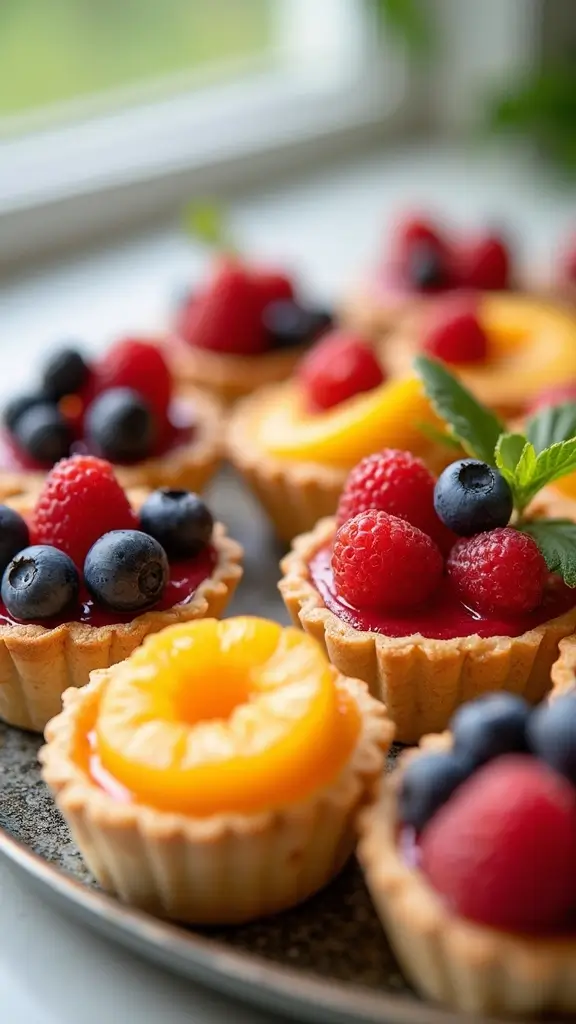
4. Mini Fruit Tarts

Mini fruit tarts are a show-stopping dessert that are as fun to make as they are to eat. With their crisp, buttery shells and luscious vanilla custard, each tart becomes a canvas for your favorite fruits. Picture vibrant strawberries, sweet blueberries, and tangy kiwi layered on top, creating a colorful feast for the eyes and the palate. These delightful treats are perfect for parties or a family gathering, and they allow you to showcase seasonal fruits beautifully.
To make these tarts, you don’t need to be a pastry chef. Grab pre-made tart shells from the store and let your creativity shine. Spend a little time assembling them, and you’ll have a stunning dessert that won’t break the bank. Plus, they’re simple enough for kids to help with, making it a fun family activity. You can prepare the shells and custard in advance, adding the fresh fruit right before serving to keep everything fresh and delicious.
Recipe Overview:
– Servings: 12
– Prep Time: 30 minutes
– Cook Time: 20 minutes
– Total Time: 50 minutes
– Calories: Approximately 200 per tart
Nutrition Information:
– Protein: 3g
– Carbohydrates: 25g
– Fat: 10g
– Sugar: 12g
Ingredients:
– 1 package of pre-made tart shells
– 1 cup vanilla pudding or custard
– 2 cups assorted fresh fruits (like strawberries, kiwi, blueberries)
– 1/4 cup apricot jam (for glazing)
Instructions:
1. Pre-bake the tart shells according to the package instructions and let them cool completely.
2. Spoon a generous amount of vanilla custard into each tart shell, filling them evenly.
3. Artfully arrange your fresh fruits on top of the custard, mixing colors and shapes for a beautiful display.
4. Warm the apricot jam slightly in the microwave, then brush it over the fruit for a shiny finish.
5. Chill the tarts in the refrigerator for at least 30 minutes before serving to let the flavors meld.
Tips for Perfect Tarts:
– Choose ripe, seasonal fruits for the best taste.
– Apply the apricot glaze just before serving to keep the fruit looking fresh.
Frequently Asked Questions:
– Can I make these tarts ahead of time? Yes, but add the fruit right before serving for maximum freshness.
– Is store-bought custard okay? Definitely! It’s a great time-saver without losing flavor.
5. Chocolate Lava Cake
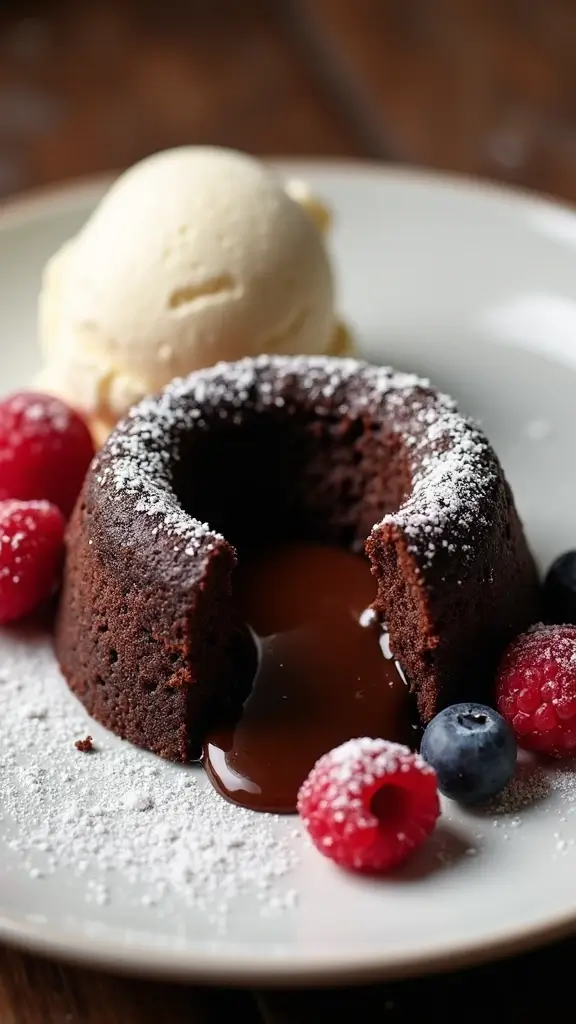
Indulge in the rich delight of a Chocolate Lava Cake! This dessert looks fancy but is surprisingly easy to make. With its outer layer of rich chocolate and a warm, gooey center, it’s a chocolate lover’s dream come true. When you slice into it, the molten chocolate flows out, creating a moment that feels truly special. Pair it with vanilla ice cream, and you’ll have a treat that impresses everyone at your table.
Recipe Overview:
– Servings: 4
– Prep Time: 15 minutes
– Cook Time: 12 minutes
– Total Time: 27 minutes
– Calories: About 400 per serving
Nutrition Information:
– Protein: 8g
– Carbohydrates: 45g
– Fat: 24g
– Sugar: 28g
Ingredients List:
– 1/2 cup unsalted butter
– 1 cup semi-sweet chocolate chips
– 2 large eggs
– 2 large egg yolks
– 1/2 cup powdered sugar
– 1/4 cup all-purpose flour
Step-by-Step Instructions:
1. Preheat your oven to 425°F (220°C) and grease four ramekins.
2. Melt the butter and chocolate chips together in a microwave-safe bowl, stirring until smooth.
3. In a separate bowl, whisk the eggs, egg yolks, and powdered sugar until thick.
4. Gently fold the melted chocolate mixture and flour in until just combined.
5. Pour the batter into the ramekins and bake for about 12 minutes. The edges should be firm while the center remains soft.
6. Let them cool for a minute, then invert onto plates. Serve warm, topped with ice cream.
Tips for Perfect Lava Cakes:
– Don’t overbake; the center must stay runny!
– Serve immediately for the best molten experience.
Frequently Asked Questions:
– Can I make these ahead of time? Yes! Prepare the batter and refrigerate it before baking.
– Can I use dark chocolate? Absolutely! Just adjust the sweetness to your liking.
Enjoy this easy Chocolate Lava Cake at your next gathering or cozy night in. You’ll impress your friends and family with your baking skills while satisfying your chocolate cravings!
6. Tiramisu in a Cup
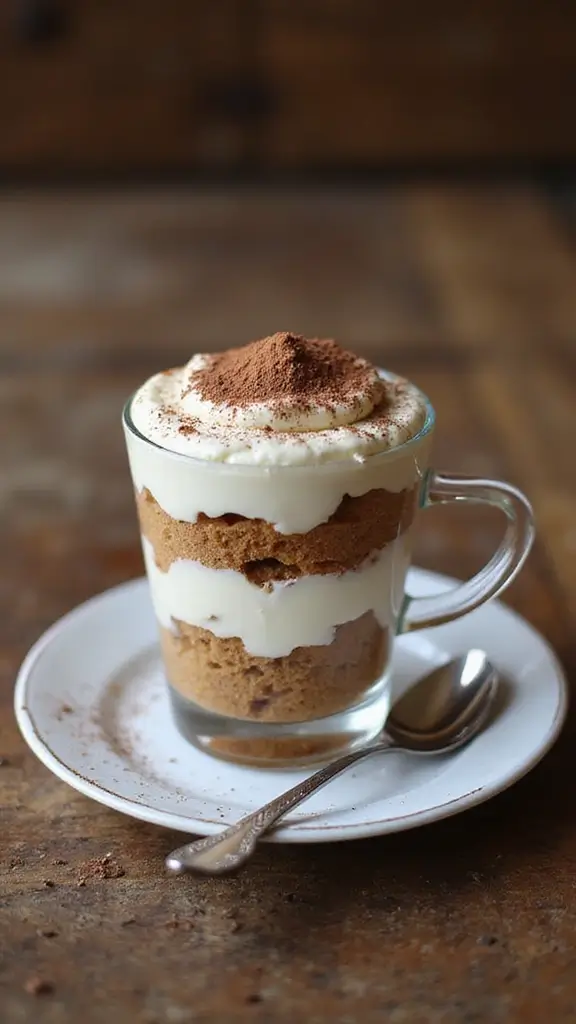
Imagine serving a dessert that wows your guests with its elegance while being incredibly easy to prepare. Tiramisu in a cup is that dessert! This delightful Italian treat layers coffee-soaked ladyfingers with creamy mascarpone, creating a flavor explosion that coffee lovers crave. Each spoonful feels like a taste of luxury, making it a perfect choice for gatherings or a cozy night in.
To elevate your presentation, sprinkle cocoa powder or add chocolate shavings on top. This simple touch makes your dessert look professional and inviting.
Here’s what you need to create this indulgent treat:
Recipe Overview:
– Servings: 6
– Prep Time: 20 minutes
– Chill Time: 4 hours
– Calories: About 250 per serving
Nutrition Information:
– Protein: 5g
– Carbs: 20g
– Fat: 15g
– Sugar: 12g
Ingredients:
– 1 cup brewed coffee, cooled
– 2 cups mascarpone cheese
– 1/2 cup sugar
– 1 cup heavy cream
– 1/2 cup ladyfinger cookies
– Cocoa powder for dusting
Instructions:
1. Beat the mascarpone cheese and sugar in a bowl until smooth.
2. In another bowl, whip the heavy cream until soft peaks form. Fold this into the mascarpone mixture.
3. Quickly dip ladyfingers in the cooled coffee and layer them in cups.
4. Spoon the mascarpone mixture over the ladyfingers. Repeat layers until the cups are full.
5. Refrigerate for at least 4 hours or overnight. Before serving, dust with cocoa powder.
Tips for a Perfect Tiramisu:
– Use strong coffee for a more intense flavor.
– Chill longer for the best taste and texture.
Common Questions:
– Can I substitute espresso for brewed coffee? Yes, espresso works great!
– How long can I keep it in the fridge? It lasts up to 2 days.
Now you’re ready to impress with this easy yet sophisticated dessert. Enjoy the compliments that follow!
7. Raspberry Sorbet
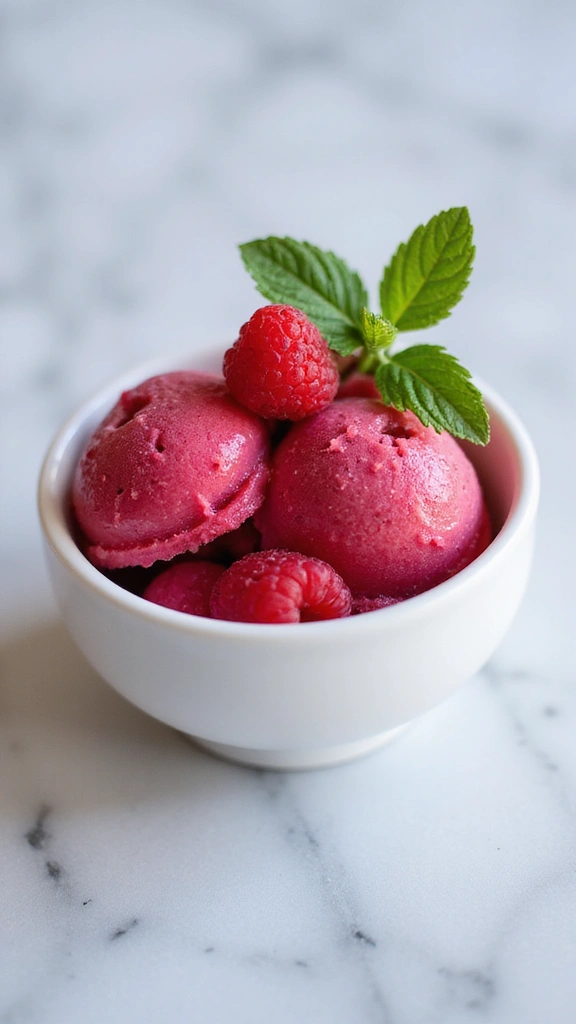
Indulge in a sweet escape with homemade raspberry sorbet! This delightful frozen treat captures the essence of summer with its refreshing flavor and vibrant color. With just three simple ingredients, you can create a crowd-pleaser that looks fancy but is incredibly easy to prepare. Imagine serving this stunning sorbet in chilled bowls, topped with fresh mint — it’s like a gourmet dessert right at your table!
Ready to make your own raspberry sorbet? Let’s break it down into easy steps. You’ll need fresh raspberries, sugar, and water. This recipe is not only tasty but also low in calories, making it a perfect guilt-free dessert for hot days. Plus, the best part? No ice cream maker is needed!
Recipe Overview:
– Servings: 4
– Prep Time: 10 minutes
– Freeze Time: 4 hours
– Calories: About 100 per serving
Ingredients List:
– 2 cups fresh raspberries
– 1/2 cup sugar
– 1 cup water
Step-by-Step Instructions:
1. In a saucepan, mix the sugar and water over medium heat. Stir until the sugar dissolves to make a simple syrup.
2. Pour the raspberries and syrup into a blender. Blend until smooth and creamy.
3. Transfer the mixture to a container and freeze for about 4 hours, stirring every hour for a softer texture.
4. Scoop the sorbet into bowls and garnish with mint leaves before serving to impress your guests!
Tips for the Best Sorbet:
– Use frozen raspberries for an even quicker treat!
– Add a splash of lemon juice to enhance the flavor.
Frequently Asked Questions:
– Can I use other fruits? Yes! Feel free to experiment with strawberries, mangoes, or peaches.
– Do I need an ice cream maker? Nope! This simple recipe doesn’t require any special equipment.
Now, you’re ready to treat yourself and others to a delicious, refreshing raspberry sorbet. Enjoy the compliments that come your way!
8. Coconut Macaroons
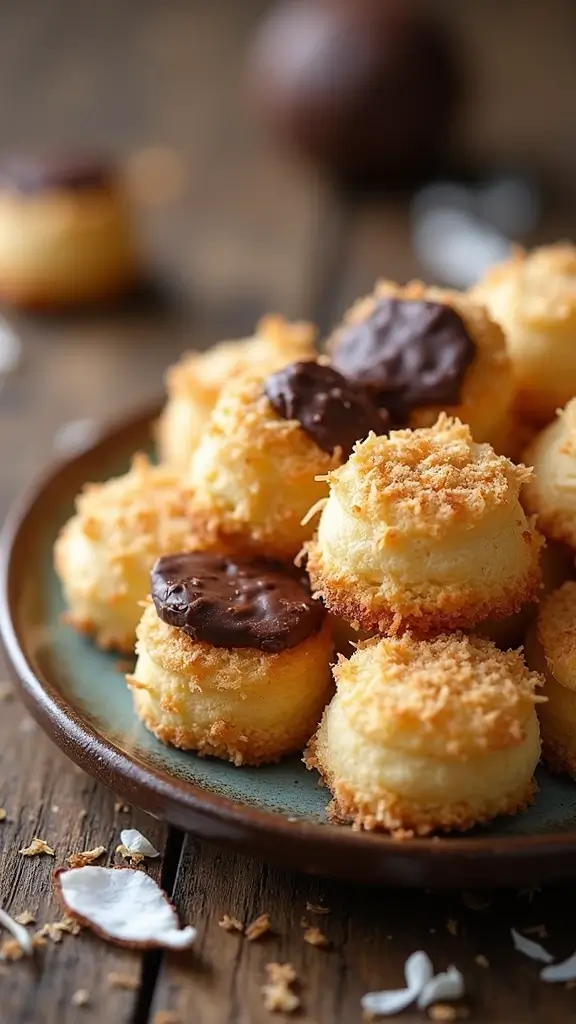
Coconut macaroons are a sweet escape for any coconut lover. These chewy treats are packed with delicious coconut flavor and are surprisingly simple to make. With just a few ingredients, you can whip up this delightful dessert in no time, perfect for when you need something quick and impressive.
Imagine biting into a macaroon with a crisp outside and a soft, chewy center. You can even dip them in chocolate for an extra treat that feels fancy. Plus, they’re naturally gluten-free, making them a hit for friends with dietary preferences.
Here’s how to make your own coconut macaroons:
Ingredients:
– 2 1/2 cups shredded coconut
– 2/3 cup sweetened condensed milk
– 1 teaspoon vanilla extract
– 2 egg whites
– 1/4 teaspoon salt
Instructions:
1. Preheat your oven to 325°F (160°C) and line a baking sheet with parchment paper.
2. In a bowl, combine shredded coconut, sweetened condensed milk, vanilla extract, and salt.
3. In another bowl, whisk the egg whites until soft peaks form. Gently fold them into the coconut mixture.
4. Drop spoonfuls of the mixture onto the baking sheet.
5. Bake for about 25 minutes, or until they turn golden brown. Let them cool on a wire rack.
Tips for Perfect Macaroons:
– Toast the coconut lightly before mixing to enhance the flavor.
– Use a cookie scoop for even-sized treats.
FAQ:
– Can I dip them in chocolate? Yes! Melted chocolate makes them even more delightful.
– How do I store leftovers? Place them in an airtight container at room temperature for a few days.
With these steps, you’ll have a delicious batch of coconut macaroons that impress everyone! Enjoy your baking adventure!
9. Almond Joy Bars
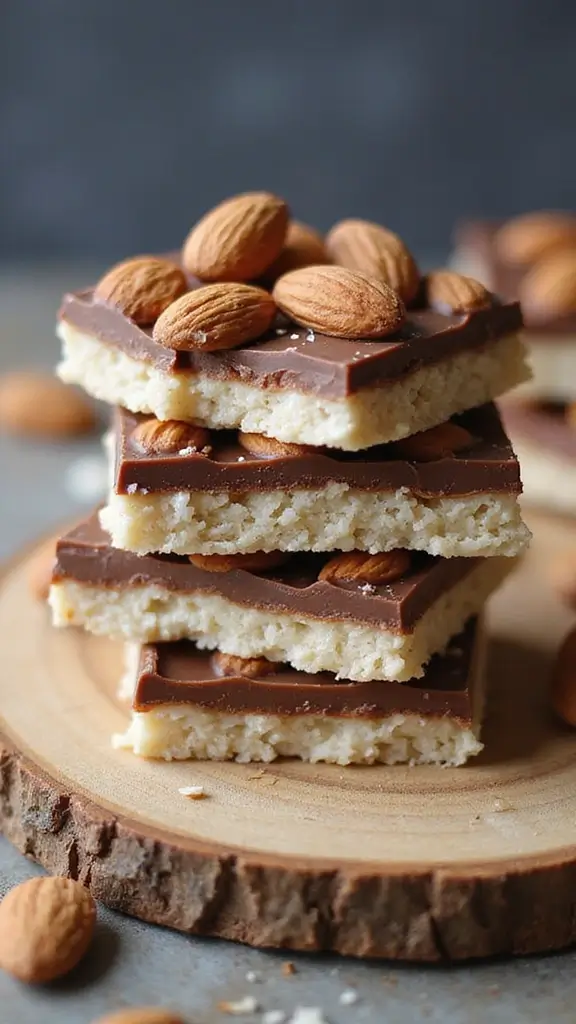
Indulge in the delightful taste of homemade Almond Joy Bars! If you adore the rich combination of coconut and chocolate, these treats are perfect for you. They mimic the beloved candy bar, layering sweet coconut and crunchy almonds, all coated in creamy chocolate. The best part? They appear fancy but are simple to whip up in no time. Whether you’re hosting a party or just treating yourself, these bars will impress everyone!
Recipe Overview:
– Servings: 12
– Prep Time: 20 minutes
– Cook Time: 10 minutes
– Total Time: 30 minutes
– Calories: Approximately 250 per bar
Nutrition Information:
– Protein: 4g
– Carbohydrates: 30g
– Fat: 15g
– Sugar: 10g
Ingredients List:
– 1 1/2 cups shredded coconut
– 1/2 cup sweetened condensed milk
– 1/4 teaspoon almond extract
– 1 cup chocolate chips
– 12 whole almonds
Step-by-Step Instructions:
1. In a bowl, mix the shredded coconut, sweetened condensed milk, and almond extract until blended well.
2. Press this mixture evenly into a lined square baking dish.
3. Freeze it for 30 minutes until firm.
4. Melt the chocolate chips in the microwave and pour over the coconut layer.
5. Top each square with an almond and refrigerate until the chocolate hardens. Cut into bars and serve.
Tips for the Best Bars:
– Use high-quality chocolate for a richer flavor.
– Allow the bars to chill completely before slicing for neat edges.
Frequently Asked Questions:
– Can I use different nuts? Yes! Feel free to try your favorite nuts.
– How long do they last? Keep them in an airtight container for up to a week.
Enjoy these delicious Almond Joy Bars! They’re sure to become a favorite in your home.
10. Berry Pavlova
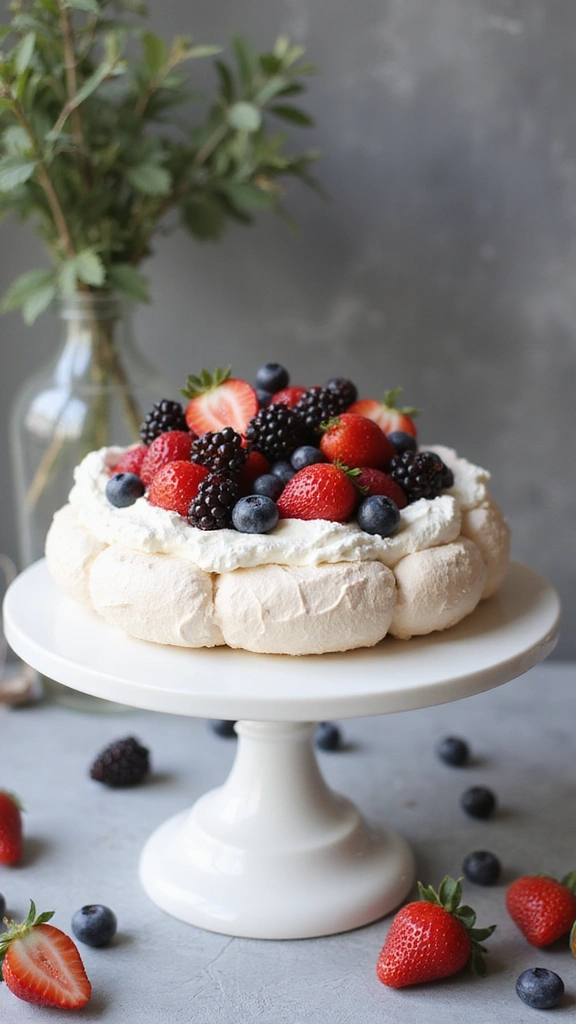
If you want to impress your friends without spending all day in the kitchen, a Berry Pavlova is the perfect choice. This light and airy dessert features a crisp meringue shell topped with fluffy whipped cream and fresh berries. Its beautiful presentation makes it a showstopper at any gathering, especially during summer parties.
The best part? It’s easier to make than it looks! With a crunchy outer layer and a soft, chewy center, each bite is a delightful experience. Just remember to let the meringue cool in the oven for that perfect texture.
Recipe Overview:
– Servings: 8
– Prep Time: 20 minutes
– Cook Time: 1 hour
– Total Time: 1 hour 20 minutes
– Calories: About 180 per slice
Nutrition Information:
– Protein: 2g
– Carbohydrates: 20g
– Fat: 10g
– Sugar: 14g
Ingredients:
– 4 large egg whites
– 1 cup granulated sugar
– 1 teaspoon vanilla extract
– 1 teaspoon vinegar
– 1 cup heavy whipping cream
– 2 cups mixed berries (strawberries, blueberries, raspberries)
Instructions:
1. Preheat your oven to 250°F (120°C) and line a baking sheet with parchment paper.
2. In a mixing bowl, beat egg whites until soft peaks form.
3. Gradually add sugar, continuing to beat until stiff peaks form.
4. Gently fold in the vanilla and vinegar.
5. Spoon the meringue onto the baking sheet into a round shape, making a slight dip in the center.
6. Bake for 1 hour, then turn off the oven and let the meringue cool inside for another hour.
7. Just before serving, top with whipped cream and sprinkle on the mixed berries.
Tips for Perfect Pavlova:
– Use room temperature egg whites for better volume.
– Avoid opening the oven door while baking to prevent cracks.
– Make the meringue a day in advance and add toppings right before serving for the best results.
– Don’t worry about cracks! Just cover them with cream and berries for a beautiful finish.
This Berry Pavlova is not just dessert; it’s a delightful experience that will make you feel like a chef. Enjoy the compliments!
11. Peanut Butter Pie
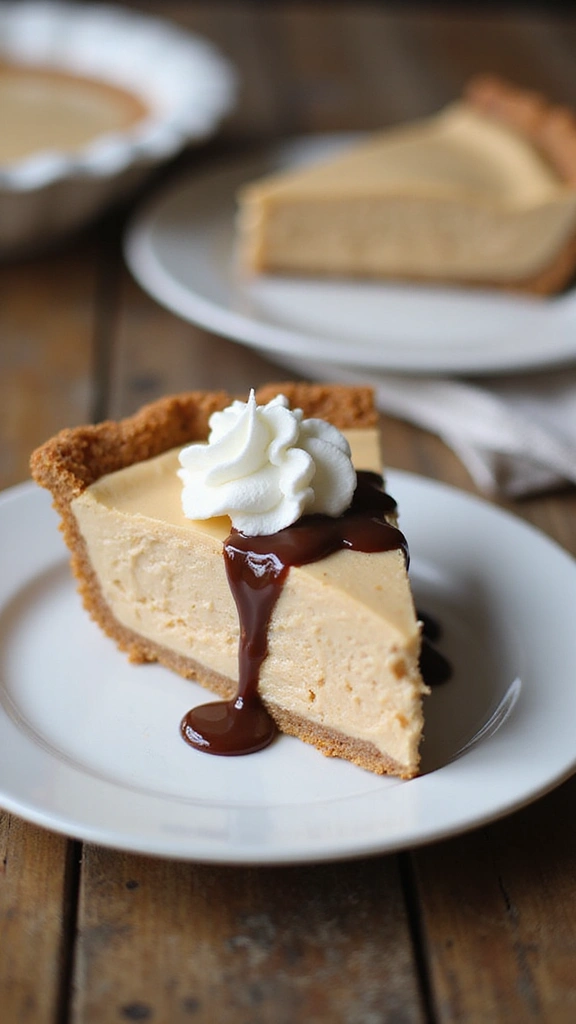
Indulge in the creamy goodness of a Peanut Butter Pie that looks fancy but is super easy to whip up! This no-bake treat brings together a crunchy graham cracker crust and a smooth peanut butter filling. It’s rich, satisfying, and sure to impress your friends and family at any gathering.
Imagine cutting into a slice topped with fluffy whipped cream and a drizzle of chocolate. It’s a dessert that will make peanut butter lovers swoon! Best of all, you can make it in just 15 minutes.
Recipe Overview:
– Servings: 8
– Prep Time: 15 minutes
– Cook Time: 0 minutes
– Total Time: 15 minutes
– Calories: Approximately 350 per slice
Nutrition Information:
– Protein: 6g
– Carbohydrates: 30g
– Fat: 25g
– Sugar: 12g
Ingredients List:
– 1 1/2 cups graham cracker crumbs
– 1/2 cup unsalted butter, melted
– 1 cup creamy peanut butter
– 8 oz cream cheese, softened
– 1 cup powdered sugar
– 1 cup whipped cream (for topping)
Step-by-Step Instructions:
1. In a bowl, mix graham cracker crumbs with melted butter until combined.
2. Press this mixture into a pie dish to form the crust.
3. In another bowl, beat together peanut butter, cream cheese, and powdered sugar until smooth.
4. Gently fold in the whipped cream and pour the filling into the crust.
5. Chill in the refrigerator for at least 4 hours before serving.
Tips for the Best Peanut Butter Pie:
– Choose a high-quality peanut butter for the best flavor.
– Let it chill overnight for firmer, easier slices.
Frequently Asked Questions:
– Can I freeze this pie? Yes, it freezes well for about 1 month.
– Can I use crunchy peanut butter? Absolutely! It adds a fun texture.
This Peanut Butter Pie is a perfect dessert for any occasion. Treat yourself or surprise your guests with this deliciously simple recipe!
12. Churros with Chocolate Sauce
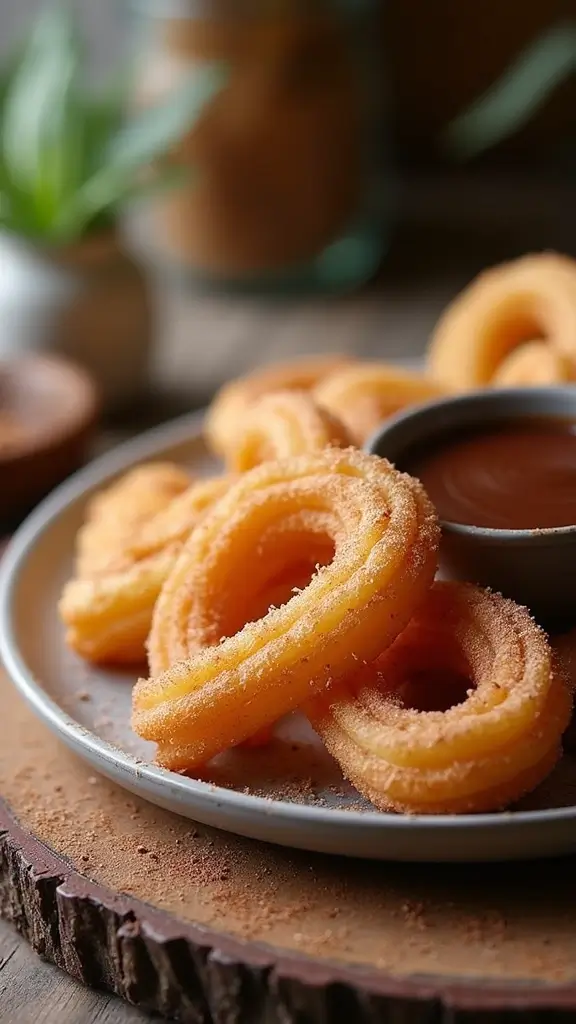
Indulge in the delightful experience of homemade churros, where crispy exteriors meet soft, warm interiors. Coated in sweet cinnamon sugar and served alongside a rich, velvety chocolate sauce, these treats will steal the spotlight at any gathering. You might think making churros is challenging, but with this simple recipe, you’ll impress your friends and family in no time!
The contrast of warm churros and cool chocolate sauce creates a mouthwatering treat that’s hard to resist. Perfect for dipping, these pastries are a guaranteed hit at parties, family gatherings, or just a cozy night in.
Recipe Overview:
– Servings: 12
– Prep Time: 20 minutes
– Cook Time: 15 minutes
– Total Time: 35 minutes
– Calories: Approximately 220 per churro
Nutrition Information:
– Protein: 3g
– Carbohydrates: 30g
– Fat: 10g
– Sugar: 8g
Ingredients List:
– 1 cup water
– 1/2 cup unsalted butter
– 1 tablespoon sugar
– 1 cup all-purpose flour
– 2 large eggs
– 1 teaspoon vanilla extract
– Cinnamon sugar (for coating)
– 1 cup chocolate chips (for sauce)
Step-by-Step Instructions:
1. In a saucepan, bring the water, butter, and sugar to a boil.
2. Remove from heat, then stir in the flour until it forms a ball.
3. Let it cool slightly, then mix in the eggs and vanilla until smooth.
4. Pipe the dough into hot oil and fry until golden brown.
5. Roll the churros in cinnamon sugar and serve with melted chocolate sauce.
Tips for the Best Churros:
– Don’t overcrowd the frying pan; fry in batches for even cooking.
– Serve immediately for the best texture and flavor.
Frequently Asked Questions:
– Can I use a churro maker? Yes! It can make the process easier.
– How do I store leftovers? Keep them in an airtight container, but they taste best when fresh.
Get ready to enjoy these delicious churros that look fancy but are surprisingly easy to make! Treat yourself and your loved ones to this irresistible dessert.
13. S’mores Dip
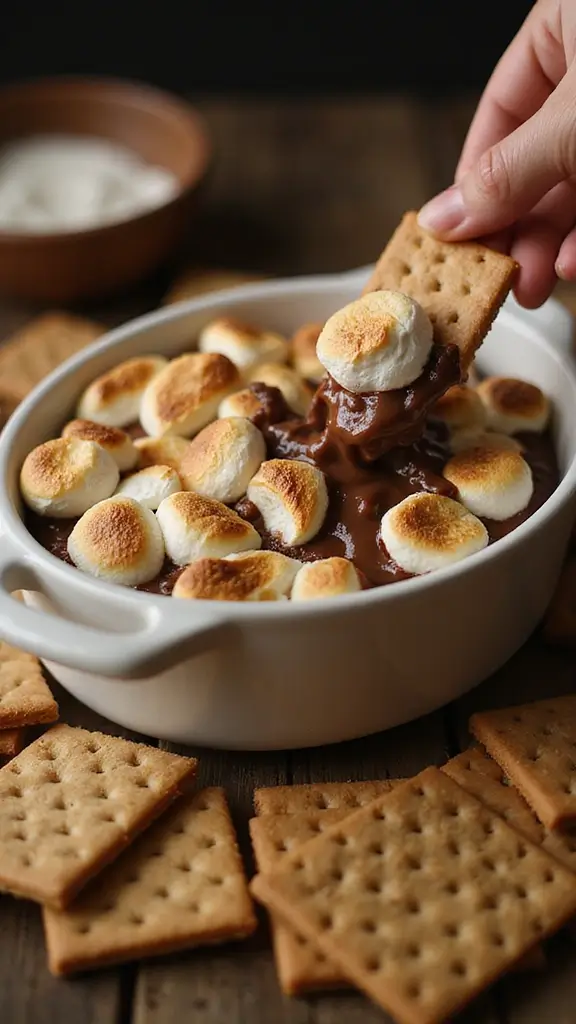
S’mores dip brings the joy of campfire treats right to your kitchen! Imagine warm chocolate melting together with fluffy marshmallows, perfect for sharing with friends. This easy dessert is a crowd-pleaser, making it a fantastic choice for parties or cozy family nights. You won’t need a campfire; just a broiler to create this delicious treat everyone will love!
Recipe Overview:
– Servings: 6
– Prep Time: 5 minutes
– Cook Time: 5 minutes
– Total Time: 10 minutes
– Calories: About 300 per serving
Nutrition Information:
– Protein: 4g
– Carbohydrates: 30g
– Fat: 14g
– Sugar: 20g
Ingredients List:
– 1 cup chocolate chips
– 1 cup mini marshmallows
– 1 tablespoon butter
– Graham crackers for dipping
Step-by-Step Instructions:
1. Preheat your oven to broil.
2. In a baking dish, mix the chocolate chips and top them with mini marshmallows.
3. Dot the mixture with butter for extra flavor.
4. Broil for 2-3 minutes until the marshmallows turn golden brown and the chocolate is melted.
5. Serve warm with graham crackers for dipping.
Tips for the Best S’mores Dip:
– Keep an eye on it while broiling to prevent burning.
– Get creative! Add peanut butter or caramel for an extra tasty twist.
Frequently Asked Questions:
– Can I prepare this ahead of time? It’s best served fresh, but you can set up the ingredients beforehand.
– Is dark chocolate okay to use? Absolutely! It gives a richer flavor to your dip.
Dive into this delectable dessert, and you’ll see why S’mores dip is a hit at every gathering! Enjoy the gooey goodness and the smiles it brings!
14. Chocolate-Dipped Pretzels
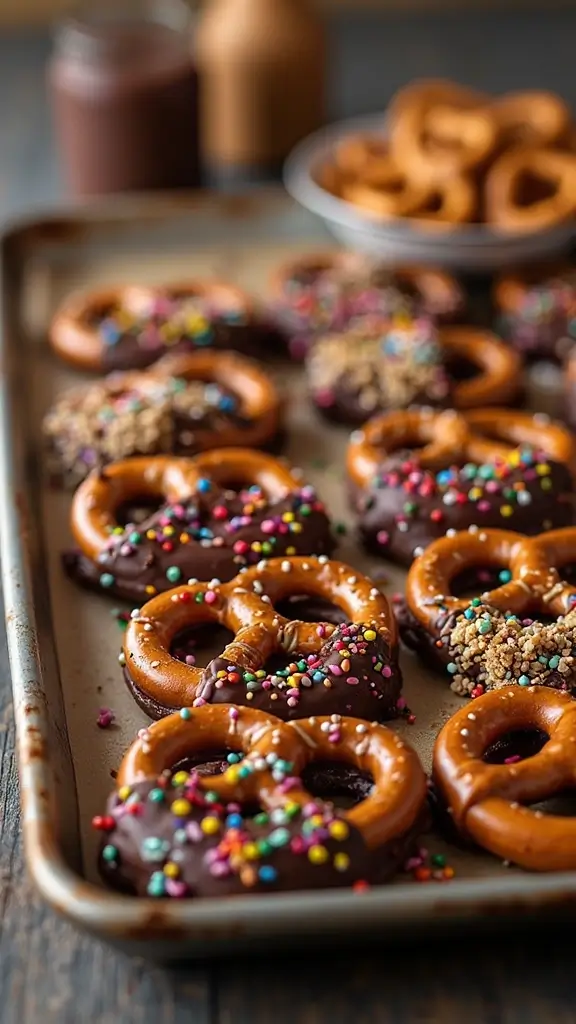
Indulge in the delightful crunch of chocolate-dipped pretzels! This sweet and salty treat is not only easy to make but also impresses everyone who tries them. Picture crispy pretzels coated in rich, melted chocolate, creating a perfect harmony of flavors. These snacks are just as fun to make as they are to eat, making them a fantastic option for parties or gifts!
Let’s dive into the details! Here’s how to create this crowd-pleaser in just a few simple steps.
Recipe Overview:
– Servings: 16
– Prep Time: 10 minutes
– Cook Time: 0 minutes
– Total Time: 10 minutes
– Calories: Approximately 150 per serving
Nutrition Information:
– Protein: 2g
– Carbohydrates: 18g
– Fat: 8g
– Sugar: 10g
Ingredients List:
– 2 cups pretzel rods
– 1 cup semi-sweet chocolate chips
– Toppings (sprinkles, crushed nuts, sea salt, etc.)
Step-by-Step Instructions:
1. Start by melting the chocolate chips in the microwave. Stir them every 30 seconds until smooth.
2. Dip each pretzel rod halfway into the melted chocolate. Let the excess chocolate drip back into the bowl.
3. While the chocolate is still wet, sprinkle your favorite toppings on top. Get creative!
4. Place the pretzels on parchment paper and let them cool until the chocolate hardens.
Tips for the Best Pretzels:
– Choose high-quality chocolate for a richer taste.
– Mix and match toppings for fun flavors and textures!
Frequently Asked Questions:
– Can I use other types of chocolate? Yes! Milk or dark chocolate works great too.
– How should I store leftovers? Keep them in an airtight container at room temperature for freshness.
These chocolate-dipped pretzels are not just easy to make but also a wonderful addition to any gathering. Whether you’re treating yourself or sharing with others, these treats are sure to delight!
15. Ice Cream Sandwiches
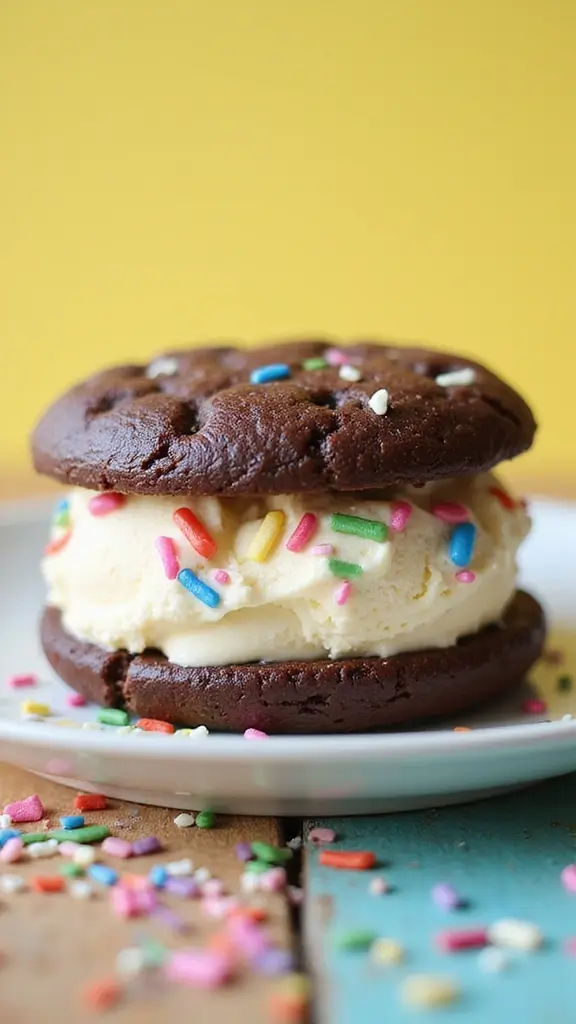
Ice cream sandwiches are a delightful treat that can bring back sweet memories! They’re not only easy to whip up but also allow you to mix and match your favorite cookies and ice cream flavors. Imagine biting into a cool, creamy sandwich on a hot day—it’s pure bliss!
You can quickly assemble these tasty sandwiches and pop them in the freezer for unexpected cravings. They’re great for parties or just a fun dessert at home.
Recipe Overview:
– Servings: 8
– Prep Time: 15 minutes
– Cook Time: 10 minutes
– Total Time: 25 minutes + freezing time
– Calories: About 250 per sandwich
Nutrition Information:
– Protein: 4g
– Carbohydrates: 35g
– Fat: 12g
– Sugar: 18g
Ingredients List:
– 16 cookies (your favorite variety)
– 2 cups of ice cream (any flavor you love)
– Sprinkles or crushed cookies for decoration
Step-by-Step Instructions:
1. Bake or prepare your cookies, then let them cool.
2. Scoop a generous amount of ice cream onto the flat side of one cookie.
3. Place another cookie on top to create a sandwich.
4. Roll the edges in sprinkles or crushed cookies for a fun finish.
5. Arrange the sandwiches on a baking sheet and freeze for at least 1 hour before enjoying.
Tips for the Best Ice Cream Sandwiches:
– Choose soft cookies for a delightful bite.
– Wrap each sandwich individually for a perfect grab-and-go treat!
Frequently Asked Questions:
– Can I use gluten-free cookies? Yes, they work wonderfully!
– How long can I keep them in the freezer? Up to 2 weeks is best.
With just a few simple steps, you’ll have a delicious dessert ready to impress your friends and family. Enjoy your homemade ice cream sandwiches!
16. Pumpkin Spice Cheesecake Bars
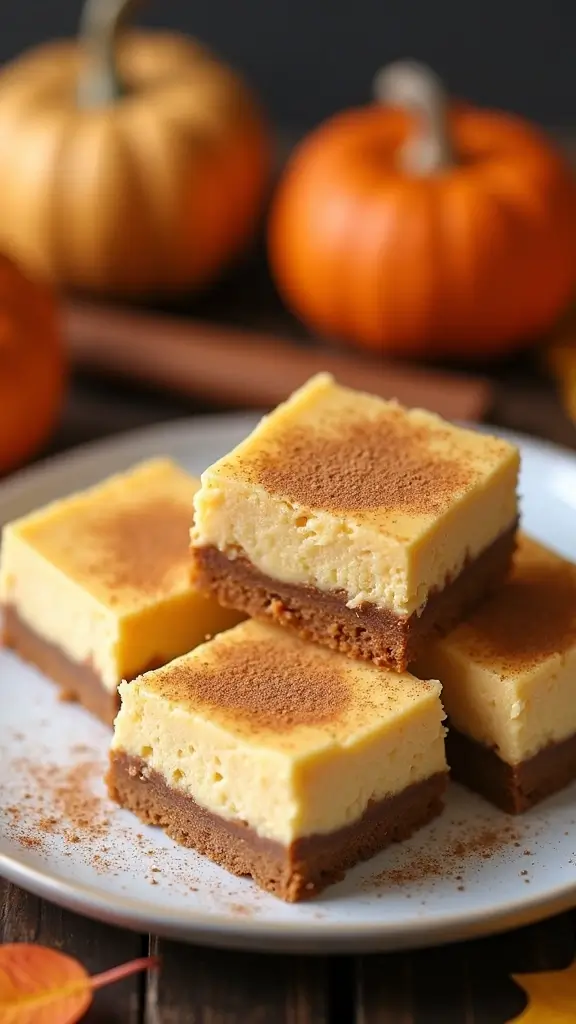
Fall into flavor with these delightful Pumpkin Spice Cheesecake Bars. Imagine a creamy cheesecake infused with rich pumpkin and warming spices, all resting on a buttery graham cracker crust. These bars not only look stunning but also taste heavenly, making them an irresistible treat for any autumn gathering. Whether it’s a Thanksgiving feast or a cozy get-together, they’re sure to impress your guests and satisfy your sweet tooth.
Here’s how to make them:
Recipe Overview:
– Servings: 12
– Prep Time: 20 minutes
– Cook Time: 30 minutes
– Total Time: 50 minutes
– Calories: Approximately 200 per bar
Nutrition Information:
– Protein: 4g
– Carbohydrates: 28g
– Fat: 8g
– Sugar: 15g
Ingredients List:
– 1 1/2 cups graham cracker crumbs
– 1/2 cup unsalted butter, melted
– 16 oz cream cheese, softened
– 1 cup pumpkin puree
– 1/2 cup sugar
– 1 teaspoon pumpkin pie spice
– 3 large eggs
– 1 teaspoon vanilla extract
Step-by-Step Instructions:
1. Preheat your oven to 325°F (160°C) and grease a baking pan.
2. In a bowl, combine graham cracker crumbs with melted butter. Press this mixture into the bottom of your pan to create a crust.
3. In a separate bowl, mix cream cheese, pumpkin puree, sugar, and pumpkin pie spice until smooth.
4. Add eggs one at a time, stirring gently after each addition.
5. Pour the cheesecake mixture over the crust. Bake for 30 minutes or until set.
6. Allow the bars to cool completely before slicing into squares.
Tips for Perfect Cheesecake Bars:
– Chill the bars overnight for the best texture.
– Top with whipped cream and a sprinkle of cinnamon before serving.
Frequently Asked Questions:
– Can I make these gluten-free? Yes! Use gluten-free graham crackers instead.
– How should I store leftovers? Keep them in an airtight container in the fridge for up to a week.
Enjoy these bars as a delicious way to celebrate the flavors of fall!
17. Apple Crisp
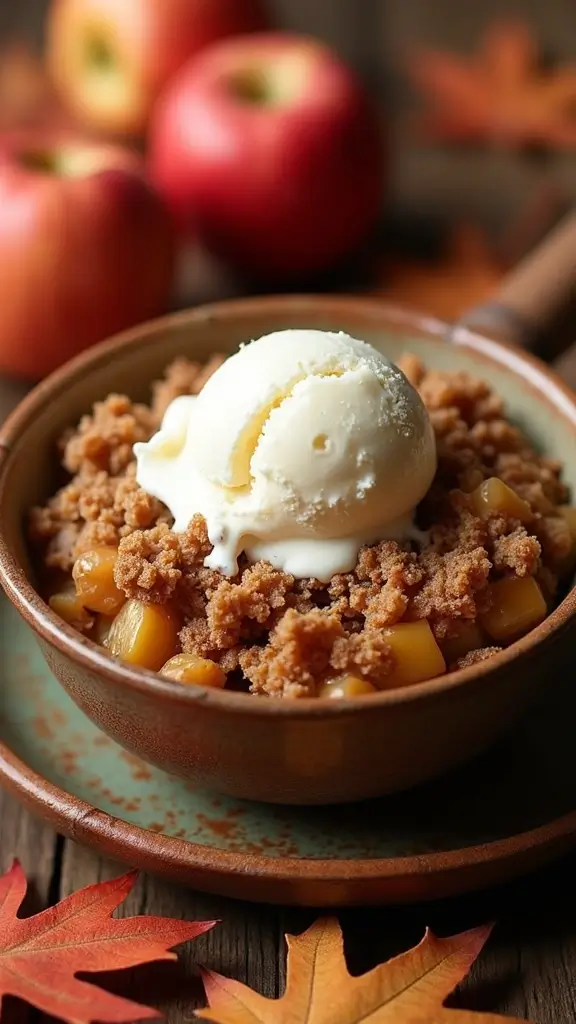
Apple crisp is the ultimate warm dessert that feels like a hug on a cold day. This easy recipe brings together tender, sweet apples and a crunchy oat topping. It’s perfect for family gatherings or a cozy night in. Serve it warm with a scoop of creamy vanilla ice cream, and watch everyone come back for more!
Here’s how to make it:
Recipe Overview:
– Servings: 6
– Prep Time: 15 minutes
– Cook Time: 35 minutes
– Total Time: 50 minutes
– Calories: About 250 per serving
Nutrition Information:
– Protein: 2g
– Carbohydrates: 35g
– Fat: 10g
– Sugar: 15g
Ingredients List:
– 4 cups sliced apples (try Granny Smith or Honeycrisp)
– 1 cup brown sugar
– 1 cup rolled oats
– 1/2 cup all-purpose flour
– 1/2 cup unsalted butter, melted
– 1 teaspoon cinnamon
Step-by-Step Instructions:
1. Preheat your oven to 350°F (175°C). Grease a baking dish.
2. Layer the sliced apples in the dish. Sprinkle them with brown sugar and cinnamon.
3. In a separate bowl, mix oats, flour, and melted butter until crumbly. Spread this mixture over the apples.
4. Bake for 35-40 minutes. Look for a golden topping and tender apples.
5. Serve it warm, topped with ice cream for a delicious finish.
Tips for the Best Apple Crisp:
– Use a mix of sweet and tart apples for a more complex flavor.
– Add a pinch of nutmeg to deepen the warm spices.
Frequently Asked Questions:
– Can I make this ahead of time? Yes! Prepare it a day early and bake just before serving.
– Can I freeze leftovers? Absolutely. It freezes well for up to 3 months.
Enjoy making this delightful apple crisp. It’s simple, satisfying, and sure to impress!
18. Brownie Sundae
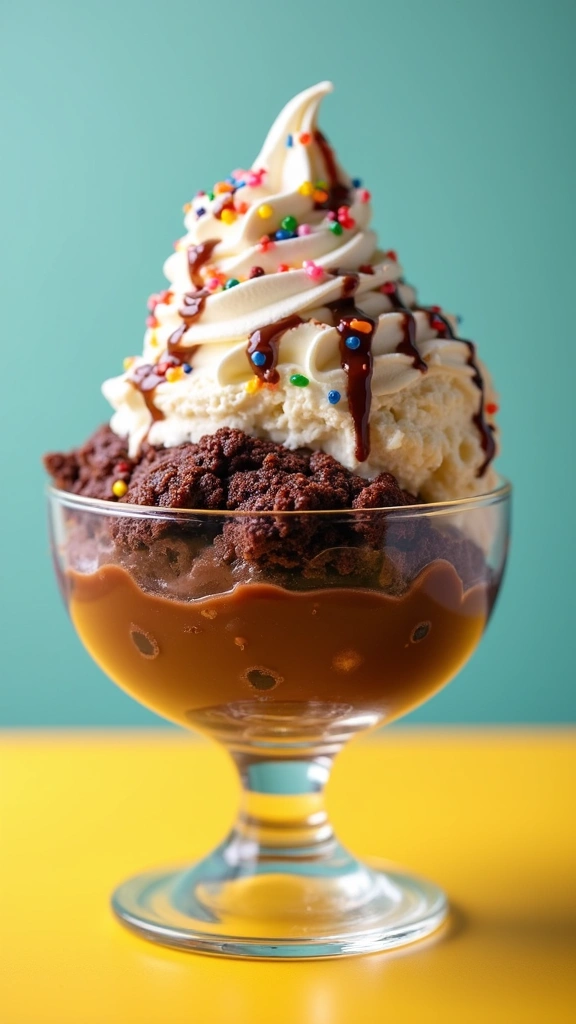
Craving a dessert that wows? Look no further than the classic brownie sundae! This delightful treat layers warm, fudgy brownies with creamy ice cream and a rainbow of toppings. It’s an irresistible combination that’s perfect for any gathering or a cozy night in. Plus, it’s incredibly simple to whip up, making it a go-to dessert for all occasions.
Start by heating your brownies to a gooey perfection. Then, stack them with scoops of your favorite ice cream. Drizzle chocolate syrup, top it with whipped cream, and finish with sprinkles or nuts for a stunning presentation. This dessert invites you to get creative, so feel free to mix flavors and toppings!
Recipe Overview:
– Servings: 4
– Prep Time: 10 minutes
– Cook Time: 30 minutes
– Total Time: 40 minutes
– Calories: Approximately 500 per serving
Nutrition Information:
– Protein: 6g
– Carbohydrates: 60g
– Fat: 25g
– Sugar: 35g
Ingredients List:
– 4 brownies (homemade or store-bought)
– 4 scoops of ice cream (any flavor you love)
– Chocolate syrup for drizzling
– Whipped cream for topping
– Sprinkles, nuts, or cherries for garnish
Step-by-Step Instructions:
1. Warm the brownies in the oven or microwave until they’re just gooey.
2. Place one brownie in a bowl or dish and add a scoop of ice cream on top.
3. Drizzle generously with chocolate syrup, then add a swirl of whipped cream.
4. Sprinkle with your favorite toppings, like nuts or colorful sprinkles.
5. Serve right away and dive into this delightful treat!
Tips for a Perfect Brownie Sundae:
– Choose various ice cream flavors for a fun twist.
– Add caramel sauce or cookie crumbles for extra flavor!
Frequently Asked Questions:
– Can I make brownies from scratch? Yes! Use your favorite brownie recipe.
– How should I store leftovers? Keep them in the fridge, but fresh is best!
Make your next dessert unforgettable with this brownie sundae. It’s a simple yet indulgent way to satisfy your sweet tooth!
19. Mocha Cupcakes
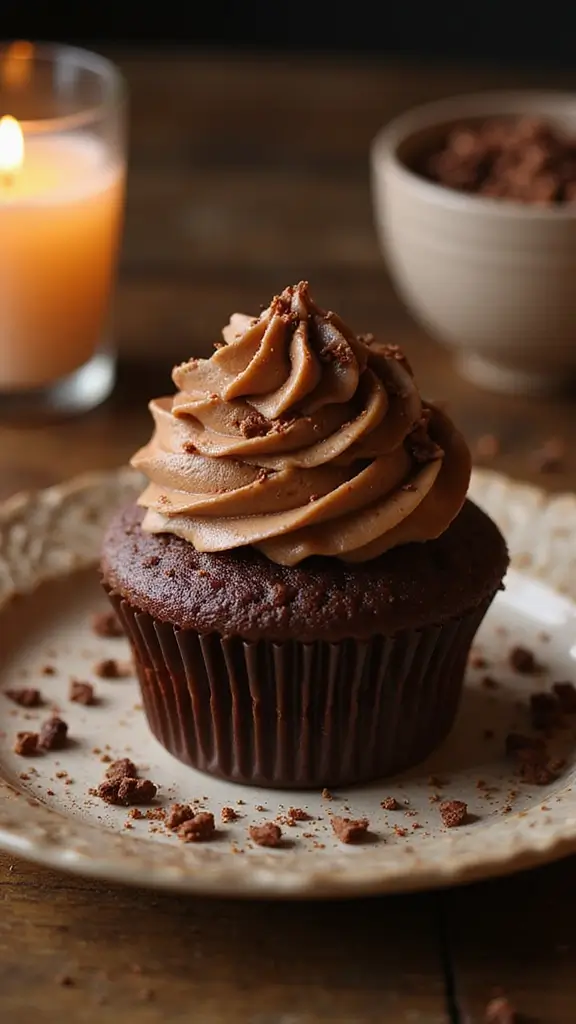
Indulge in the delightful world of mocha cupcakes, where rich chocolate meets aromatic coffee. These treats are perfect for coffee enthusiasts and anyone with a sweet tooth. Their elegant appearance makes them a fantastic choice for gatherings, yet they are simple enough for a casual afternoon snack. Pair them with a steaming cup of coffee for an extra touch of bliss!
Here’s how you can whip up these delicious cupcakes in no time. Follow the easy recipe below to impress your friends and family. With just a few ingredients, you can create a dessert that looks and tastes gourmet.
Recipe Overview:
– Servings: 12
– Prep Time: 20 minutes
– Cook Time: 20 minutes
– Total Time: 40 minutes
– Calories: About 250 per cupcake
Nutrition Information:
– Protein: 3g
– Carbohydrates: 30g
– Fat: 12g
– Sugar: 18g
Ingredients List:
– 1 1/2 cups all-purpose flour
– 1 cup granulated sugar
– 1/2 cup unsweetened cocoa powder
– 1 teaspoon baking soda
– 1/2 teaspoon salt
– 1 cup brewed coffee, cooled
– 1/3 cup vegetable oil
– 1 teaspoon vanilla extract
– 1/2 cup butter, softened (for frosting)
– 2 cups powdered sugar (for frosting)
– 1 tablespoon cocoa powder (for frosting)
– 1 tablespoon brewed coffee (for frosting)
Step-by-Step Instructions:
1. Preheat your oven to 350°F (175°C) and line a cupcake tin with liners.
2. In a large bowl, mix together the flour, sugar, cocoa powder, baking soda, and salt.
3. Pour in the cooled coffee, vegetable oil, and vanilla. Stir until the batter is smooth.
4. Fill the cupcake liners with the batter and bake for 20 minutes or until a toothpick comes out clean.
5. Let the cupcakes cool completely before adding the creamy mocha frosting.
Tips for the Best Cupcakes:
– Always cool the coffee before mixing it in for better results.
– Add chocolate shavings on top for a fancy finish that will wow your guests!
Frequently Asked Questions:
– Can I make these ahead of time? Yes! Bake them the day before and frost right before serving.
– Can I use decaf coffee? Absolutely! Decaf works just as well for a lighter caffeine hit.
Mocha Cupcakes
Editor’s Choice

200pcs Natural Tulip Cupcake Liners for Baking Cups Unbleached European …

Hamilton Beach 6-Speed Electric Hand Mixer with Whisk, Traditional Beate…
Snapware (2-Layer, 24 Cupcakes Plastic Detachable Cupcake Carrier Storag…
Conclusion

These 19 easy dessert recipes not only look spectacular but also taste divine! Whether you are hosting a party or simply satisfying a sweet craving, these treats offer the perfect blend of simplicity and elegance.
Each recipe pairs wonderfully with crowd-pleasing cocktails, making them an ideal addition to your next gathering. Remember, the art of dessert does not have to be complicated; sometimes, the simplest treats can leave the biggest impression!
Note: We aim to provide accurate product links, but some may occasionally expire or become unavailable. If this happens, please search directly on Amazon for the product or a suitable alternative.
This post contains Amazon affiliate links, meaning I may earn a small commission if you purchase through my links, at no extra cost to you.
Frequently Asked Questions
What are some easy dessert recipes that look complicated?
If you’re looking to impress without the stress, there are plenty of easy dessert recipes that appear sophisticated! Think of options like chocolate mousse or tiramisu. These desserts often involve simple techniques and ingredients, yet they come together beautifully to wow your guests.
Check out our article for 19 recipes that fit this description perfectly!
How can I make easy cocktails to pair with desserts?
Pairing easy cocktails with your desserts can elevate your gathering. Think simple yet delicious combinations like a vanilla vodka lemonade or a classic mimosa. These drinks are not only quick to prepare but also complement many desserts beautifully, making them crowd-pleasers.
Mixing cocktails can be as simple as combining a few ingredients, so don’t hesitate to experiment!
What crowd-pleasing drinks can I serve at a party?
When hosting a party, you want crowd-pleasing drinks that cater to various tastes. Consider serving a refreshing punch or a signature cocktail that aligns with your dessert theme. Additionally, offering non-alcoholic options like flavored sparkling water can ensure everyone has something to enjoy.
Don’t forget to garnish your drinks to make them visually appealing!
Are there quick party drinks that I can prepare in advance?
Absolutely! You can prepare several quick party drinks in advance to save time on the big day. Make a batch of sangria or a batch cocktail that can be stored in the fridge. This way, all you need to do is pour and serve, leaving you more time to enjoy your guests and desserts.
Just remember to add any fresh ingredients, like fruit, right before serving for the best flavor!
What tips can I follow to make my dessert presentation look fancy?
Presentation can make all the difference when serving dessert! Use tall glasses for layering desserts like trifles or mousse, and don’t shy away from garnishing with fresh herbs or edible flowers to add flair. A drizzle of sauce or a dusting of powdered sugar can elevate even the simplest dessert.
Remember, people eat with their eyes first, so take a moment to make your desserts look as amazing as they taste!