As the seasons shift, our cravings often change along with the weather. There’s something special about the snacks we enjoy during each time of year. Maybe it’s the fresh, bright flavors of spring or the cozy comfort of winter treats. I created this post to celebrate those irresistible seasonal snacks that not only satisfy our taste buds but also reflect the essence of each season.
If you’re someone who loves to eat and share good food, you’re in for a treat. We all know that certain flavors just fit perfectly with the mood of the season, whether it’s a refreshing summer fruit salad or a hearty fall stew. This list is for anyone looking to spice up their snack game, no matter the weather outside.
You’ll discover 23 seasonal snacks that are not only delicious but also easy to prepare and perfect for gatherings or solo enjoyment. Think of recipes that make your kitchen feel cozy in winter or bring a burst of freshness in the summer heat. Each snack idea is designed to bring a smile to your face and warmth to your heart, reminding you of the simple joys of seasonal eating.
So grab your apron and let’s dive into these tasty treats that change with the weather! You’ll find plenty of inspiration here to keep your snacking habits fun and flavorful all year round.
Contents
- 1. Spring Pea Hummus
- 2. Lemon Basil Bruschetta
- 3. Strawberry Rhubarb Mini Pies
- 4. Grilled Vegetable Skewers
- 5. Watermelon Feta Salad
- 6. Caprese Salad Bites
- 7. Peach Salsa
- 8. Corn on the Cob with Herb Butter
- 9. Tomato Basil Soup Shooters
- 10. Apple Cinnamon Energy Bites
- 11. Pumpkin Spice Muffins
- 12. Maple Roasted Sweet Potatoes
- 13. Butternut Squash Soup
- 14. Spiced Apple Cider
- 15. Chocolate Peppermint Bark
- 16. Gingerbread Cookies
- 17. Hot Chocolate Bombs
- 18. Cranberry Brie Bites
- 19. Eggnog Truffles
- 20. Winter Citrus Salad
- 21. Chocolate-Covered Pretzels
- 22. Coconut Macaroons
- 23. Mulled Wine
1. Spring Pea Hummus
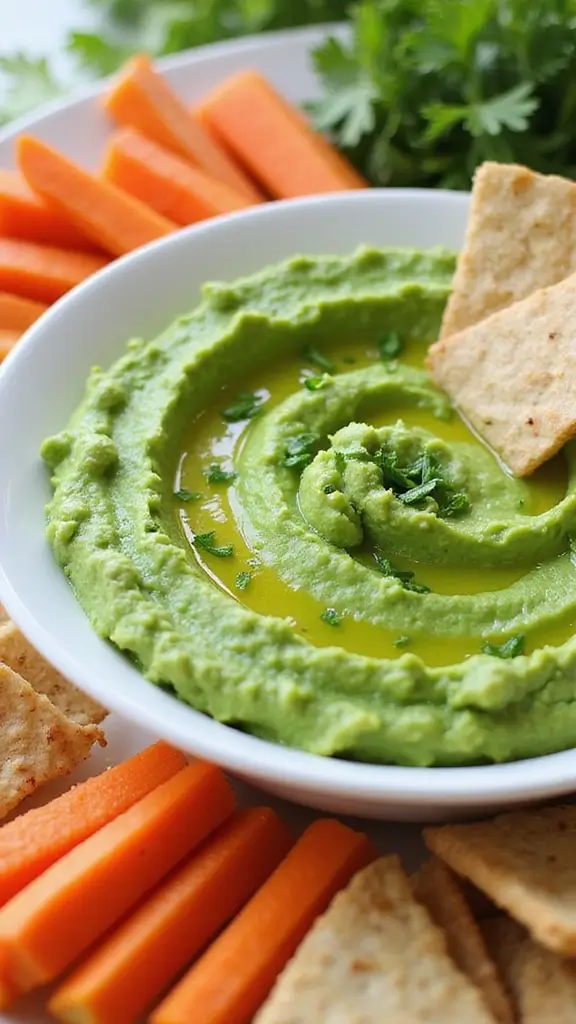
Spring Pea Hummus is the perfect way to welcome the warmer days. This lively dip, bursting with the taste of fresh peas and mint, is a delightful treat for any gathering. Its bright green hue catches the eye, while the zesty lemon adds a refreshing zing. Whether you’re having a picnic or hosting friends, this hummus pairs beautifully with crunchy veggie sticks or crispy pita chips.
Ready to make your own? It’s simple and quick! In just 10 minutes, you’ll have a delicious, healthy snack. Plus, it’s low in calories, making it a guilt-free choice. Here’s how to whip up this springtime favorite:
Ingredients:
– 2 cups fresh peas (or frozen)
– 1/4 cup tahini
– 2 tablespoons olive oil
– Juice of 1 lemon
– A handful of fresh mint leaves
– Salt and pepper to taste
Instructions:
1. If you’re using fresh peas, blanch them in boiling water for 2 minutes. Quickly transfer them to ice water to cool.
2. In a food processor, combine the peas, tahini, olive oil, lemon juice, and mint leaves.
3. Blend until smooth. If it’s too thick, add a splash of water to reach your desired consistency.
4. Season with salt and pepper to your liking.
5. Serve with your favorite veggies or pita chips for a tasty snack.
Want to spice it up? Try adding a clove of garlic for an extra kick. This hummus keeps well in the fridge for up to a week, stored in an airtight container.
FAQs:
– Can I use frozen peas? Yes, just thaw them before mixing.
– What can I serve with this? Try crackers, bread, or even fresh veggies!
Enjoy making and sharing this spring pea hummus, a snack that’s as vibrant as the season itself!
2. Lemon Basil Bruschetta
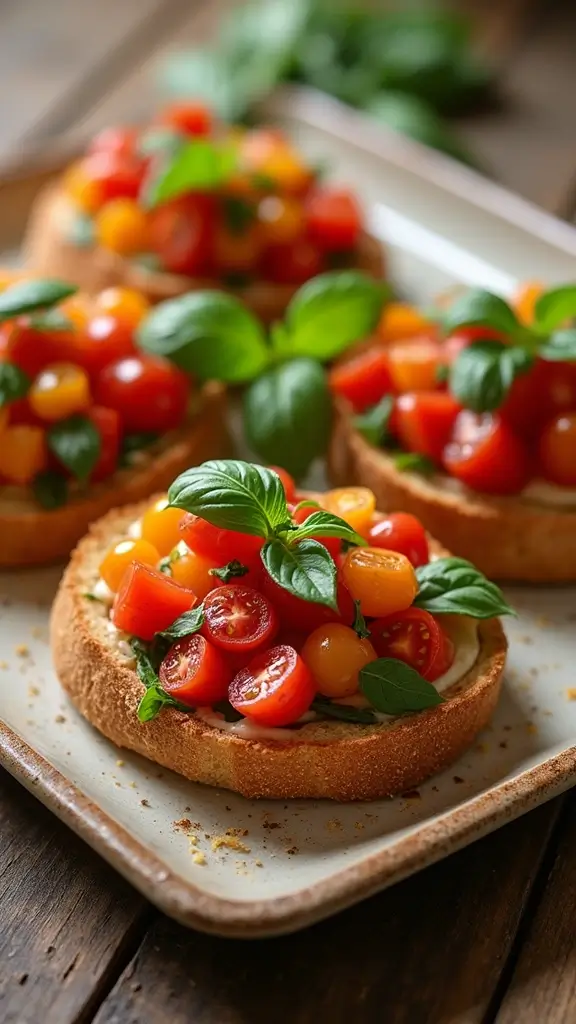
Spring brings fresh flavors, and Lemon Basil Bruschetta is a perfect way to celebrate. Imagine biting into a crispy baguette topped with juicy tomatoes, fragrant basil, and a splash of zesty lemon. This appetizer not only looks beautiful but also tastes incredible, making it an ideal choice for outdoor gatherings or a light snack at home.
Let’s get into the simple recipe so you can enjoy this burst of spring flavors. It’s quick, too—ready in just 25 minutes! Here’s what you’ll need:
Ingredients:
– 1 French baguette, sliced
– 2 cups cherry tomatoes, diced
– 1/4 cup fresh basil, chopped
– Juice of 1 lemon
– 2 tablespoons olive oil
– Salt and pepper to taste
Instructions:
1. Preheat your oven to 400°F (200°C).
2. Lay the baguette slices on a baking sheet. Drizzle them lightly with olive oil. Toast for 5-7 minutes until golden brown.
3. In a bowl, mix diced tomatoes, chopped basil, lemon juice, olive oil, salt, and pepper.
4. Spoon the tomato mixture onto each toasted baguette slice.
5. Serve right away for the freshest taste!
Want to add a twist? Try adding mozzarella pearls on top for a creamy finish or prepare the topping in advance and assemble just before serving.
FAQs:
– Can I use dried basil? Fresh basil is best for flavor, but dried works in a pinch!
– What other toppings can I try? Avocado or feta cheese make delicious alternatives!
Enjoy this delightful spring treat and impress your guests with your culinary skills!
3. Strawberry Rhubarb Mini Pies

Savor the taste of spring with Strawberry Rhubarb Mini Pies. These delightful treats combine the sweet and tangy flavors of fresh strawberries and rhubarb, all wrapped in a flaky crust. They not only remind you of childhood desserts but also make a perfect addition to gatherings or cozy evenings at home. Each pie is a bite-sized burst of nostalgia, and they are sure to win over anyone who tries them.
Ready to make these mini pies? Here’s how! The recipe is simple, and you’ll have a delicious snack in about 45 minutes. Plus, they’re budget-friendly, using common ingredients you might already have at home. Serve them warm with a scoop of vanilla ice cream or a dollop of whipped cream for an extra special touch. You’ll love how they make your space feel inviting and festive.
Ingredients:
– 1 cup strawberries, chopped
– 1 cup rhubarb, chopped
– 1/2 cup sugar
– 2 tablespoons cornstarch
– 1 teaspoon vanilla extract
– 1 package refrigerated pie crusts
Instructions:
1. Preheat your oven to 375°F (190°C).
2. In a mixing bowl, combine strawberries, rhubarb, sugar, cornstarch, and vanilla extract. Stir until well mixed.
3. Roll out the pie crusts and cut circles that fit your muffin tin. Place the circles in the tin.
4. Fill each crust with the fruit mixture.
5. Top with another mini crust or create a lattice design. Bake for 25 minutes, or until golden brown.
6. Allow cooling before serving.
Tips:
– Brush the top crust with egg wash for a shiny finish.
– Use frozen strawberries if needed, just thaw and drain them first.
– Store leftovers in an airtight container in the fridge for up to 3 days.
– These pies are perfect for spring picnics or family gatherings!
4. Grilled Vegetable Skewers
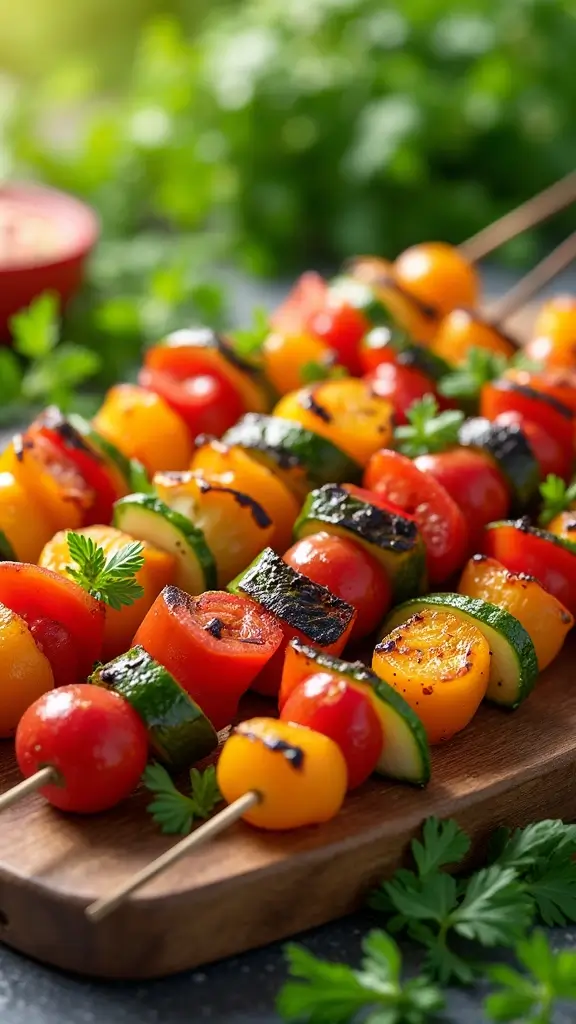
When summer rolls in, nothing beats the freshness of Grilled Vegetable Skewers. These colorful treats are loaded with vibrant vegetables like sweet bell peppers, crunchy zucchini, and juicy cherry tomatoes. They bring both flavor and a pop of color to your BBQ or picnic. Plus, grilling adds a delicious smokiness that makes them irresistible. Perfect as a light snack or a tasty side, these skewers are a crowd-pleaser!
Getting started is easy! Here’s what you need and how to make them:
Recipe Overview:
– Servings: 4
– Prep Time: 15 minutes
– Cook Time: 10 minutes
– Total Time: 25 minutes
– Calories: 100 per skewer
Nutrition Information:
100 calories, 3g protein, 15g carbs, 4g fat, 3g fiber.
Ingredients:
– 1 bell pepper, cubed
– 1 zucchini, sliced
– 1 cup cherry tomatoes
– 1 red onion, cubed
– 2 tablespoons olive oil
– Salt and pepper to taste
– Skewers (wooden or metal)
Instructions:
1. If you’re using wooden skewers, soak them in water for about 30 minutes to stop them from burning.
2. Preheat your grill to medium-high heat.
3. In a large bowl, toss the veggies with olive oil, salt, and pepper.
4. Thread the vegetables onto the skewers, mixing up the colors for a fun look.
5. Grill for about 10 minutes, turning occasionally, until they are tender and nicely charred.
6. Allow them to cool slightly before serving. Enjoy!
Feel free to mix it up! Experiment with other vegetables like mushrooms or asparagus for added flavor. You can also serve them with a cool yogurt dip for a refreshing twist.
FAQ:
– Can I use frozen vegetables? Fresh is best for that grilled taste, but thawed frozen veggies can work in a pinch.
– How do I store leftover skewers? Keep them in the fridge and enjoy within a day or two.
These grilled vegetable skewers are not just tasty; they are also a healthy addition to your summer meals. So fire up that grill and let the good times roll!
5. Watermelon Feta Salad

Dive into summer with a Watermelon Feta Salad that refreshes your taste buds and cools you down. This delightful mix of sweet watermelon and salty feta cheese, accented with fresh mint, makes every bite a burst of flavor. It’s not just a snack; it’s a colorful addition to any summer gathering that will impress your friends and family!
Recipe Overview:
– Servings: 4
– Prep Time: 10 minutes
– Cook Time: 0 minutes
– Total Time: 10 minutes
– Calories: 120 per serving
Nutrition Information:
– 120 calories
– 3g protein
– 11g carbs
– 8g fat
– 1g fiber
Ingredients:
– 4 cups watermelon, cubed
– 1 cup feta cheese, crumbled
– 1/4 cup fresh mint, chopped
– Juice of 1 lime
– Salt and pepper to taste
Instructions:
1. In a large bowl, toss together the watermelon cubes, crumbled feta cheese, and chopped mint.
2. Squeeze the lime juice over the salad and sprinkle with salt and pepper.
3. Gently mix everything until well combined.
4. Serve right away or chill in the fridge for a few minutes to enhance the flavors.
Pro Tip: Drizzle a little balsamic glaze on top for an extra punch of flavor! This salad is best enjoyed fresh, but you can keep it in the fridge for up to one day.
FAQ:
– Can I use another cheese? Yes! Goat cheese is a fantastic substitute.
– Is it good for meal prep? It’s best eaten fresh, as watermelon can lose its crispness.
This simple yet stunning salad is perfect for summer barbecues, picnics, or just a light lunch. Enjoy the taste of summer with every forkful!
6. Caprese Salad Bites
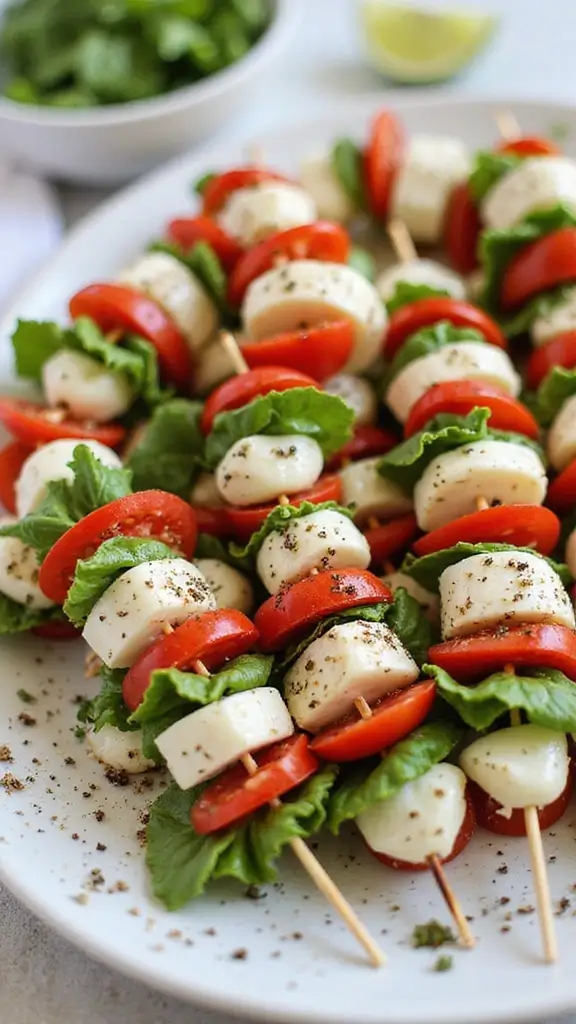
Looking for a refreshing snack that’s as vibrant as summer itself? Caprese Salad Bites are your answer! These colorful bites combine juicy cherry tomatoes, creamy mozzarella, and fragrant basil, making them a feast for the eyes and the taste buds. Drizzle them with balsamic glaze, and watch them vanish from your plate at gatherings.
Here’s how to whip them up quickly. You’ll need just a few ingredients, and they don’t require any cooking. Grab some cherry tomatoes, mozzarella balls, fresh basil, and balsamic glaze. Assemble them on toothpicks, and you’re ready to impress!
Ingredients:
– 12 cherry tomatoes
– 12 small mozzarella balls
– 12 fresh basil leaves
– Balsamic glaze for drizzling
– Salt and pepper to taste
Instructions:
1. Take a toothpick or skewer and slide on a cherry tomato.
2. Add a basil leaf next, followed by a mozzarella ball.
3. Repeat until all ingredients are used.
4. Arrange them on a platter. Drizzle with balsamic glaze.
5. Season with salt and pepper before serving.
Tips for Success:
– Choose heirloom tomatoes for a splash of color.
– Serve them fresh on the same day for the best taste.
FAQ:
– Can I make these ahead? Yes, but add the glaze just before serving.
– What if I can’t find mozzarella balls? Cubes of mozzarella work perfectly!
These bites are perfect for summer parties, picnics, or even a quick snack at home. Enjoy the burst of flavors and the smiles they bring!
7. Peach Salsa
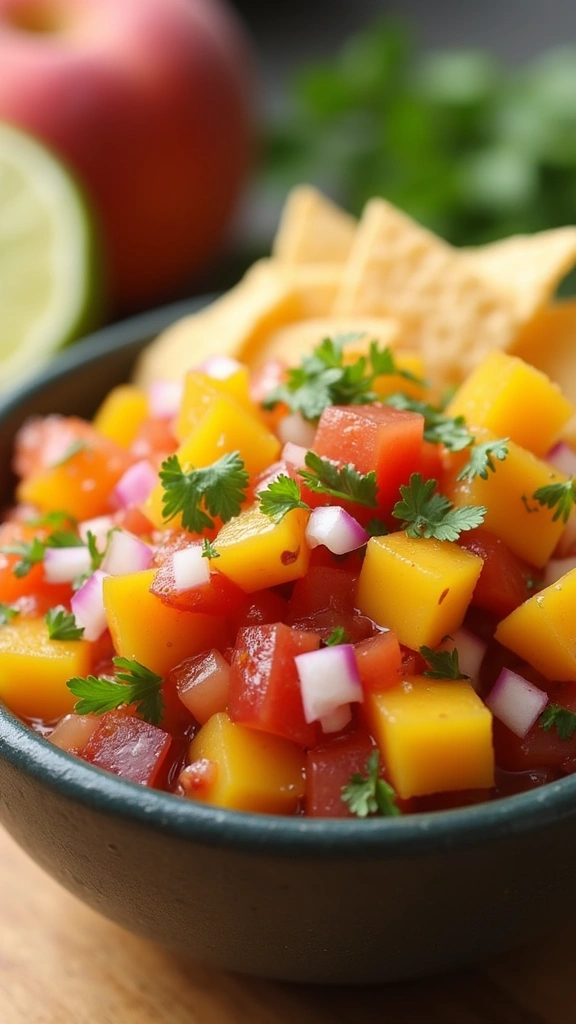
Summer is here, and it’s time to spice things up with a fresh batch of Peach Salsa. This vibrant mix of sweet and spicy flavors will brighten any meal. Picture juicy peaches combined with zesty jalapeños, crunchy red onion, and fragrant cilantro. Whether you use it as a dip for tortilla chips or a topping for grilled fish, it’s sure to impress your family and friends!
Here’s how to whip up this delightful dish:
Recipe Overview:
– Servings: 6
– Prep Time: 15 minutes
– Cook Time: 0 minutes
– Total Time: 15 minutes
– Calories: 60 per serving
Nutrition Information:
60 calories, 1g protein, 14g carbs, 0g fat, 2g fiber.
Ingredients:
– 2 ripe peaches, diced
– 1 jalapeño, seeded and minced
– 1/4 cup red onion, finely chopped
– 1/4 cup fresh cilantro, chopped
– Juice of 1 lime
– Salt to taste
Instructions:
1. In a bowl, mix the diced peaches, jalapeño, red onion, and cilantro.
2. Drizzle lime juice over the top and sprinkle with salt.
3. Gently stir to combine, being careful not to mash the peaches.
4. Allow it to sit for at least 10 minutes to let the flavors blend.
5. Serve it with crispy tortilla chips or as a topping for your grilled meats.
Want an extra kick? Leave some jalapeño seeds in! Or try swapping peaches for mango for a unique twist.
FAQ:
– How long does this salsa last? It keeps well in the fridge for up to 3 days.
– Can I use canned peaches? Fresh is best, but canned will do in a pinch!
Dive into summer with this refreshing Peach Salsa. It’s quick, easy, and adds a burst of flavor to any dish you serve. Enjoy the sunshine with every bite!
8. Corn on the Cob with Herb Butter

Nothing says summer like Corn on the Cob. This classic treat is a must-have at your cookouts and gatherings. You can take it to the next level with a simple herb butter that enhances its natural sweetness. The smell of corn grilling on the barbecue is enough to get anyone excited!
Want to make it? Here’s a quick overview:
– Servings: 4
– Prep Time: 5 minutes
– Cook Time: 20 minutes
– Total Time: 25 minutes
– Calories: 180 per cob
Nutrition Information: 180 calories, 4g protein, 30g carbs, 7g fat, 3g fiber.
Ingredients:
– 4 ears of corn, husked
– 1/2 cup unsalted butter, softened
– 1/4 cup fresh herbs like parsley, chives, or basil, chopped
– Salt to taste
Instructions:
1. Preheat your grill to medium heat.
2. Combine the softened butter, chopped herbs, and salt in a bowl.
3. Grill the corn for 15-20 minutes, turning occasionally until it’s tender and has nice grill marks.
4. Slather the hot corn with your herb butter and dig in right away!
Want to add some flair? Try sprinkling Parmesan cheese on top for a cheesy twist! If you prefer a softer texture, wrap the corn in aluminum foil while grilling.
FAQ:
– Can I boil the corn instead? Absolutely! Boiling is a quick and easy option.
– How do I store leftover corn? Keep it in the fridge for up to 3 days.
This delicious corn on the cob is not just easy to make; it’s also a crowd favorite. Enjoy the flavors of summer with this simple yet delightful dish!
9. Tomato Basil Soup Shooters
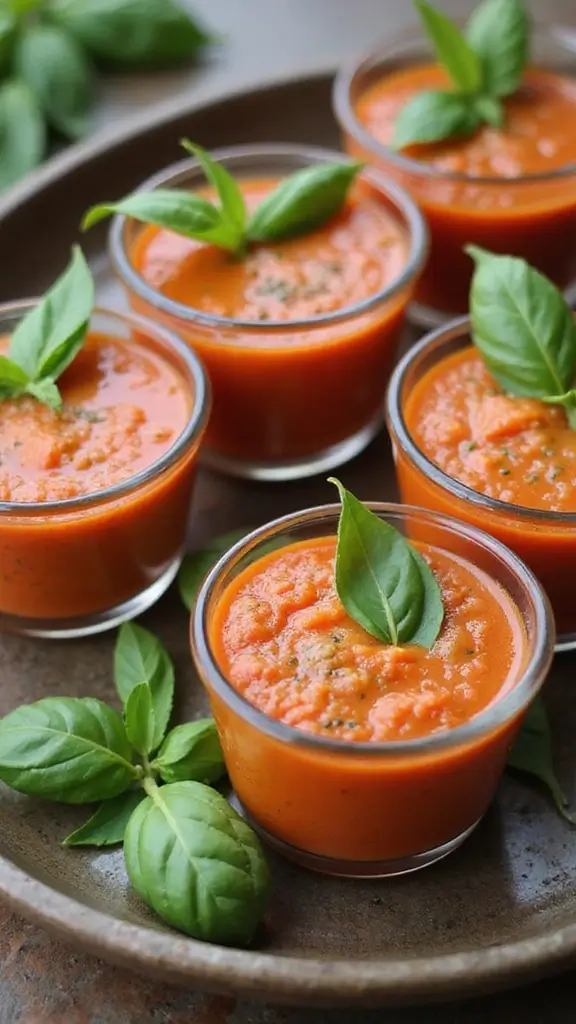
Tomato Basil Soup Shooters bring a playful twist to a beloved classic. These small cups of warm, flavorful soup are perfect for summer parties. Picture yourself sipping these delightful shooters alongside gooey grilled cheese sandwiches. The fresh basil adds a fragrant touch, making each bite a burst of comfort.
Here’s how to make them:
Recipe Overview:
– Servings: 8
– Prep Time: 10 minutes
– Cook Time: 20 minutes
– Total Time: 30 minutes
– Calories: 90 per shooter
Nutrition Information: 90 calories, 3g protein, 16g carbs, 2g fat, 2g fiber.
Ingredients:
– 2 cups canned crushed tomatoes
– 1/2 cup vegetable broth
– 1/4 cup fresh basil, chopped
– 1 garlic clove, minced
– 1 tablespoon olive oil
– Salt and pepper to taste
Instructions:
1. Heat olive oil in a pot over medium heat. Sauté the minced garlic until fragrant.
2. Add the crushed tomatoes and vegetable broth, bringing the mixture to a gentle simmer.
3. Stir in the chopped basil, salt, and pepper.
4. Blend the soup until smooth, then return it to the pot to heat through.
5. Serve in small cups, garnished with a basil leaf for a touch of elegance.
Pro Tips:
– Make it creamy: Stir in a splash of cream or coconut milk for extra richness.
– Prepare ahead: You can make these shooters in advance and warm them just before serving.
Common Questions:
– Can I use fresh tomatoes? Absolutely! Just adjust the cooking time for fresh tomatoes.
– What can I add? A sprinkle of cheddar cheese or a drizzle of pesto elevates the flavor!
These Tomato Basil Soup Shooters are sure to impress your guests. Enjoy the nostalgia and warmth they bring to your table!
10. Apple Cinnamon Energy Bites
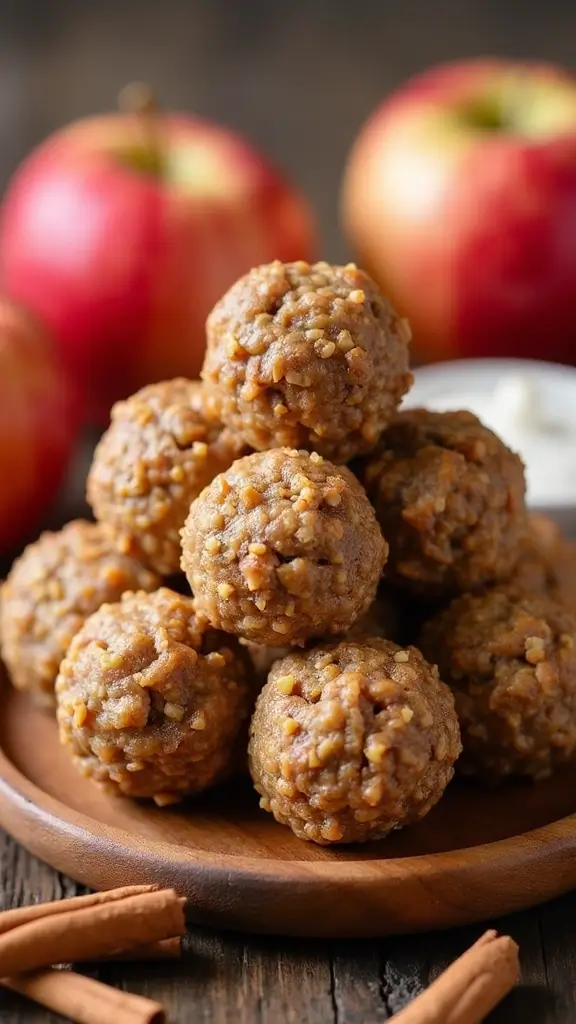
Fall is here, and that means cozy snacks are a must! Apple Cinnamon Energy Bites are the perfect treat to fuel your busy days. These tasty bites blend the sweetness of dried apples with warm cinnamon and hearty oats, giving you energy and flavor in every bite. Plus, they’re super easy to whip up, making them a go-to snack for autumn adventures.
Ready to make your own? Here’s how!
Recipe Overview:
– Servings: 10
– Prep Time: 10 minutes
– Total Time: 10 minutes
– Calories: 100 per bite
Nutrition Information:
100 calories, 3g protein, 15g carbs, 4g fat, 2g fiber.
Ingredients:
– 1 cup rolled oats
– 1/2 cup almond butter (or any nut butter you love)
– 1/4 cup honey
– 1/2 cup dried apple, chopped
– 1 teaspoon ground cinnamon
– A pinch of salt
Instructions:
1. In a mixing bowl, combine all the ingredients. Stir until everything is well mixed.
2. Chill the mixture in the fridge for about 30 minutes. This helps it firm up.
3. Once chilled, roll the mixture into small balls.
4. Store your energy bites in an airtight container in the fridge. They’re perfect for a quick snack anytime!
Feel free to customize your bites! Add chocolate chips or nuts for extra crunch. Make a double batch to freeze some for later—these snacks keep well for busy days ahead!
FAQs:
– Can I use peanut butter instead? Absolutely! Any nut butter you prefer works.
– How long do they last in the fridge? These bites will stay fresh for about a week.
Now you have a delicious, healthy snack ready to enjoy all season long!
11. Pumpkin Spice Muffins
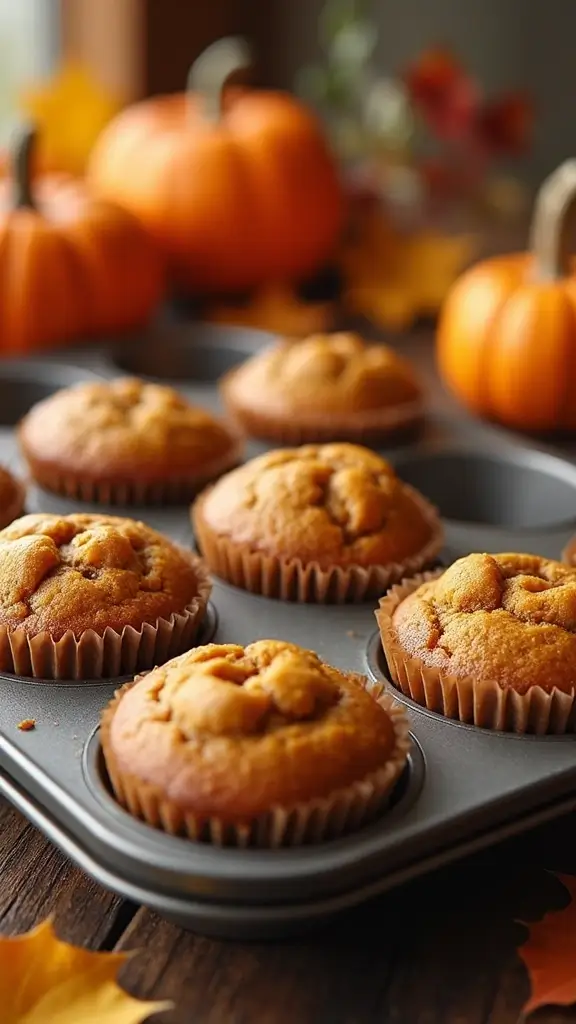
Enjoy the cozy embrace of autumn with Pumpkin Spice Muffins. These delightful treats bring the warm, inviting smell of fall right into your kitchen. With rich pumpkin puree and a blend of comforting spices, they make the perfect snack for any time of day. Whether you enjoy them with your morning coffee or as an afternoon pick-me-up, these muffins will surely please your taste buds!
Ready to bake? Here’s what you need to know:
Recipe Overview:
– Servings: 12
– Prep Time: 15 minutes
– Cook Time: 20 minutes
– Total Time: 35 minutes
– Calories: 180 per muffin
Nutrition Information:
180 calories, 3g protein, 25g carbs, 8g fat, 1g fiber.
Ingredients:
– 1 cup all-purpose flour
– 1/2 cup pumpkin puree
– 1/2 cup sugar
– 1/2 cup vegetable oil
– 2 eggs
– 1 teaspoon baking powder
– 1 teaspoon pumpkin spice
– 1/2 teaspoon salt
Instructions:
1. Preheat your oven to 350°F (175°C). Line a muffin tin with paper liners.
2. In a large bowl, whisk together the flour, sugar, baking powder, pumpkin spice, and salt.
3. In another bowl, mix the pumpkin puree, oil, and eggs until smooth.
4. Combine both mixtures and pour into the muffin liners.
5. Bake for 20 minutes, or until a toothpick inserted in the center comes out clean.
6. Let cool before enjoying!
Feel free to enhance your muffins! Add chocolate chips or nuts for an extra treat. They taste best fresh but can be stored in an airtight container for a few days.
FAQ:
– Can I use whole wheat flour? Yes, but it may change the texture slightly.
– What can I use instead of eggs? Applesauce or flaxseed meal work well as substitutes.
Now, let’s get baking and embrace the flavors of fall!
12. Maple Roasted Sweet Potatoes
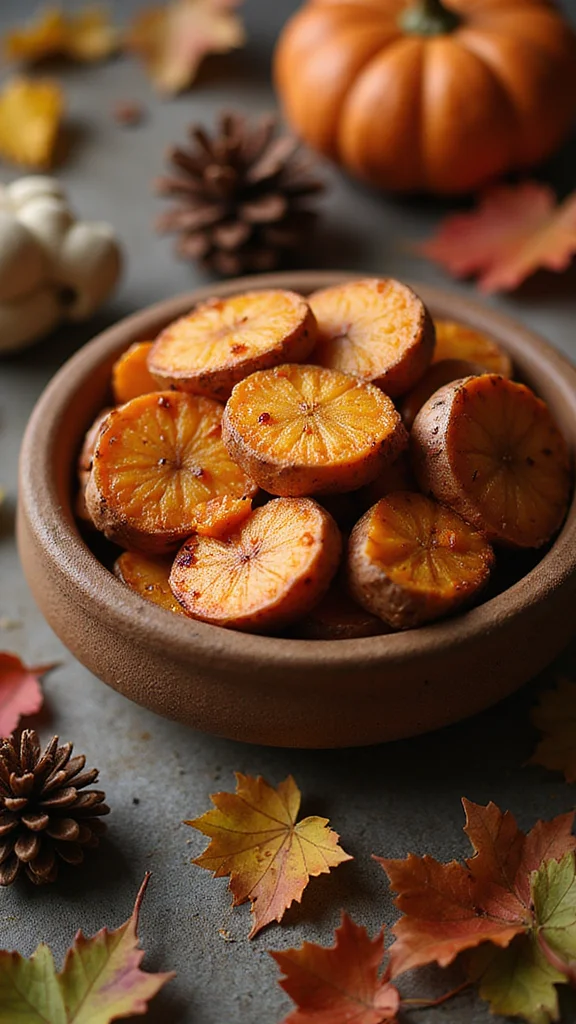
Indulge in the delicious taste of Maple Roasted Sweet Potatoes this fall. Their natural sweetness shines through as they caramelize in the oven, all while being drizzled with rich maple syrup. This dish not only complements your favorite meals, but it also brings warmth and comfort to your table. You’ll find it’s a simple yet elegant way to celebrate the season.
To make these tasty bites, gather your ingredients and follow these easy steps. They’re budget-friendly and perfect for meal prep. You can roast them ahead of time and simply reheat when you’re ready to serve. Imagine the cozy feel they bring to your dinner table, making every meal feel like a special occasion.
Ingredients:
– 4 medium sweet potatoes, cubed
– 1/4 cup olive oil
– 1/4 cup maple syrup
– Salt and pepper to taste
Instructions:
1. Preheat your oven to 425°F (220°C) and line a baking sheet with parchment paper.
2. In a large bowl, mix sweet potatoes with olive oil, maple syrup, salt, and pepper.
3. Spread the sweet potatoes in a single layer on the baking sheet.
4. Roast for 30 minutes, flipping halfway through, until they turn golden brown.
5. Serve warm as a delightful side or a sweet snack.
For an extra kick, sprinkle cinnamon or nutmeg on top before roasting. These sweet potatoes pair wonderfully with roasted meats or can be tossed into a fall salad for added flavor and texture.
Quick Tips:
– Use brown sugar for a caramelized twist.
– Pair with grilled chicken or turkey for a hearty meal.
– Add chopped herbs for a fresh finish.
– Store leftovers in the fridge for easy reheating.
Enjoy the comforting flavors of autumn with each bite of these Maple Roasted Sweet Potatoes!
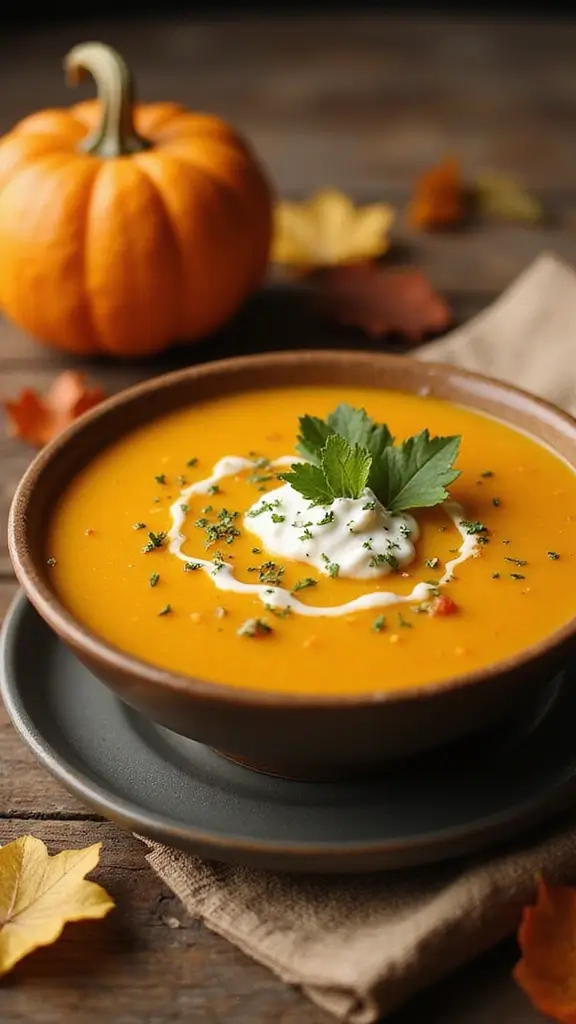
13. Butternut Squash Soup

Warm up your fall days with a comforting bowl of Butternut Squash Soup. This creamy delight bursts with flavor from roasted butternut squash, garlic, and a hint of spice. It’s not just delicious; it’s a fun way to sneak in those veggies while enjoying a hearty snack!
Imagine the sweet aroma of butternut squash roasting in your oven. The vibrant orange color and silky texture make this soup a fall favorite. Whether you’re curled up on the couch or entertaining friends, this dish sets the perfect cozy mood.
Ready to make this tasty soup? Here’s how:
Ingredients:
– 1 medium butternut squash, peeled and cubed
– 1 onion, chopped
– 2 cloves garlic, minced
– 4 cups vegetable broth
– 1/2 teaspoon nutmeg
– Salt and pepper to taste
Instructions:
1. Preheat your oven to 400°F (200°C). Spread out the butternut squash on a baking sheet and roast for about 25 minutes until tender.
2. In a large pot, sauté the chopped onion and minced garlic until soft and fragrant.
3. Add the roasted squash and vegetable broth to the pot, bringing everything to a gentle simmer.
4. Use an immersion blender to blend the mixture until smooth and creamy.
5. Stir in nutmeg, salt, and pepper to taste. Serve hot, and consider topping with a swirl of cream or crunchy croutons for an extra touch.
Feel free to make this soup ahead of time. It keeps well in the fridge and even tastes better the next day!
Frequently Asked Questions:
– Can I freeze the soup? Yes, but fresh is best for flavor!
– Want to mix things up? Add coconut milk for creaminess or chopped apple for sweetness!
This soup is not just a recipe; it’s a warm hug in a bowl, perfect for embracing the fall season. Enjoy every spoonful!
14. Spiced Apple Cider

When the chill of autumn arrives, nothing warms you up quite like a steaming cup of Spiced Apple Cider. This drink blends the rich flavors of cinnamon, cloves, and nutmeg, creating a cozy experience that’s perfect for curling up by the fire or enjoying while watching the leaves fall. Imagine the scent filling your home as you sip this comforting beverage; it truly captures the essence of fall in every drop.
Here’s how you can make your own delightful spiced apple cider. It’s simple and perfect for gatherings or a quiet evening at home. You can easily adjust the sweetness to your liking and even add a splash of rum for a festive twist. Plus, this recipe is great for batch cooking—just pop it in a slow cooker for effortless serving throughout the day.
Recipe Overview:
– Servings: 6
– Prep Time: 10 minutes
– Cook Time: 30 minutes
– Total Time: 40 minutes
– Calories: 120 per cup
Ingredients:
– 8 cups apple cider
– 1/2 teaspoon cinnamon
– 1/4 teaspoon cloves
– 1/4 teaspoon nutmeg
– 1 orange, sliced
– 1/4 cup brown sugar (optional)
Instructions:
1. In a large pot, combine the apple cider, cinnamon, cloves, nutmeg, and orange slices.
2. Bring to a simmer over medium heat for about 30 minutes.
3. If you like it sweeter, stir in brown sugar to taste.
4. Serve warm in your favorite mugs!
Tips:
– Add a splash of rum for an adult version!
– Use a slow cooker for easy serving and keep it warm throughout the evening.
FAQ:
– How long does it last? You can store spiced apple cider in the refrigerator for up to a week.
– Can I use store-bought cider? Absolutely! It’s a quick and convenient option.
This spiced apple cider is more than just a drink; it’s a celebration of the season. Enjoy it at holiday gatherings or on a quiet evening with friends and family.
15. Chocolate Peppermint Bark

Embrace the chill of winter with a delightful treat: Chocolate Peppermint Bark. This festive snack combines creamy chocolate with the cool zing of peppermint. Not only is it easy to prepare, but it also adds a touch of holiday magic to any gathering. You’ll love how quickly it comes together, making it an ideal last-minute dessert for parties or cozy nights in.
You can make this treat in just 15 minutes. Start by gathering your ingredients, which are simple and affordable. It’s a great way to involve kids in the kitchen, too! Plus, it looks stunning when served, making it perfect for sharing with friends or as a thoughtful gift.
Ingredients:
– 12 oz dark chocolate, chopped
– 12 oz white chocolate, chopped
– 1 teaspoon peppermint extract
– Crushed candy canes for topping
Instructions:
1. Melt the dark chocolate in a double boiler until it’s smooth.
2. Spread the melted dark chocolate evenly on a parchment-lined baking sheet.
3. Melt the white chocolate and mix in the peppermint extract.
4. Swirl the white chocolate over the dark layer and sprinkle with crushed candy canes.
5. Refrigerate until set, then break into pieces.
Tips:
– Use high-quality chocolate for richer flavor.
– Package in decorative boxes for a lovely gift.
– Add other flavors like orange or almond extract for variety.
– Store in an airtight container for up to two weeks.
You’ll find this treat not only delicious but also a delightful addition to your winter celebrations. Enjoy making and sharing it with those you love!
16. Gingerbread Cookies

Winter is the perfect time to indulge in Gingerbread Cookies. Their warm spices like ginger and cinnamon wrap you in cozy flavors. Whether for Christmas or a chilly afternoon, these cookies are a must-have. Imagine biting into a soft, spiced cookie while sipping your favorite tea. You can decorate them with icing for a festive touch or enjoy them plain.
Let’s dive into how to make these delightful treats!
Recipe Overview:
– Servings: 24 cookies
– Prep Time: 20 minutes
– Cook Time: 10 minutes
– Total Time: 30 minutes
– Calories: 120 per cookie
Nutrition Information:
120 calories, 1g protein, 17g carbs, 5g fat, 0g fiber.
Ingredients:
– 3 cups all-purpose flour
– 1/4 cup molasses
– 1/2 cup sugar
– 1 teaspoon baking soda
– 1 tablespoon ground ginger
– 1 tablespoon ground cinnamon
– 1/2 teaspoon salt
Instructions:
1. Preheat your oven to 350°F (175°C) and line cookie sheets with parchment paper.
2. In a large bowl, combine flour, sugar, baking soda, ground ginger, ground cinnamon, and salt.
3. Pour in the molasses and mix until a dough forms.
4. Roll out the dough on a floured surface and cut into fun shapes.
5. Bake for about 10 minutes. Let them cool completely before decorating.
Tips:
– Use royal icing for colorful decorations!
– Freeze extras for a sweet treat later.
FAQ:
– Can I use brown sugar instead of white? Absolutely! It adds a deeper flavor.
– How should I store them? Keep your cookies in an airtight container, and they’ll stay fresh for up to a week.
17. Hot Chocolate Bombs

Warm up your winter with Hot Chocolate Bombs—a magical treat that makes every sip feel special. These chocolate spheres hide rich cocoa powder and fluffy marshmallows inside. When you drop one into hot milk, it bursts open, creating a cozy drink that’s perfect for chilly nights. Plus, they’re a fun project to make with family or friends!
Recipe Overview:
– Servings: 4
– Prep Time: 20 minutes
– Cook Time: 5 minutes
– Total Time: 25 minutes
– Calories: 150 per bomb
Nutrition Information:
150 calories, 2g protein, 20g carbs, 7g fat, 1g fiber.
Ingredients:
– 8 oz chocolate (dark or milk)
– 1/2 cup hot cocoa mix
– 1/2 cup mini marshmallows
Instructions:
1. Melt the chocolate in a microwave or double boiler.
2. Coat the insides of silicone molds with the melted chocolate.
3. Chill the molds in the fridge until the chocolate hardens.
4. Fill half of the hardened shells with hot cocoa mix and mini marshmallows.
5. Seal the bombs with more melted chocolate and chill again until firm.
6. To enjoy, drop the bomb into a cup of hot milk and watch it dissolve!
Feel free to get creative! You can add flavors like peppermint or orange zest to the cocoa mix. These treats also make fantastic gifts during the holidays. Just wrap them up in a festive box, and you’re all set!
Tips:
– Store: Keep them in a cool, dry place for up to a month.
– Substitute: Use chocolate chips if you’re in a pinch, but bars melt better.
– Decorate: Drizzle extra chocolate on the finished bombs for a fancy touch.
– Flavor: Don’t hesitate to experiment with different flavorings for variety.
18. Cranberry Brie Bites
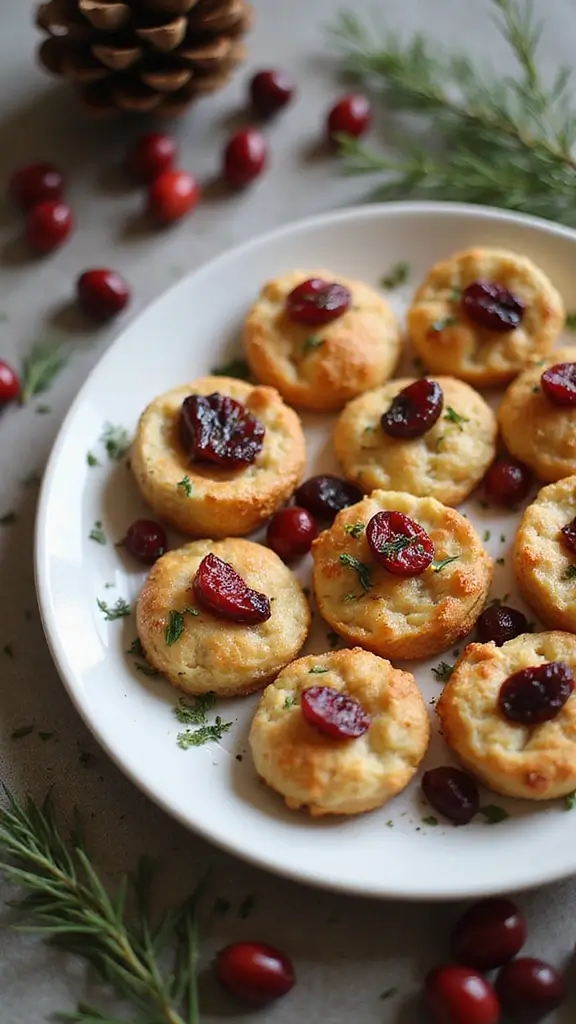
Warm up your winter gatherings with delightful Cranberry Brie Bites. These little treasures combine creamy brie and zesty cranberry sauce, all wrapped in flaky puff pastry. They are not just tasty; they also add a touch of elegance to any holiday table. Your guests will be raving about these bites and begging for the recipe!
Let’s break down how to make these savory treats:
Recipe Overview:
– Servings: 24
– Prep Time: 15 minutes
– Cook Time: 20 minutes
– Total Time: 35 minutes
– Calories: 100 per bite
Nutrition Information:
100 calories, 3g protein, 8g carbs, 7g fat, 0g fiber.
Ingredients:
– 1 sheet of puff pastry, thawed
– 1 wheel of brie cheese
– 1/2 cup cranberry sauce
– 1 egg, beaten (for egg wash)
Instructions:
1. Preheat your oven to 375°F (190°C). Cut the brie into small pieces.
2. Roll out the puff pastry and cut it into squares.
3. Place a piece of brie and a spoonful of cranberry sauce in the center of each square.
4. Fold over the pastry, pinching to seal, and brush with egg wash.
5. Bake for 20 minutes or until they are golden brown.
6. Serve warm, and if you want to elevate the flavors, drizzle with balsamic reduction.
You can prepare these bites ahead of time and freeze them before baking for a quick snack.
FAQ:
– What other fillings can I use? Try fig jam or apple chutney with your brie!
– Can I use a different cheese? Absolutely! Goat cheese works beautifully as well!
These Cranberry Brie Bites are perfect for parties, making your winter gatherings warm and inviting. Enjoy the compliments that come your way!
19. Eggnog Truffles

Indulge in the festive spirit with Eggnog Truffles, a delightful twist on the classic holiday drink. These creamy, rich treats are packed with the warm flavors of nutmeg and a hint of rum. Whether you’re cozying up by the fire or looking for the perfect homemade gift, these truffles are sure to impress. Their melt-in-your-mouth texture makes them utterly irresistible!
Here’s how to whip up a batch that serves 16 in just 15 minutes:
Ingredients:
– 8 oz cream cheese, softened
– 2 cups powdered sugar
– 1/4 cup eggnog
– 1 teaspoon nutmeg
– 1 cup white chocolate chips (for coating)
Instructions:
1. In a mixing bowl, combine softened cream cheese, powdered sugar, eggnog, and nutmeg. Mix until smooth.
2. Roll the mixture into small balls and place them in the fridge until firm, about 30 minutes.
3. Meanwhile, melt the white chocolate in a microwave or double boiler.
4. Dip each chilled truffle into the melted chocolate, allowing excess to drip off. Place them on parchment paper to cool.
5. For an elegant touch, dust with extra nutmeg before serving!
These truffles can be stored in the fridge for up to a week, making them a perfect treat for holiday gatherings or a sweet surprise for friends. You can even switch it up by using milk chocolate instead of white, but expect a different flavor profile.
Enjoy these Eggnog Truffles this season and share the joy of homemade goodness with everyone around you!
• Mix well for a smooth texture
• Chill for the best consistency
• Dust with nutmeg for a festive look
• Use as gifts or holiday treats
20. Winter Citrus Salad
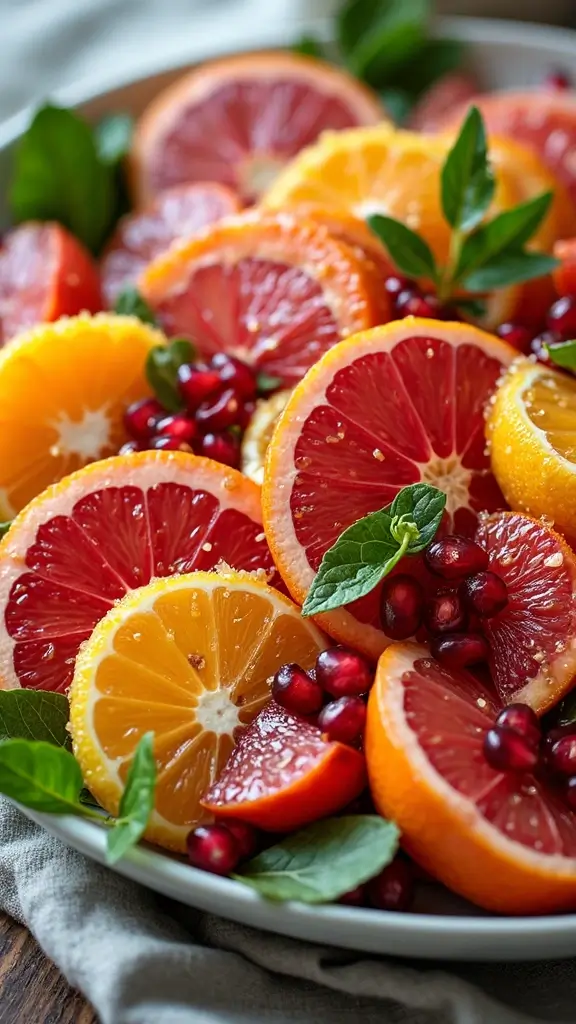
Brighten those chilly winter days with a delightful Winter Citrus Salad. This salad bursts with fresh oranges, zesty grapefruit, and crunchy pomegranate seeds. Drizzled with a touch of honey and topped with mint, it’s a feast for your eyes and taste buds. Perfect as a light dish during the holidays or a healthy snack any day, it’ll help you stay energized through the cold months.
Making this salad is a breeze! You can whip it up in just 15 minutes. Plus, it’s packed with vitamins, making it a smart choice when you want a nutritious boost. And remember, you can prepare it a few hours ahead; just wait to add the honey until you’re ready to serve.
Recipe Overview:
– Servings: 4
– Prep Time: 15 minutes
– Cook Time: 0 minutes
– Total Time: 15 minutes
– Calories: 100 per serving
Nutrition Information:
100 calories, 2g protein, 24g carbs, 0g fat, 3g fiber.
Ingredients:
– 2 oranges, segmented
– 1 grapefruit, segmented
– 1 cup pomegranate seeds
– 1/4 cup honey
– Fresh mint leaves for garnish
Instructions:
1. In a large bowl, mix the segmented oranges, grapefruit, and pomegranate seeds.
2. Drizzle honey over the fruit and toss gently to combine.
3. Top with fresh mint leaves before serving.
4. Serve immediately for the best flavor.
Tips:
Add nuts like walnuts or pistachios for extra crunch!
Mix in kiwi or apple for a fun twist.
Enjoy your salad fresh within a day for optimal taste.
This salad is not just healthy; it’s also a great way to impress guests at your next gathering. So, gather your ingredients and get ready to enjoy a taste of winter sunshine!
21. Chocolate-Covered Pretzels

Indulging in Chocolate-Covered Pretzels during winter is one of life’s simple joys. These sweet and salty snacks are not only fun to make, but they also make delightful gifts. Imagine biting into a crunchy pretzel covered in luscious chocolate, topped with colorful sprinkles or crushed candies. It’s a treat that brings smiles all around, perfect for holiday gatherings or cozy nights in.
Want to whip up a batch? Here’s a quick recipe:
Recipe Overview:
– Servings: 24
– Prep Time: 15 minutes
– Cook Time: 0 minutes
– Total Time: 15 minutes
– Calories: 80 per pretzel
Ingredients:
– 2 cups pretzels (rods or twists)
– 12 oz chocolate (choose dark, milk, or white)
– Assorted toppings (sprinkles, nuts, or crushed candies)
Instructions:
1. Melt the chocolate in a microwave-safe bowl or a double boiler until smooth.
2. Dip each pretzel into the melted chocolate, letting the excess drip off.
3. Place the coated pretzels on parchment paper and sprinkle with your chosen toppings.
4. Allow the chocolate to set before enjoying!
For a fun twist, drizzle contrasting chocolate over the top. You can also package these pretzels in jars for a heartfelt homemade gift that anyone would cherish.
FAQ:
– How long do they last? Store them in an airtight container for up to 2 weeks.
– Can I use gluten-free pretzels? Absolutely! They work just as well.
22. Coconut Macaroons

Treat yourself to a tropical delight with Coconut Macaroons. These sweet, chewy cookies are made from shredded coconut, making them a perfect indulgence for any gathering. Whether you’re hosting a holiday party or just craving something sweet, these macaroons will satisfy your taste buds and impress your guests.
They’re simple to make, needing just a few ingredients you likely have at home. Plus, they take only 30 minutes from start to finish, so you can whip them up in no time! Drizzled with chocolate, they look fancy but are easy enough for anyone to make.
Ready to get started? Here’s your complete recipe:
Ingredients:
– 2 1/2 cups shredded coconut
– 2/3 cup sweetened condensed milk
– 1 teaspoon vanilla extract
– 2 egg whites, beaten until stiff
Instructions:
1. Preheat your oven to 325°F (160°C) and line a baking sheet with parchment paper.
2. In a bowl, mix shredded coconut, sweetened condensed milk, vanilla, and the beaten egg whites until well combined.
3. Drop spoonfuls of the mixture onto the parchment-lined baking sheet.
4. Bake for about 20 minutes, or until they turn golden brown.
5. Allow them to cool before serving.
Pro Tip: Drizzle melted chocolate on top for extra flavor! Store any leftovers in an airtight container to keep them fresh for up to a week.
FAQs:
– Can I freeze them? Yes! They freeze perfectly for up to a month.
– Can I use unsweetened coconut? Yes, but you may want to add a bit of sugar for sweetness.
Enjoy these coconut macaroons as a delightful treat that everyone will love!
23. Mulled Wine

Warm up your winter evenings with a comforting glass of Mulled Wine. This delightful drink brings together rich red wine and a blend of spices, perfect for holiday gatherings or a quiet night by the fireplace. The fragrant aroma of cinnamon and citrus will wrap you in warmth, making every sip a cozy experience.
Here’s how to make it. You’ll need just a few ingredients and about 40 minutes. It’s an easy recipe that lets you enjoy a festive drink without fuss. Gather your friends, or keep it all to yourself for a relaxing evening with a good book.
Ingredients:
– 1 bottle of red wine
– 1/4 cup honey or sugar
– 1 orange, sliced
– 2 cinnamon sticks
– 4 whole cloves
– 2 star anise
Instructions:
1. In a pot, mix the red wine, honey, orange slices, cinnamon sticks, cloves, and star anise.
2. Heat on low for about 30 minutes, stirring occasionally to blend the flavors.
3. Serve warm in mugs, garnished with an orange slice for a festive touch.
Feel free to get creative! Add ginger for a zesty kick or cardamom for extra warmth. Pair your mulled wine with a cheese platter for a delightful experience.
FAQ:
What type of wine should I use? Choose a full-bodied red like Merlot or Cabernet Sauvignon for the best taste.
Can I make this ahead of time? Absolutely! Just reheat it gently before serving to enjoy that cozy flavor again.
This mulled wine will surely become a winter favorite, warming your heart and home all season long.
Mulled Wine
Editor’s Choice
Spicy World Cinnamon Sticks 7 Ounce Bag – 36-44 Sticks – Perfect for Bak…

The Spice Way Star Anise – whole star anise (3 oz) great for baking and tea
Genuine German Mulled Wine Spice Mulling Spices Mix Gluhwein – 18 x 0.5O…
Conclusion
Seasonal snacks are a wonderful way to celebrate the change in weather and the bounty of ingredients each season brings. Whether you’re savoring the fresh produce of spring, the vibrant flavors of summer, the warm spices of fall, or the comforting treats of winter, there’s always something delicious to indulge in. Embrace the seasons with these 23 irresistible snacks and get ready to make memories with friends and family!
From festive gatherings to casual nights at home, these recipes are designed to be quick, fun, and most importantly, absolutely delicious. What will you whip up first?
Note: We aim to provide accurate product links, but some may occasionally expire or become unavailable. If this happens, please search directly on Amazon for the product or a suitable alternative.
This post contains Amazon affiliate links, meaning I may earn a small commission if you purchase through my links, at no extra cost to you.
Frequently Asked Questions
What Are Some Popular Seasonal Snacks for Each Season?
Seasonal snacks can really bring the flavors of each time of year to life! In the spring, think fresh fruit salads and herb-infused dips. For summer, enjoy refreshing popsicles and grilled veggie skewers. As fall rolls in, indulge in pumpkin spice treats and caramel apples. Finally, in winter, warm up with spiced nuts and cozy hot cocoa. Each season brings its own delicious offerings!
How Can I Create Quick Bites for Seasonal Celebrations?
Creating quick bites for seasonal celebrations is easier than you think! For spring, whip up some cucumber sandwiches. In summer, try making caprese skewers with fresh tomatoes and mozzarella. As fall approaches, mini pumpkin muffins are a hit! And during winter, serve up bite-sized cheese and charcuterie boards. These simple yet delightful snacks are sure to impress your guests!
What Are Some Healthy Seasonal Snack Options?
Looking for healthy seasonal snacks? You can’t go wrong with spring snap peas with hummus, summer watermelon slices, and fall apple slices with almond butter. In winter, try roasted chestnuts or baked sweet potato fries. These options are not only nutritious but also bursting with seasonal flavors that celebrate the best of each time of year!
How Do Seasonal Recipes Change With the Weather?
Seasonal recipes adapt beautifully with the weather! In spring, recipes often include lighter ingredients like greens and herbs. Summer brings a focus on fresh fruits and grilled items, while fall introduces hearty flavors like squash and spices. Finally, winter recipes lean towards comfort foods, utilizing warming spices and rich flavors. Embracing these changes keeps your meals exciting and in tune with nature!
What Are Some Unique Fall Flavors to Incorporate into Snacks?
Fall flavors are a delightful way to enhance your snacks! Think of incorporating pumpkin, cinnamon, and nutmeg into your treats. You could create pumpkin spice energy balls or cinnamon apple chips. Also, consider using maple syrup for a sweet touch in your fall snacks. These flavors not only taste great but also evoke the cozy feeling of the season!