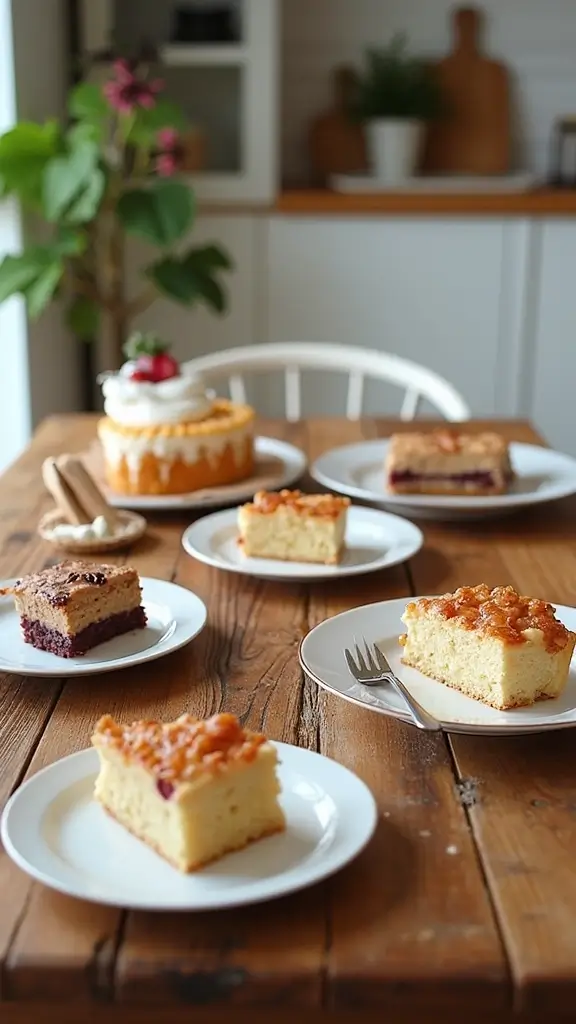
Sweet cravings are a real thing, aren’t they? Whether it’s the end of a long day or a special occasion, there’s nothing like something sugary to lift your spirits. I’ve been on a quest for satisfying treats that are easy to whip up, and I couldn’t help but share my finds with you. If you’re someone who loves baking or just enjoys indulging in sweet delights, you’re in the right place.
In this post, I’ve gathered 19 easy sweet recipes that are perfect for any occasion. These recipes are not only simple but also incredibly delicious, making them great for both novice bakers and seasoned pros. You’ll find something here that fits your mood, whether you’re having a cozy night in or hosting a fun gathering with friends.
What can you expect from these recipes? They are quick, fun, and sure to satisfy your sweet tooth. You’ll discover treats that require minimal ingredients and time, but still pack a punch in flavor. Think gooey brownies, fluffy cakes, and delightful cookies that will have everyone asking for seconds.
So, grab your mixing bowl and get ready to bake! These recipes are crafted with love and designed to bring joy to your kitchen. Let’s dive into the world of sweetness together, and you’ll soon find yourself making these delightful treats on repeat.
Contents
- 1. No-Bake Chocolate Cheesecake
- 2. 5-Minute Mug Cake
- 3. Easy Fruit Parfait
- 4. Classic Rice Krispie Treats
- 5. No-Bake Peanut Butter Bars
- 6. Quick Chocolate Mousse
- 7. No-Bake Strawberry Icebox Cake
- 8. Chocolate-Dipped Pretzels
- 9. Banana Bread Cookies
- 10. Easy Coconut Macaroons
- 11. S’mores Dip
- 12. Cinnamon Roll Casserole
- 13. Chocolate Chip Cookie Dough Bites
- 14. Peanut Butter Chocolate Chip Cookies
- 15. Lemon Bars
- 16. Chocolate Bark
- 17. Apple Nachos
- 18. No-Bake Oreo Cheesecake
- 19. Mint Chocolate Chip Ice Cream
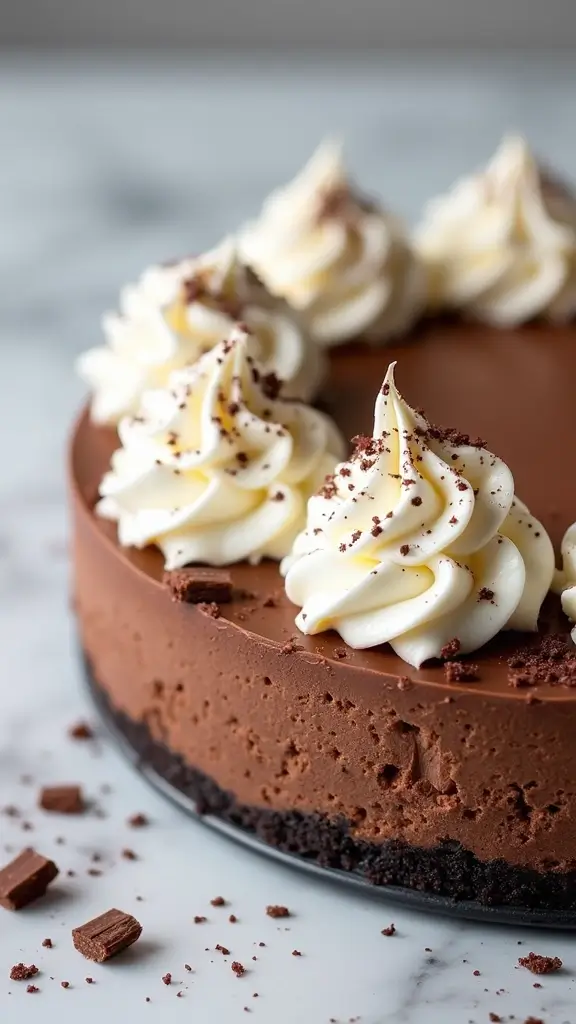
1. No-Bake Chocolate Cheesecake
Treat yourself to a delicious no-bake chocolate cheesecake that’s sure to impress! This creamy dessert is not only rich and decadent, but it also comes together effortlessly. Perfect for warm days, you won’t have to worry about turning on the oven. Just mix, chill, and enjoy!
Imagine slicing into a velvety, chocolate delight that melts in your mouth. The best part? You can make it in advance and let it set in the fridge. It’s the ideal dessert for parties or cozy nights at home.
Here’s how to make it:
Recipe Overview
– Servings: 8
– Prep Time: 20 minutes
– Cook Time: 0 minutes
– Total Time: 4 hours (including chilling)
– Calories: About 350 per slice
Nutrition Information
– Fat: 25g
– Carbohydrates: 30g
– Protein: 7g
– Sugar: 18g
Ingredients List
– 1 ½ cups crushed chocolate cookies
– ½ cup melted butter
– 16 oz cream cheese (softened)
– 1 cup powdered sugar
– 2 cups heavy whipping cream
– 1 cup melted chocolate
– 1 tsp vanilla extract
Step-by-Step Instructions
1. Combine the crushed chocolate cookies and melted butter in a bowl. Mix well.
2. Press the mixture into the bottom of a 9-inch springform pan to create the crust.
3. In a large bowl, beat the softened cream cheese and powdered sugar until smooth.
4. Add the melted chocolate and vanilla extract, mixing until everything is well blended.
5. In another bowl, whip the heavy cream until stiff peaks form.
6. Gently fold the whipped cream into the chocolate mixture to keep it light.
7. Pour the filling over the crust in the springform pan and smooth the top.
8. Chill for at least 4 hours, or overnight, before serving.
Pro Tips:
– Use high-quality chocolate to enhance the flavor.
– Let the cheesecake sit at room temperature for about 10 minutes before serving. This makes slicing easier.
Frequently Asked Questions
– Can I use a different type of cookie for the crust? Yes! Oreos or graham crackers work great.
– How long will it last in the fridge? It stays fresh for up to 5 days if stored properly.
This no-bake chocolate cheesecake is more than just a dessert; it’s a delightful experience you’ll want to repeat. Enjoy every creamy bite!
2. 5-Minute Mug Cake
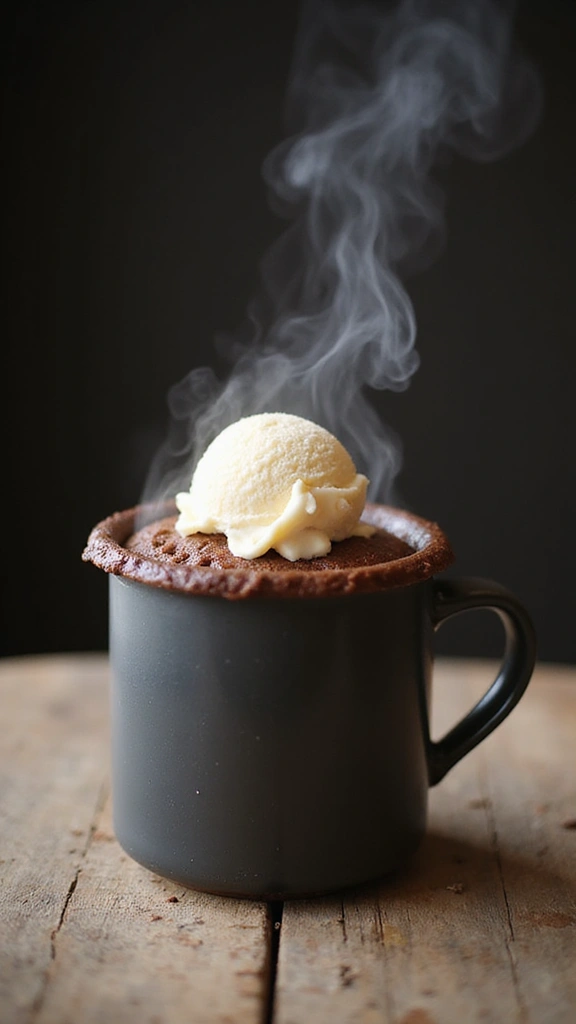
When a sweet craving strikes but you’re short on time, the 5-Minute Mug Cake is here to save the day. This delightful treat is quick, simple, and incredibly satisfying. In just five minutes, you can indulge in a warm, fluffy chocolate cake made right in your microwave. Perfect for those solo dessert moments, you can enjoy it all by yourself, no sharing required!
This mug cake is also highly adaptable. Want a twist? Add chocolate chips, nuts, or even fresh fruit to elevate your cake. Let’s dive into how to make this scrumptious dessert!
Recipe Overview
– Servings: 1
– Prep Time: 2 minutes
– Cook Time: 3 minutes
– Total Time: 5 minutes
– Calories: Approximately 350
Nutrition Information
– Fat: 15g
– Carbohydrates: 45g
– Protein: 5g
– Sugar: 20g
Ingredients List
– 4 tbsp all-purpose flour
– 4 tbsp sugar
– 2 tbsp cocoa powder
– 3 tbsp milk
– 2 tbsp vegetable oil
– 1/2 tsp baking powder
– A pinch of salt
Step-by-Step Instructions
1. Grab a microwave-safe mug and mix together the flour, sugar, cocoa powder, and baking powder.
2. Pour in the milk and vegetable oil. Stir until everything is well combined and smooth.
3. Microwave on high for 1-2 minutes, or until the cake has risen and looks fully cooked.
4. Let it cool slightly before digging in straight from the mug.
Tips for the Best Mug Cake
– Adjust the cooking time based on your microwave’s power.
– Top with whipped cream or a scoop of ice cream for an extra treat!
Frequently Asked Questions
– Can I use whole wheat flour? Yes, though the texture may change a bit.
– What toppings can I use? Try caramel sauce, chocolate syrup, or fresh fruits for fun variations!
This mug cake is a lifesaver for late-night cravings or a quick afternoon snack. Make it your go-to for instant dessert joy!
3. Easy Fruit Parfait
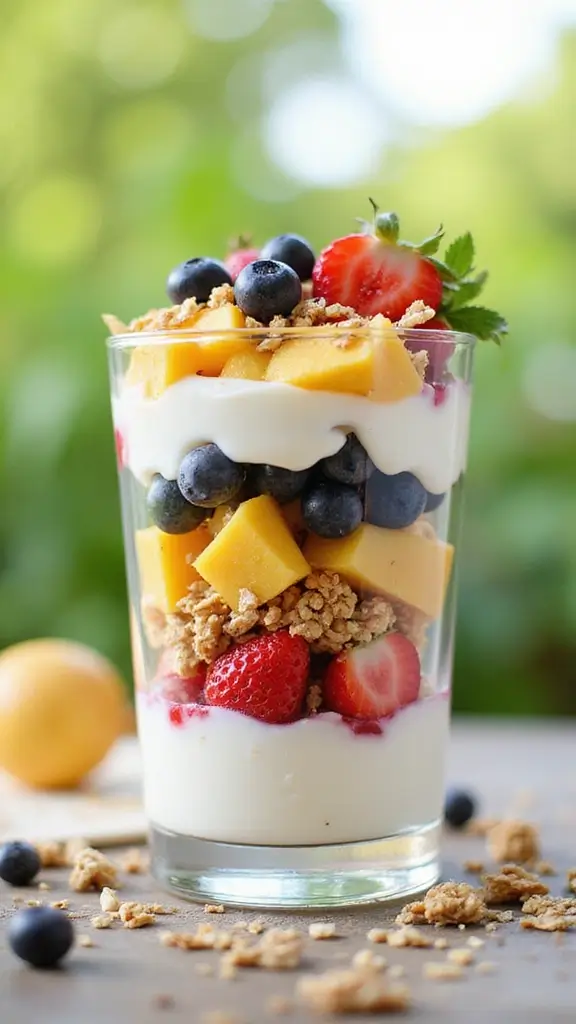
Brighten your mornings or impress your guests with a stunning fruit parfait! This easy dessert combines creamy yogurt, luscious fruits, and crunchy granola for a treat that’s as good for you as it is delicious. With its vibrant layers, this parfait is a feast for your eyes and your taste buds.
Feel free to mix and match seasonal fruits to keep it fresh. Whether you’re serving it for breakfast or a light dessert, this parfait showcases your culinary flair without requiring much effort. Let’s dive into the recipe!
Recipe Overview
– Servings: 4
– Prep Time: 10 minutes
– Cook Time: 0 minutes
– Total Time: 10 minutes
– Calories: Approximately 200 per serving
Nutrition Information
– Fat: 5g
– Carbohydrates: 35g
– Protein: 6g
– Sugar: 10g
Ingredients List
– 2 cups yogurt (your favorite flavor)
– 2 cups mixed fresh fruits (try berries, bananas, or kiwis)
– 1 cup granola
– Honey or maple syrup (optional)
Step-by-Step Instructions
1. Grab a clear glass or bowl and start with a layer of yogurt at the bottom.
2. Add a colorful layer of mixed fruits on top of the yogurt.
3. Sprinkle a layer of granola over the fruits for that satisfying crunch.
4. Repeat the layers until your glass is full, finishing with granola on top.
5. Drizzle honey or maple syrup if you want an extra touch of sweetness.
Tips for the Best Parfait
– Choose seasonal fruits for the best flavor and freshness.
– Use Greek yogurt for a thicker texture and added protein.
– Keep granola separate until serving to maintain its crunch.
– Try dairy-free options like whipped coconut cream if you prefer.
Frequently Asked Questions
– Can I prepare this in advance? Yes! Just add granola right before serving to keep it crunchy.
– What if I don’t like yogurt? Substitute with whipped coconut cream for a delicious dairy-free option!
This fruit parfait is not just a recipe; it’s a delightful way to nourish your body and satisfy your sweet cravings. Enjoy every colorful bite!
4. Classic Rice Krispie Treats
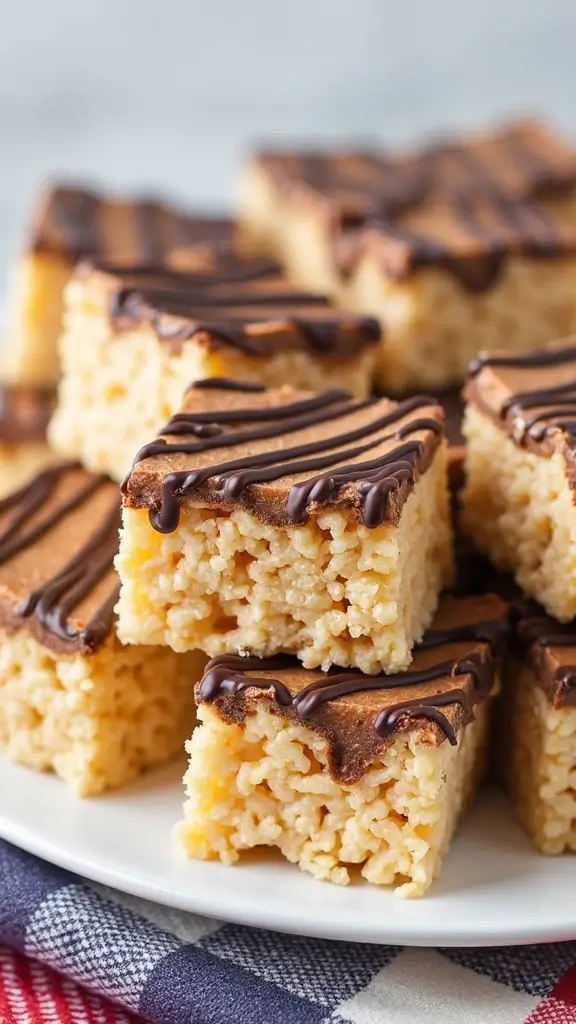
Relive your childhood with delicious classic Rice Krispie treats! These chewy, sweet squares are super easy to whip up. With just three simple ingredients, they are a go-to for a quick dessert or snack.
Perfect for parties, lunchboxes, or a cozy afternoon treat, you can even personalize them. Add chocolate chips, sprinkles, or even nuts for a fun twist. These treats are a sweet reminder that sometimes, simple is best!
Recipe Overview
– Servings: 12
– Prep Time: 10 minutes
– Cook Time: 0 minutes
– Total Time: 30 minutes (including cooling)
– Calories: Approximately 90 per square
Nutrition Information
– Fat: 2g
– Carbohydrates: 17g
– Protein: 1g
– Sugar: 7g
Ingredients List
– 3 cups Rice Krispies cereal
– 4 cups mini marshmallows
– 3 tbsp butter
Step-by-Step Instructions
1. In a large saucepan, melt the butter over low heat.
2. Add the mini marshmallows and stir until melted and smooth.
3. Remove from heat, then mix in the Rice Krispies until well coated.
4. Press the mixture into a greased 9×13 inch pan and let it cool.
5. Once set, cut into squares and enjoy!
Tips for the Best Treats
– Use parchment paper for easy removal from the pan.
– Don’t overheat the marshmallows; they should be melted but not boiling.
Frequently Asked Questions
– Can I add flavors? Try vanilla extract or cocoa powder!
– How long do they stay fresh? Store in an airtight container for up to a week.
These Rice Krispie treats are quick, easy, and oh-so-delicious. Make a batch today and enjoy the simple joy of this nostalgic snack!
5. No-Bake Peanut Butter Bars
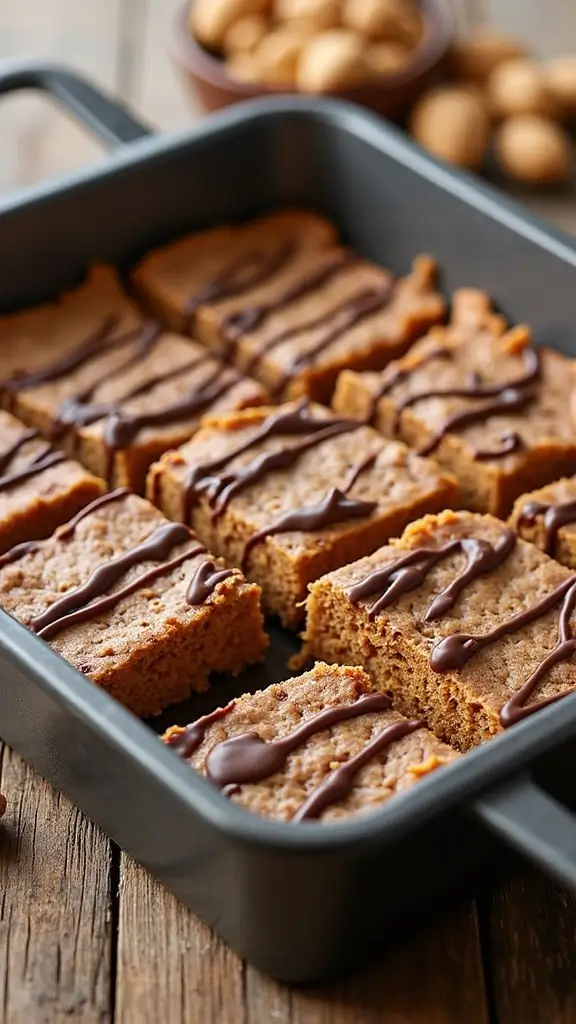
Craving a delicious treat that doesn’t require baking? Try these no-bake peanut butter bars! Perfect for snack time or as a sweet dessert, they’re creamy, crunchy, and oh-so-satisfying. Plus, they come together in just minutes and keep well in the fridge for later.
You can whip up these bars with just a few ingredients. They are rich in protein and a fantastic way to use up leftover peanut butter. Let’s dive into how to make these mouthwatering bars.
Recipe Overview
– Servings: 10
– Prep Time: 10 minutes
– Chill Time: 2 hours
– Calories: About 250 per bar
Nutrition Information
– Fat: 12g
– Carbohydrates: 31g
– Protein: 8g
– Sugar: 15g
Ingredients
– 1 cup peanut butter
– 1/2 cup honey
– 2 cups oats
– 1/2 cup chocolate chips
Making Your Bars
1. In a bowl, mix the peanut butter and honey until smooth.
2. Add in the oats and stir until fully blended.
3. Press the mixture into a lined 8×8 inch baking dish.
4. Melt the chocolate chips and drizzle over the top.
5. Refrigerate for at least 2 hours until firm, then cut into bars.
Tips for the Best Bars
– Use creamy peanut butter for a smoother texture.
– Add nuts or dried fruits for extra flavor and crunch.
Frequently Asked Questions
– Can I substitute maple syrup for honey? Yes, it’s a great vegan option!
– How do I store these bars? Keep them in an airtight container in the fridge for up to a week.
These no-bake peanut butter bars are not just quick and easy; they are a wholesome treat you’ll love to make again and again!
6. Quick Chocolate Mousse

Indulge in a rich and creamy chocolate mousse that’s surprisingly easy to whip up! This dessert is perfect for any occasion, from a casual weeknight treat to a fancy dinner party. With its velvety texture and deep chocolate flavor, it’s sure to impress everyone.
Top it off with fresh berries or a dollop of whipped cream for an extra touch. You’ll love how quickly this dessert comes together, making it a go-to recipe.
Recipe Overview
– Servings: 4
– Prep Time: 10 minutes
– Cook Time: 0 minutes
– Chill Time: 20 minutes
– Calories: About 300 per serving
Nutrition Information
– Fat: 20g
– Carbohydrates: 22g
– Protein: 4g
– Sugar: 15g
Ingredients
– 1 cup heavy cream
– 1 cup chocolate chips
– 2 tbsp sugar
– 1 tsp vanilla extract
Instructions
1. Melt the chocolate chips in a saucepan over low heat until smooth.
2. In a mixing bowl, whip the heavy cream, sugar, and vanilla until stiff peaks form.
3. Gently fold the melted chocolate into the whipped cream until fully blended.
4. Spoon the mousse into serving dishes and chill for at least 20 minutes before serving.
Tips for the Best Mousse
– Chill your mixing bowl before whipping the cream for better results.
– Garnish with chocolate shavings or fresh berries for a beautiful finish.
Frequently Asked Questions
– Can I use dark chocolate? Absolutely! Dark chocolate will give your mousse a more intense flavor.
– How long can I store it? Enjoy your mousse within two days, stored in the fridge.
This chocolate mousse is not just simple; it’s a delightful treat that will satisfy your sweet cravings. Enjoy creating this easy dessert!
7. No-Bake Strawberry Icebox Cake
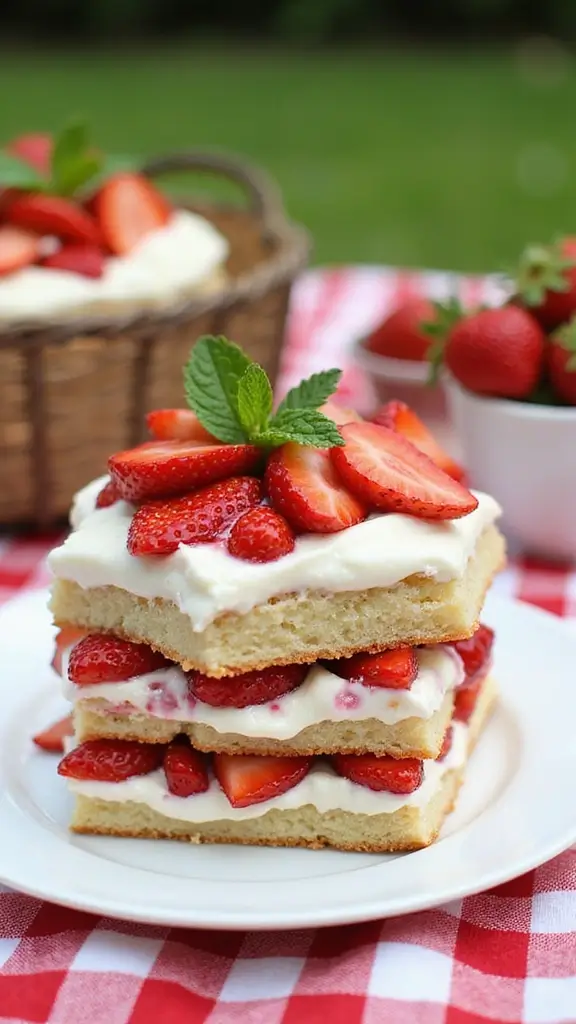
Get ready to enjoy a delicious no-bake strawberry icebox cake that screams summer! This easy dessert combines fresh strawberries, fluffy whipped cream, and crunchy graham crackers. It’s the perfect treat for those hot days when you want something light and refreshing. Plus, you can whip it up in just 15 minutes and let it chill!
Imagine impressing your friends at a potluck or family gathering with this stunning cake. It looks beautiful and tastes even better, creating sweet memories with every slice.
Here’s everything you need to make it:
Recipe Overview
– Servings: 8
– Prep Time: 15 minutes
– Cook Time: 0 minutes
– Total Time: 4 hours (including chilling)
– Calories: Approximately 220 per slice
Nutrition Information
– Fat: 9g
– Carbohydrates: 30g
– Protein: 2g
– Sugar: 17g
Ingredients List
– 2 cups heavy cream
– 1 cup powdered sugar
– 1 lb fresh strawberries (sliced)
– 1 package graham crackers
Step-by-Step Instructions
1. In a large mixing bowl, beat the heavy cream and powdered sugar until soft peaks form.
2. Start with a layer of graham crackers at the bottom of a rectangular dish.
3. Spread half of the whipped cream over the crackers, then add a layer of sliced strawberries.
4. Repeat the layers, finishing with a generous layer of whipped cream on top.
5. Chill in the fridge for at least 4 hours, or overnight for best results.
Tips for the Best Cake
– Use fresh strawberries for a burst of flavor; frozen ones can turn mushy.
– Garnish with extra strawberries for a stunning presentation.
Frequently Asked Questions
– Can I use other berries? Yes! Blueberries or raspberries make great substitutes.
– How long can I store this? For the best taste, eat within 3 days.
This no-bake strawberry icebox cake is a must-have summer dessert that brings joy and nostalgia to your table with every bite!
8. Chocolate-Dipped Pretzels

Indulge in the delightful crunch of chocolate-dipped pretzels! These treats offer a perfect mix of salty and sweet that will keep you reaching for more. Whether you’re hosting a party or looking for a fun family activity, these pretzels are easy to make and even easier to customize. Try using different chocolates and toppings like colorful sprinkles or crunchy nuts to make them uniquely yours. Your friends and family will be impressed!
Here’s how to whip them up quickly:
Recipe Overview
– Servings: 12
– Prep Time: 15 minutes
– Cook Time: 0 minutes
– Total Time: 30 minutes (including cooling)
– Calories: Approximately 150 per serving
Nutrition Information
– Fat: 8g
– Carbohydrates: 20g
– Protein: 2g
– Sugar: 9g
Ingredients List
– 1 bag pretzel rods
– 1 cup milk or dark chocolate chips
– 1/2 cup toppings (sprinkles, chopped nuts, coconut flakes, etc.)
Step-by-Step Instructions
1. Melt the chocolate chips in a microwave-safe bowl. Heat in 30-second bursts, stirring until smooth.
2. Dip each pretzel rod halfway into the melted chocolate.
3. Roll the chocolate-covered rod in your favorite toppings before placing it on a parchment-lined tray.
4. Allow the pretzels to cool until the chocolate hardens.
Tips for Success
– Use a fork for easier dipping and to shake off excess chocolate.
– Mix and match chocolate types for exciting flavors.
Frequently Asked Questions
– Can I use white chocolate? Yes! White chocolate adds a delicious twist.
– How do I store them? Keep in an airtight container at room temperature for about a week.
Chocolate-dipped pretzels are more than just a snack; they’re a delightful way to satisfy your cravings while keeping things fun. Enjoy making these sweet bites over and over again!
9. Banana Bread Cookies
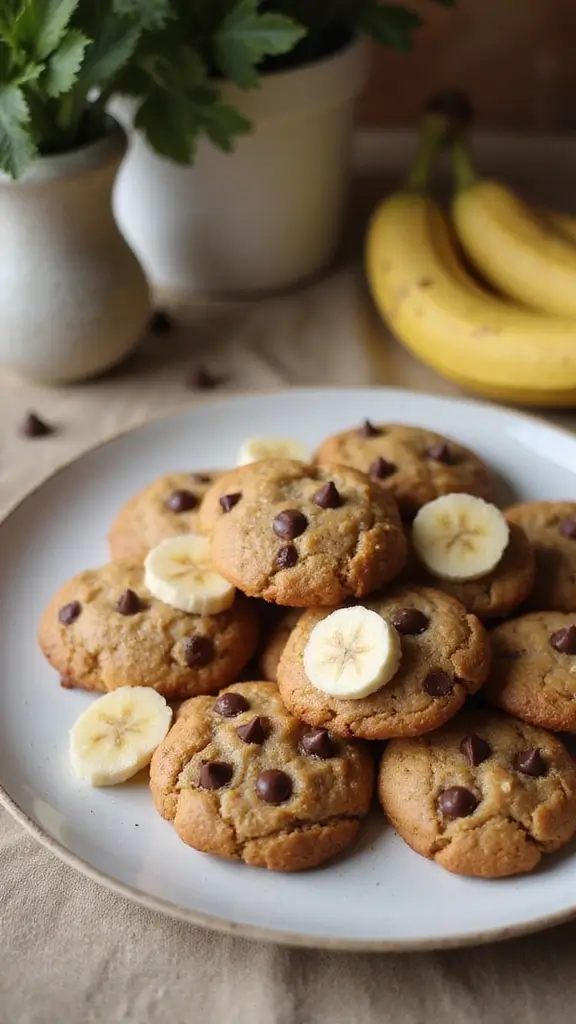
Craving something sweet and comforting? Try banana bread cookies! These treats blend the classic flavors of banana bread into soft, chewy cookies that will keep you coming back for more. They’re perfect for using up those overripe bananas sitting on your counter and make an excellent snack for family or friends.
Here’s how to whip up these delightful cookies in no time!
Recipe Overview
– Servings: 12
– Prep Time: 10 minutes
– Cook Time: 10–12 minutes
– Total Time: 22 minutes
– Calories: About 120 per cookie
Nutrition Information
– Fat: 4g
– Carbohydrates: 18g
– Protein: 2g
– Sugar: 7g
Ingredients
– 1 cup mashed ripe bananas
– 1 cup brown sugar
– 2 cups flour
– 1/2 cup butter (softened)
– 1 tsp baking soda
– 1/2 tsp salt
Instructions
1. Preheat your oven to 350°F (175°C).
2. In a bowl, cream the softened butter and brown sugar until smooth.
3. Add the mashed bananas and mix well to combine.
4. Gradually stir in the flour, baking soda, and salt until everything is just mixed together.
5. Scoop spoonfuls of dough onto a greased baking sheet, spacing them out.
6. Bake for 10 to 12 minutes until the edges are lightly golden.
Tips for the Best Cookies
– Use very ripe bananas for a sweeter flavor.
– Let your cookies cool for a few minutes on the baking sheet before transferring them to a wire rack.
Frequently Asked Questions
– Can I add chocolate chips? Yes! They add a delicious twist.
– How should I store them? Keep in an airtight container for up to a week.
These banana bread cookies are a delightful way to satisfy your sweet tooth. They’re not only easy to make but also a crowd-pleaser. Happy baking!
10. Easy Coconut Macaroons

If you’re a coconut lover, these Easy Coconut Macaroons will quickly become your favorite treat! Imagine biting into a chewy, coconut-packed delight with a crisp exterior. These little gems are not only simple to whip up but also require just a handful of ingredients, making them perfect for those last-minute dessert cravings. For a delightful twist, dip the bottoms in chocolate to elevate their flavor and wow your friends and family.
Recipe Overview
– Servings: 16
– Prep Time: 15 minutes
– Cook Time: 20 minutes
– Total Time: 35 minutes
– Calories: About 150 per macaroon
Nutrition Information
– Fat: 8g
– Carbohydrates: 20g
– Protein: 2g
– Sugar: 12g
Ingredients List
– 2 1/2 cups shredded coconut
– 1/2 cup sugar
– 1/4 cup almond flour
– 2 egg whites
– 1 tsp vanilla extract
Step-by-Step Instructions
1. Preheat your oven to 325°F (160°C).
2. In a mixing bowl, combine the shredded coconut, sugar, almond flour, and vanilla extract.
3. In a separate bowl, whisk the egg whites until frothy, then gently fold them into the coconut mixture.
4. Drop spoonfuls of the mixture onto a lined baking sheet, spacing them out.
5. Bake for 15-20 minutes, or until they turn golden brown.
Pro Tips for the Best Macaroons:
– Let the macaroons cool completely before removing them from the baking sheet to keep their shape.
– For a touch of elegance, dip the bottoms in melted chocolate after baking.
Frequently Asked Questions:
– Can I use sweetened coconut? Yes, using sweetened coconut is fine; just adjust the sugar if needed.
– How do I store them? Place them in an airtight container, and they’ll stay fresh for several days.
These coconut macaroons are little bites of paradise, perfect for satisfying your sweet tooth and impressing your guests! Enjoy making them over and over again!
11. S’mores Dip
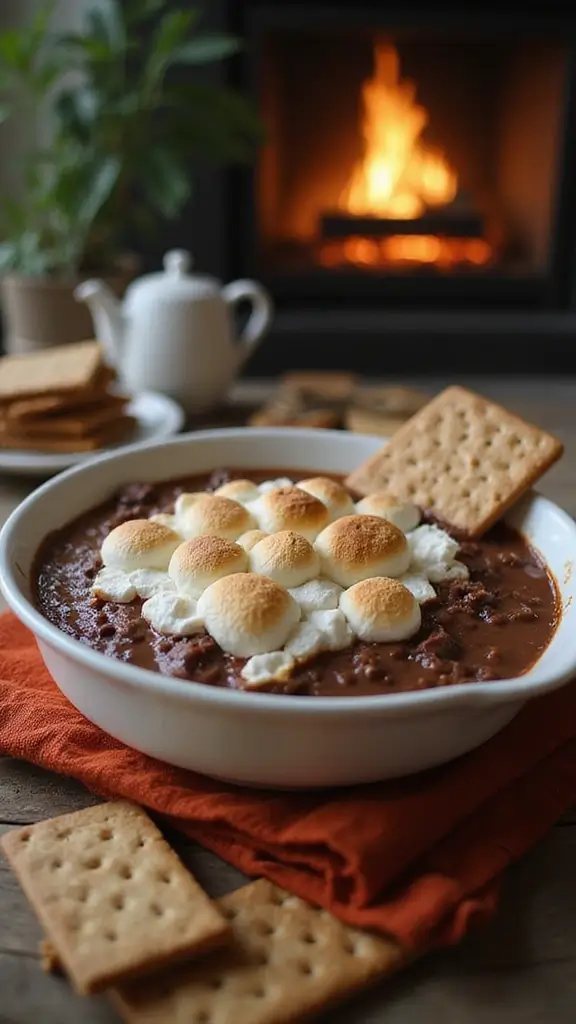
Craving s’mores but stuck indoors? Try this s’mores dip that captures that campfire magic without the hassle. It’s warm, gooey, and perfect for sharing during movie nights or parties. Picture this: melted chocolate and soft marshmallows, all ready for you to dip graham crackers into. It’s a fun twist on a classic treat that will have everyone coming back for seconds!
Here’s how to whip it up in no time. Gather your ingredients and follow these simple steps. You’ll have a crowd-pleaser on your hands in just 20 minutes.
Recipe Overview
– Servings: 8
– Prep Time: 10 minutes
– Cook Time: 10 minutes
– Total Time: 20 minutes
– Calories: Approximately 200 per serving
Nutrition Information
– Fat: 8g
– Carbohydrates: 30g
– Protein: 2g
– Sugar: 18g
Ingredients List
– 1 cup chocolate chips
– 2 cups mini marshmallows
– 1 package graham crackers
Step-by-Step Instructions
1. Preheat your oven to 350°F (175°C).
2. Spread the chocolate chips evenly in a baking dish.
3. Sprinkle mini marshmallows on top of the chocolate.
4. Bake for about 10 minutes, until the marshmallows are golden and the chocolate is gooey.
5. Serve warm with graham crackers for dipping.
Tips for the Best S’mores Dip
– Mix semi-sweet and milk chocolate for extra flavor.
– Watch the marshmallows closely to avoid burning.
Frequently Asked Questions
– Can I make this ahead of time? It’s best fresh from the oven for maximum gooiness.
– What can I dip besides graham crackers? Try fruit slices, pretzels, or even cookies for a twist!
This s’mores dip is a sweet, nostalgic treat that brings everyone together. Enjoy every delicious bite!
12. Cinnamon Roll Casserole

Wake up to a warm hug in a dish with this delightful cinnamon roll casserole! Imagine the sweet aroma of cinnamon filling your kitchen as you gather friends and family for brunch. This easy recipe takes everything you love about classic cinnamon rolls and transforms it into a shareable delight that everyone will love. Drizzle it with cream cheese icing for that extra touch of sweetness!
Ready to whip this up? Here’s what you’ll need:
Ingredients:
– 2 cans of cinnamon rolls (with icing)
– 4 large eggs
– 1/2 cup of milk
– 1 tsp of vanilla extract
– 1 tsp of ground cinnamon
Instructions:
1. Preheat your oven to 375°F (190°C).
2. Cut the cinnamon rolls into quarters and place them in a greased 9×13 inch baking dish.
3. In a bowl, whisk together the eggs, milk, vanilla, and cinnamon until smooth.
4. Pour the egg mixture over the cinnamon rolls, making sure they are well coated.
5. Bake for 25-30 minutes or until golden brown.
6. Drizzle with the icing from the cinnamon roll package just before serving.
To make this dish even better:
– Add chopped nuts or fruits for a delightful crunch.
– Serve it warm to enjoy the full flavor experience.
FAQs:
– Can I prepare this the night before? Yes! Just cover it and pop it in the fridge before baking.
– What can I use instead of cinnamon rolls? Any type of sweet bread works great!
This cinnamon roll casserole is sure to become a beloved breakfast staple. It’s not just a recipe; it’s a sweet way to celebrate every morning!
13. Chocolate Chip Cookie Dough Bites

If you’re a cookie dough lover, you’re in for a treat! These Chocolate Chip Cookie Dough Bites are not only safe to eat raw but also bursting with flavor. They’re quick to whip up and perfect for satisfying your sweet tooth any time of the day.
Imagine reaching into your fridge for a cold, chewy bite of cookie dough bliss. You can make these treats in just 10 minutes, and they store well. Every bite is a delightful mix of buttery richness and chocolatey goodness, making them a go-to snack for you and your family!
Recipe Overview
– Servings: 12
– Prep Time: 10 minutes
– Cook Time: 0 minutes
– Total Time: 10 minutes
– Calories: About 110 per bite
Nutrition Information
– Fat: 6g
– Carbohydrates: 12g
– Protein: 2g
– Sugar: 5g
Ingredients List
– 1/2 cup butter (softened)
– 1/4 cup brown sugar
– 1/4 cup sugar
– 1 tsp vanilla extract
– 1 cup flour (heat-treated)
– 1/2 cup chocolate chips
Step-by-Step Instructions
1. Cream the softened butter, brown sugar, and white sugar together in a mixing bowl until smooth.
2. Mix in the vanilla extract and heat-treated flour until everything is combined.
3. Gently fold in the chocolate chips.
4. Scoop tablespoon-sized portions and roll them into balls.
5. Chill the bites in the refrigerator until they’re firm.
Tips for the Best Bites
– Heat-Treat Your Flour: Bake flour at 350°F for 5 minutes to make it safe.
– Get Creative: Add nuts or dried fruits for extra flavor!
Frequently Asked Questions
– Can I freeze these bites? Yes, they freeze perfectly for a quick treat later.
– What if I can’t find heat-treated flour? Just heat regular flour in the oven as mentioned above!
These cookie dough bites are a fun and guilt-free indulgence, perfect for any occasion. Enjoy them at home or share them with friends!
14. Peanut Butter Chocolate Chip Cookies
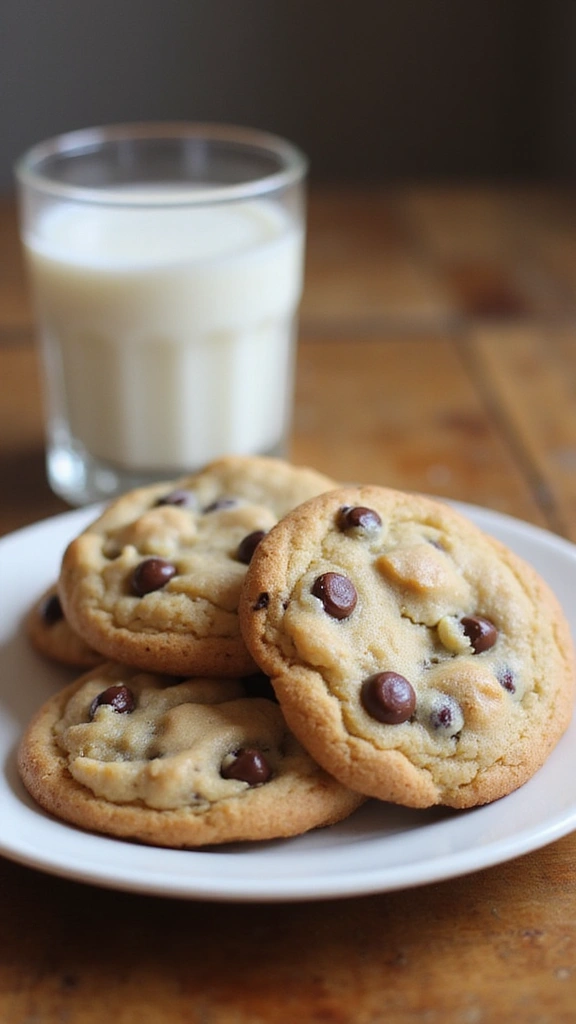
Indulge in the delightful world of Peanut Butter Chocolate Chip Cookies, a must-have for any peanut butter enthusiast. These cookies are soft, chewy, and bursting with rich chocolate chips, making every bite a treat for your taste buds. With just a handful of ingredients, you can create this classic cookie that’s perfect for any occasion.
Here’s a quick look at what you’ll be making:
– Servings: 24 cookies
– Prep Time: 10 minutes
– Cook Time: 10 minutes
– Total Time: 20 minutes
– Calories: About 130 per cookie
Nutrition Information:
– Fat: 6g
– Carbohydrates: 16g
– Protein: 3g
– Sugar: 8g
Ingredients:
– 1 cup peanut butter
– 1 cup brown sugar
– 1 egg
– 1 cup chocolate chips
Instructions:
1. Preheat your oven to 350°F (175°C).
2. In a bowl, combine the peanut butter, brown sugar, and egg. Mix until smooth.
3. Gently fold in the chocolate chips until they are evenly distributed.
4. Drop spoonfuls of dough onto a greased baking sheet.
5. Bake for 10-12 minutes until the cookies are golden brown.
Helpful Tips:
– Use creamy peanut butter for a smoother cookie texture.
– Let the cookies cool on the baking sheet for a few minutes before transferring them to a wire rack.
Common Questions:
– Can I add nuts? Yes! Chopped peanuts will add a nice crunch.
– How do I store these cookies? Keep them in an airtight container for up to a week.
These cookies capture everything you love about peanut butter—soft, chewy, and oh-so-delicious! Bake a batch and enjoy them fresh out of the oven or save some for later. You won’t be able to stop at just one!
15. Lemon Bars
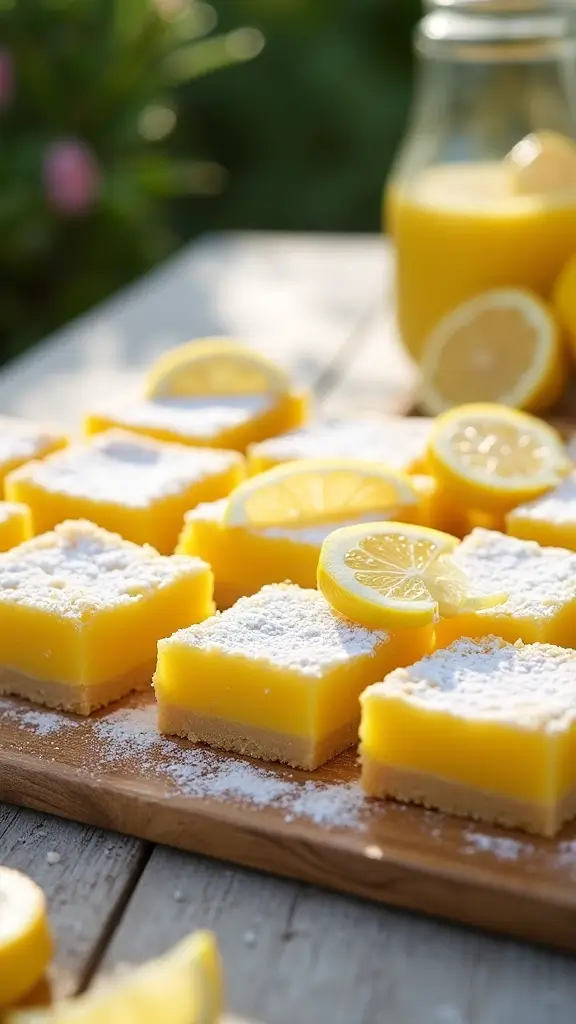
Brighten your day with delicious lemon bars! These tasty treats blend the zingy taste of fresh lemons with a rich, buttery crust. They’re perfect for parties or just a sweet snack at home. Once you try them, you’ll want to make these bars again and again.
Lemon bars are simple to whip up and can be enjoyed at room temperature. They’re a great option for picnics and potlucks, as their sweet and tangy flavor will have everyone asking for more. Plus, chilling them in the fridge adds a refreshing twist!
Here’s how to make your own lemon bars:
Ingredients:
– 1 ½ cups all-purpose flour
– ½ cup powdered sugar
– ½ cup unsalted butter, softened
– 2 cups granulated sugar
– 4 large eggs
– ½ cup fresh lemon juice
– 1 tsp baking powder
Instructions:
1. Preheat your oven to 350°F (175°C).
2. In a large bowl, combine the flour, powdered sugar, and softened butter until crumbly.
3. Press this mixture into the bottom of a greased 9×13 inch pan.
4. Bake for 15-20 minutes until lightly golden.
5. In another bowl, whisk together the granulated sugar, eggs, lemon juice, and baking powder.
6. Pour this mixture over the baked crust and bake for an additional 20 minutes.
7. Allow to cool before slicing into squares.
Tips:
– Chill in the fridge for a few hours for a refreshing treat.
– Dust with powdered sugar before serving for a beautiful finish.
FAQs:
– Can I use bottled lemon juice? Fresh lemon juice is best for flavor.
– How should I store lemon bars? Keep them in an airtight container in the fridge for up to a week.
These lemon bars are perfect for anyone who loves a sweet treat with a kick! Enjoy making them and sharing with friends.
16. Chocolate Bark
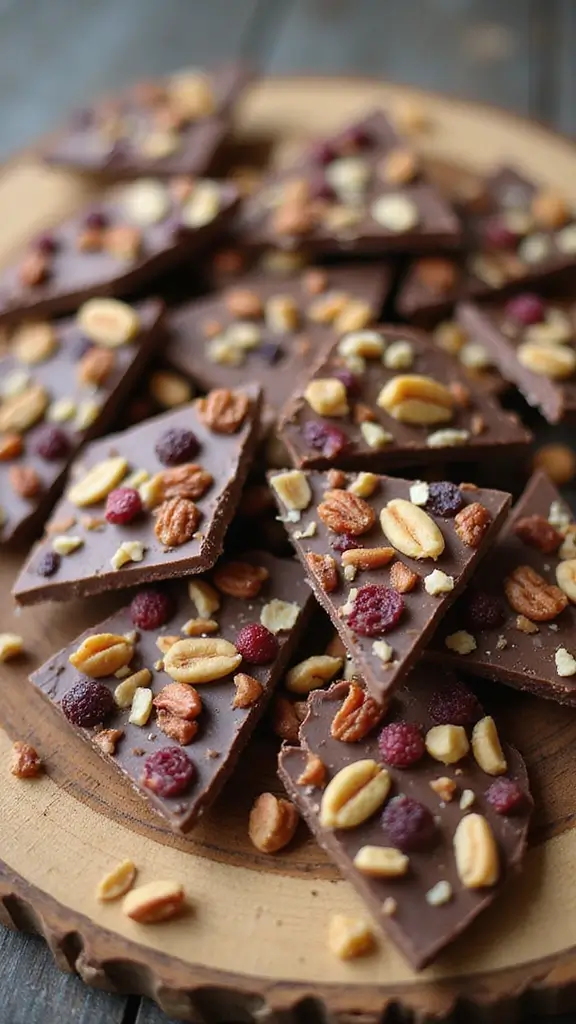
Satisfy your sweet tooth with homemade chocolate bark. It’s an easy and fun treat that you can customize with your favorite toppings. Whether you’re a chocolate connoisseur or just looking for a quick dessert, this recipe is perfect for you.
Not only can you whip up a batch in just 15 minutes, but it also makes a lovely gift for friends and family. Use leftover chocolate or nuts to create this delightful snack. Plus, it’s great for parties or holiday gatherings when you need a crowd-pleaser.
Recipe Overview
– Servings: 10
– Prep Time: 10 minutes
– Cook Time: 5 minutes
– Total Time: 15 minutes
– Calories: About 200 per serving
Nutritional Information
– Fat: 12g
– Carbohydrates: 24g
– Protein: 3g
– Sugar: 15g
Ingredients
– 2 cups of chocolate chips (dark or milk)
– 1 cup of mixed nuts
– 1/2 cup of dried fruit (like cranberries or raisins)
Instructions
1. Begin by melting the chocolate chips in a microwave-safe bowl. Stir until it’s silky smooth.
2. Line a baking sheet with parchment paper to keep the chocolate from sticking.
3. Pour the melted chocolate onto the sheet and spread it evenly.
4. Sprinkle your mixed nuts and dried fruit on top, pressing them gently into the chocolate.
5. Chill in the fridge until it’s firm. Once set, break it into pieces and enjoy!
Tips for Your Best Bark
– Experiment with toppings like pretzels, seeds, or even coconut.
– Store your bark in an airtight container for up to a week to keep it fresh.
Frequently Asked Questions
– Can I use white chocolate? Yes! White chocolate adds a sweet twist to your bark.
– How should I store chocolate bark? Keep it cool, either at room temperature or in the fridge, to prevent melting.
This chocolate bark is a simple way to treat yourself or share with others. Enjoy the sweet satisfaction of making something delicious and unique!
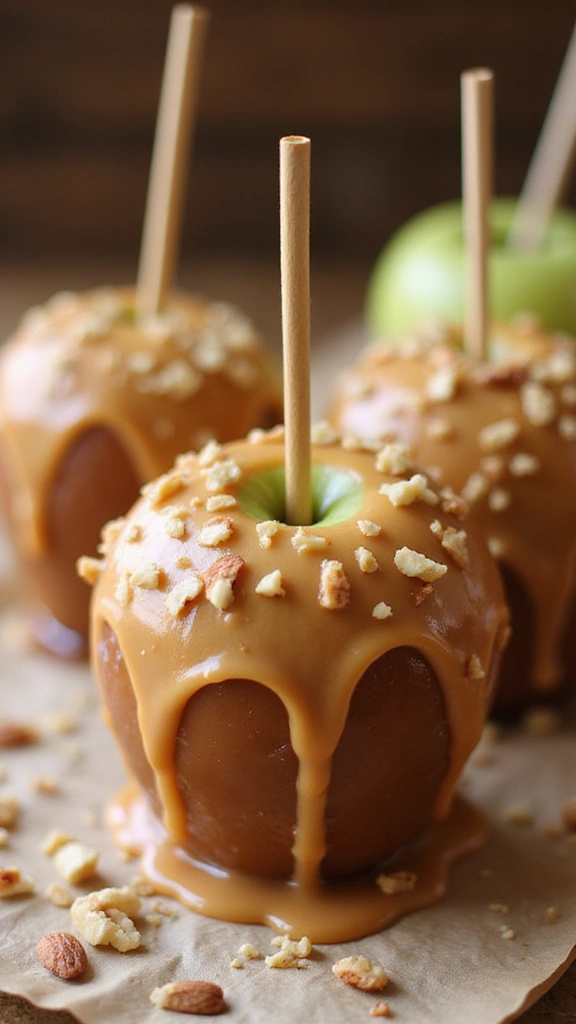
17. Apple Nachos
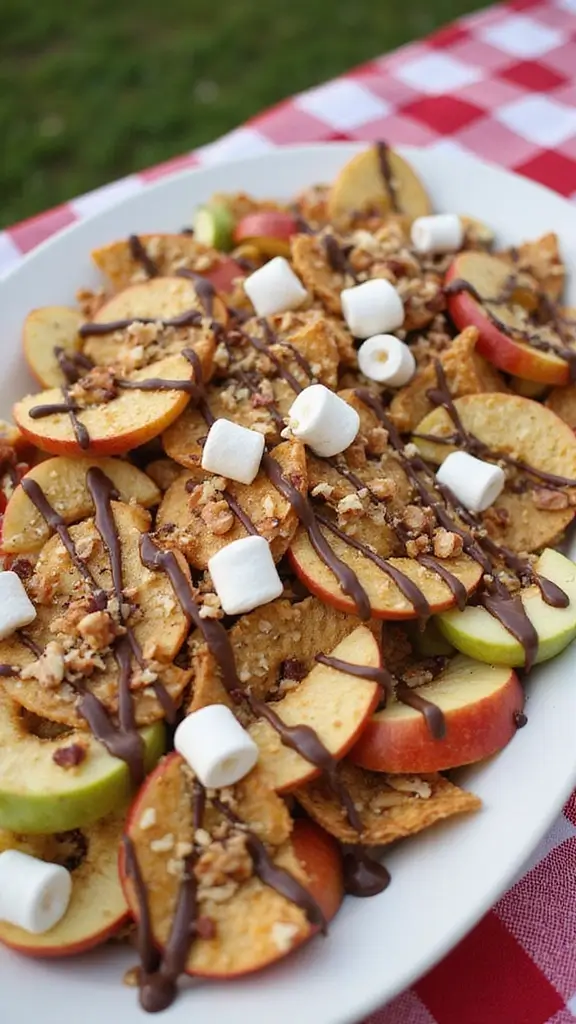
Looking for a sweet treat that won’t ruin your healthy eating goals? Try these delightful apple nachos! They feature crisp apple slices drizzled with creamy peanut butter and rich chocolate, then topped with your favorite goodies. It’s a fun and nutritious way to satisfy your dessert cravings. Perfect for gatherings, family movie nights, or just a quick snack, these nachos are a hit with both kids and adults!
Recipe Overview
– Servings: 4
– Prep Time: 10 minutes
– Cook Time: 0 minutes
– Total Time: 10 minutes
– Calories: About 150 per serving
Nutrition Information
– Fat: 8g
– Carbohydrates: 20g
– Protein: 2g
– Sugar: 10g
Ingredients
– 4 apples, sliced
– 1/2 cup chocolate chips
– 1/2 cup peanut butter
– Toppings: mini marshmallows, chopped nuts, granola, etc.
Instructions
1. Start by slicing the apples into thin wedges and spread them out on a platter.
2. In two microwave-safe bowls, melt the chocolate chips and peanut butter until smooth. Stir and combine well.
3. Drizzle the melted chocolate and peanut butter generously over the apple slices.
4. Sprinkle with mini marshmallows, nuts, or granola as desired for extra flavor and crunch.
Tips for the Best Apple Nachos
– Choose a mix of apple varieties for different flavors, like sweet Fuji and tart Granny Smith.
– Serve immediately to keep apples fresh and crispy!
FAQs
– Can I use caramel instead of chocolate? Absolutely! Caramel adds a delicious twist.
– How long can I store leftovers? Enjoy these fresh, but you can keep them in the fridge for a few hours.
These apple nachos offer a playful take on a classic snack, blending health and indulgence in every bite!
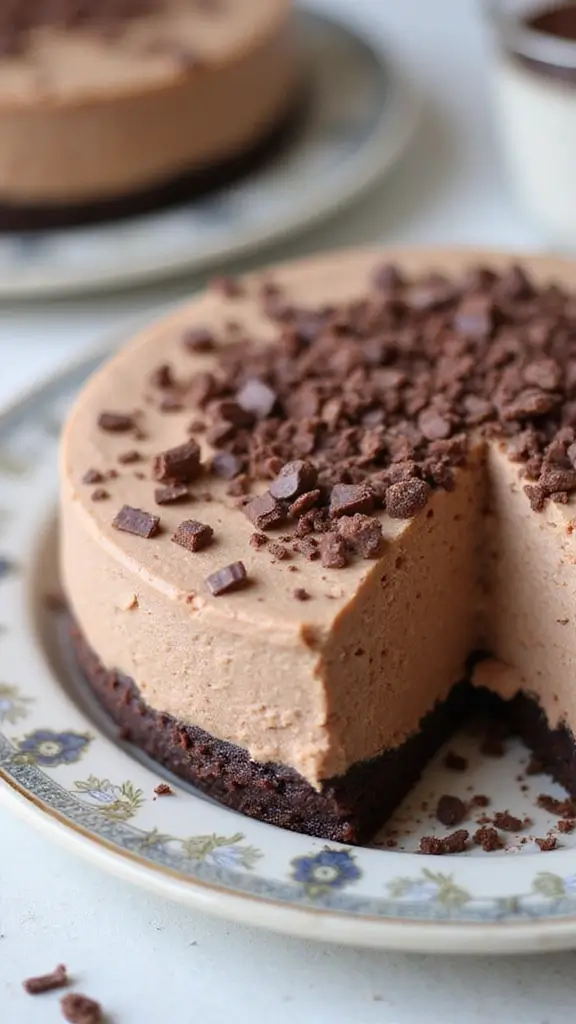
18. No-Bake Oreo Cheesecake
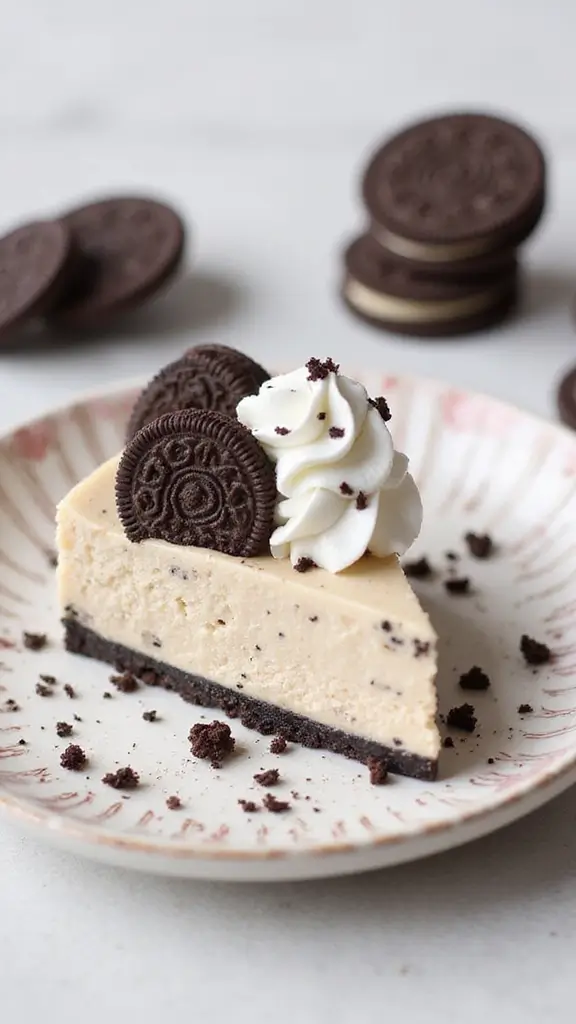
Indulge your cravings with a delightful No-Bake Oreo Cheesecake. This dessert features a crunchy Oreo crust paired with a velvety filling that chocolate lovers will adore. Best of all, there’s no baking required! It’s perfect for parties or casual get-togethers since you can prepare it ahead of time and simply chill it until serving.
Imagine slicing into this creamy cake, with layers of rich flavors that melt in your mouth. It’s a guaranteed crowd-pleaser that combines the best of both worlds – cheesecake and Oreos.
Recipe Overview
– Servings: 10
– Prep Time: 20 minutes
– Chill Time: 4 hours or overnight
– Calories: About 350 per slice
Nutrition Information
– Fat: 24g
– Carbohydrates: 30g
– Protein: 6g
– Sugar: 18g
Ingredients
– 1 ½ cups crushed Oreos
– ½ cup melted butter
– 16 oz cream cheese (softened)
– 1 cup powdered sugar
– 2 cups heavy whipping cream
– 1 tsp vanilla extract
Instructions
1. Combine crushed Oreos and melted butter in a bowl.
2. Press this mixture firmly into the bottom of a springform pan.
3. In another bowl, beat the softened cream cheese and powdered sugar until smooth.
4. Whip the heavy cream in a separate bowl until soft peaks form.
5. Gently fold the whipped cream into the cream cheese mixture until well combined.
6. Pour the filling over the crust and smooth the top with a spatula.
7. Chill for at least 4 hours or overnight for the best flavor and texture.
Tips for the Best Cheesecake
– Save some crushed Oreos to sprinkle on top for added crunch before serving.
– Use room temperature cream cheese to ensure a perfectly smooth filling.
Frequently Asked Questions
– How long does it last in the fridge? This cheesecake stays fresh for up to 5 days if stored properly.
– Can I make it gluten-free? Absolutely! Just swap regular Oreos for gluten-free ones.
This No-Bake Oreo Cheesecake is sure to impress your friends and family. With its rich flavors and easy preparation, it’s a dessert you’ll want to make again and again!
19. Mint Chocolate Chip Ice Cream
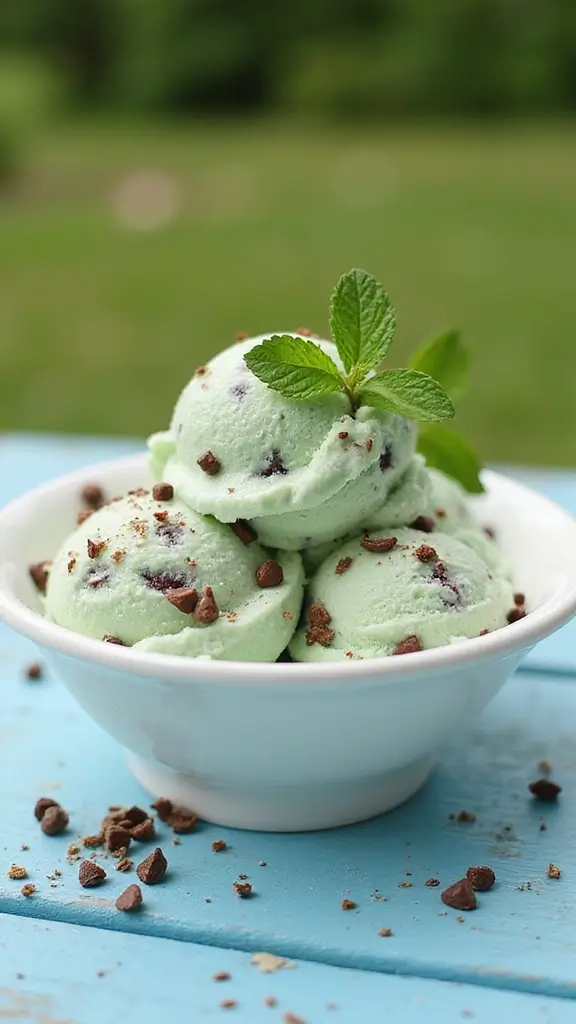
Treat yourself to a refreshing bowl of mint chocolate chip ice cream, a delicious delight that cools you down on hot days. This creamy dessert is fun to make and will surely impress your friends and family.
Imagine the smooth, cool texture melting in your mouth, blending minty freshness with rich chocolate. It’s a crowd favorite, perfect as a sweet finish to any meal or enjoyed on its own. Let’s dive into how to whip up this tasty treat in no time!
Recipe Overview
– Servings: 6
– Prep Time: 15 minutes
– Cook Time: 0 minutes
– Total Time: 4 hours (including chilling)
– Calories: Around 250 per serving
Nutrition Information
– Fat: 15g
– Carbohydrates: 30g
– Protein: 3g
– Sugar: 20g
Ingredients List
– 2 cups heavy cream
– 1 cup sweetened condensed milk
– 1 tsp mint extract
– 1 cup chocolate chips
Step-by-Step Instructions
1. In a mixing bowl, whisk together the heavy cream and sweetened condensed milk until smooth.
2. Gently fold in the mint extract and chocolate chips.
3. Transfer the mixture to an airtight container and freeze for at least 4 hours, or until it’s solid.
Tips for the Best Ice Cream
– Add a few drops of green food coloring for a fun twist!
– Garnish with fresh mint leaves for a beautiful finish.
Frequently Asked Questions
– Can I use low-fat milk? Low-fat milk will make it less creamy; stick with heavy cream for best results.
– How long can I store homemade ice cream? Keep it in the freezer for up to two weeks for the best taste.
This mint chocolate chip ice cream is a delightful treat that you’ll want to make again and again! Enjoy every creamy spoonful and share the joy with loved ones!
Mint Chocolate Chip Ice Cream
Editor’s Choice

Cuisinart Ice Cream Maker Machine, 1.5 Quart Double Insulated Machine, S…

Ice Cream Scoop, 2PCS Nonstick Anti-Freeze Food grade PPR + rubber Ice C…

Tovolo Glide-A-Scoop Reusable Ice Cream Tub, Sunburst – Airtight BPA-Fre…
Conclusion
With these 19 easy sweet recipes, your dessert game is bound to elevate! From no-bake options to quick treats, there’s something for every craving and occasion.
These recipes make it easy to indulge without spending hours in the kitchen. Enjoy experimenting with different flavors and creating beautiful dishes that are just as fun to eat as they are to make!
Note: We aim to provide accurate product links, but some may occasionally expire or become unavailable. If this happens, please search directly on Amazon for the product or a suitable alternative.
This post contains Amazon affiliate links, meaning I may earn a small commission if you purchase through my links, at no extra cost to you.
Frequently Asked Questions
What are some quick and easy sweet recipes I can try at home?
If you’re looking for quick and easy sweet recipes, you’re in for a treat! Many of the recipes in this article are designed to be made in just a few minutes or require no baking at all. From 5-minute desserts like chocolate mug cakes to no-bake cheesecakes, you can whip up something delicious in no time. Perfect for satisfying your sweet tooth without a lot of fuss!
Are there healthy options in these easy sweet recipes?
Absolutely! Many of the easy sweet recipes can be adapted to be healthier. You can use ingredients like whole grain flours, natural sweeteners like honey or maple syrup, and incorporate fruits for added nutrition. Look for recipes that focus on wholesome ingredients, or feel free to tweak your favorites to make them a bit lighter without sacrificing taste!
Can I make these sweet recipes ahead of time?
Yes, many of the recipes can be made ahead of time! For instance, no-bake desserts typically store well in the fridge, making them a great option for prepping in advance. Just be sure to check the individual recipes for specific storage instructions to keep them fresh and delicious until you’re ready to enjoy them!
What are some fun variations I can try with these sweet recipes?
Get creative with your easy sweet recipes by experimenting with different flavors and ingredients! Swap out chocolate for peanut butter, add spices like cinnamon or nutmeg, or throw in your favorite nuts or dried fruits. The beauty of these recipes is their flexibility, allowing you to customize them to suit your cravings or dietary needs!
Are these recipes suitable for kids to help with?
Absolutely! Many of the easy sweet recipes are kid-friendly and perfect for involving little ones in the kitchen. They can help with mixing, pouring, and decorating, making it a fun bonding activity. Just keep an eye on them when it comes to tasks that involve heat or sharp objects. It’s a great way to encourage their interest in cooking!