As the seasons change, so do our cravings. Whether it’s the warmth of a summer evening or the cozy embrace of winter, there’s always a dessert that fits the mood. That’s why I created this post—because I know how much joy a delicious dessert can bring, no matter the time of year.
If you’re someone who loves to whip up sweet treats for family gatherings, holiday celebrations, or just a quiet night in, this one’s for you. You want desserts that not only satisfy your sweet tooth but also impress your friends and loved ones. You care about flavor, presentation, and the memories that come with every bite.
In this post, you’ll find 19 crowd-pleasing desserts that are perfect for every season. The recipes are simple, yet mouthwateringly good. They range from light and fruity summer delights to rich and comforting winter indulgences. So, whether you’re baking for a picnic or hosting a holiday dinner, these desserts will help you create moments that are as sweet as the flavors themselves. Let’s dive into the delicious world of seasonal treats and make your dessert game shine!
Contents
- 1. Fall Spiced Pumpkin Cheesecake
- 2. Winter Wonderland Chocolate Mousse
- 3. Spring Berry Pavlova
- 4. Summer Watermelon Sorbet
- 5. Autumn Maple Pecan Pie
- 6. No-Bake Strawberry Shortcake Cups
- 7. Chocolate-Dipped Coconut Macaroons
- 8. Lemon Blueberry Layer Cake
- 9. Gingerbread Cookies for the Holidays
- 10. No-Bake Chocolate Chip Cookie Dough Bites
- 11. Chocolate Lava Cake for Special Occasions
- 12. Fruity Summer Trifle
- 13. Caramel Apple Crisp for Cozy Nights
- 14. No-Bake Chocolate Peanut Butter Bars
- 15. Choco-Matcha Cupcakes for a Unique Twist
- 16. Classic Tiramisu for a Touch of Elegance
- 17. Sweet Potato Pie for a Southern Comfort
- 18. Raspberry Lemon Bars for a Tart Delight
- 19. Chocolate Chip Banana Bread for a Cozy Treat
1. Fall Spiced Pumpkin Cheesecake
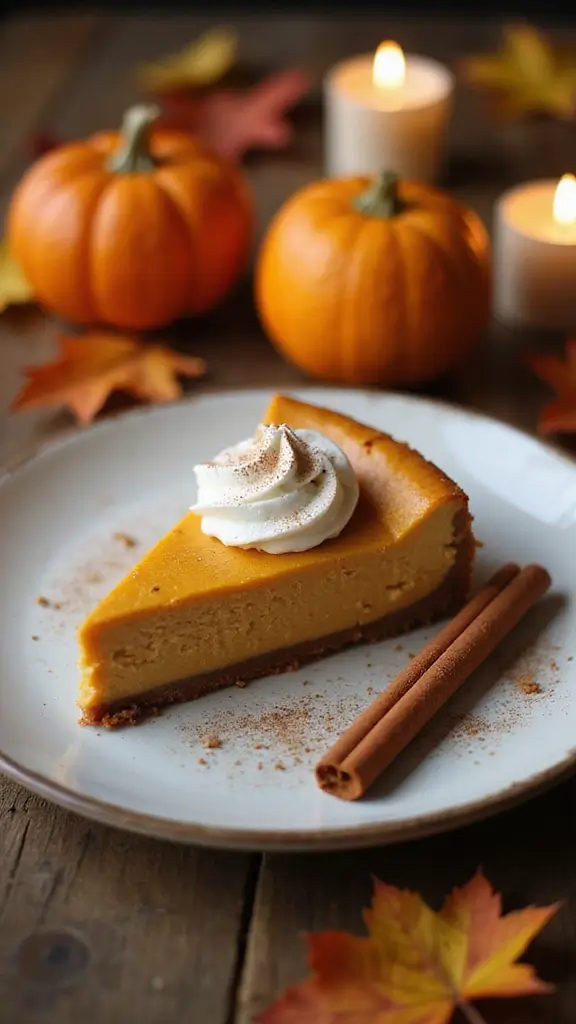
Embrace the cozy vibes of fall with a delightful treat: Fall Spiced Pumpkin Cheesecake. This dessert combines the creamy goodness of cream cheese with the warm flavors of pumpkin, cinnamon, nutmeg, and cloves. Just imagine each bite melting in your mouth while the spices wrap around you like a soft blanket. When topped with a generous swirl of whipped cream, it becomes a showstopper that will have your guests coming back for seconds!
Recipe Overview:
– Servings: 12
– Prep Time: 25 minutes
– Cook Time: 60 minutes
– Total Time: 85 minutes
– Calories: 350 per slice
Ingredients:
– 1 cup graham cracker crumbs
– 1/4 cup sugar
– 1/2 cup unsalted butter, melted
– 2 cups cream cheese
– 1 cup pumpkin puree
– 1 cup sugar
– 3 large eggs
– 1 tsp vanilla extract
– 1 tsp cinnamon
– 1/2 tsp nutmeg
– 1/4 tsp cloves
Instructions:
1. Preheat your oven to 325°F (160°C).
2. In a bowl, mix graham cracker crumbs, 1/4 cup sugar, and melted butter. Press this mixture into the bottom of a springform pan.
3. In another bowl, beat cream cheese until smooth. Add pumpkin puree, sugar, eggs, vanilla, and spices. Mix until everything is combined.
4. Pour the filling over your crust and bake for 60 minutes. Let it cool, then chill for at least 4 hours before serving.
For a lovely finishing touch, sprinkle a bit of cinnamon on top.
FAQs:
Can I make this ahead of time? Yes, it stores well in the fridge for up to a week. Enjoy this seasonal favorite that captures the essence of fall in every slice!
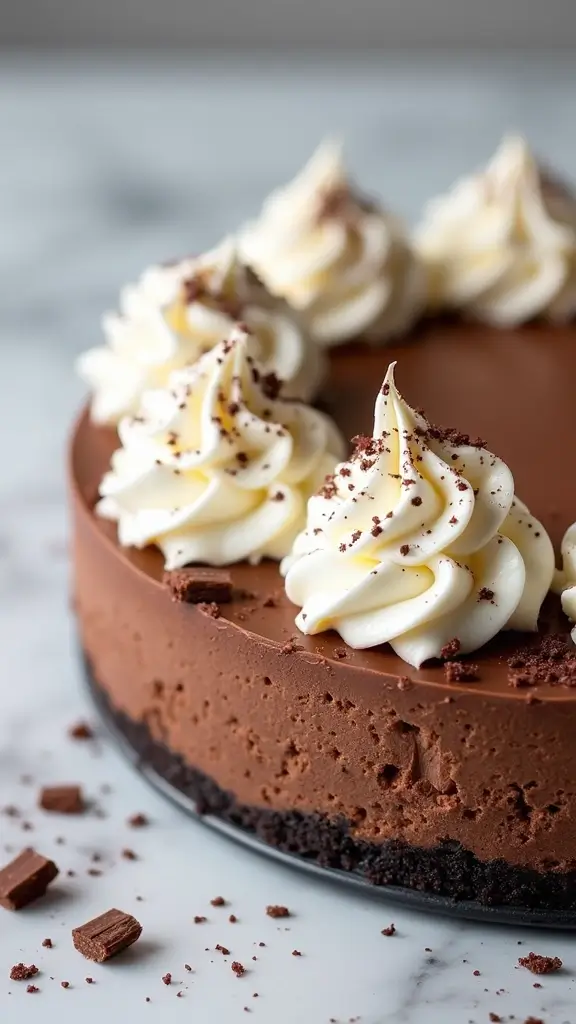
2. Winter Wonderland Chocolate Mousse
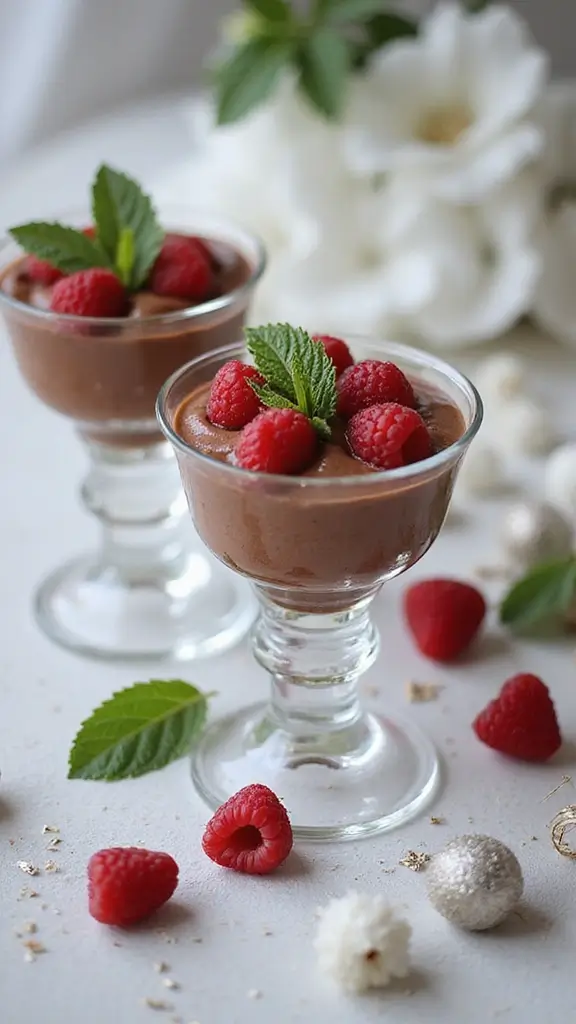
Warm up your winter evenings with a rich and creamy Winter Wonderland Chocolate Mousse. This dessert is a chocolate lover’s dream, offering a smooth texture and deep flavor that will make you feel cozy inside. Pair it with fresh berries for a pop of color and a refreshing bite that balances the mousse’s richness. Your friends and family will be asking for seconds!
Here’s a simple recipe to create this delightful treat at home. It only takes 25 minutes of your time, and the results are simply divine. Get ready to impress!
Recipe Overview:
– Servings: 6
– Prep Time: 15 minutes
– Cook Time: 10 minutes
– Total Time: 25 minutes
– Calories: 420 per serving
Ingredients:
– 8 oz dark chocolate, chopped
– 3 large eggs, separated
– 1/4 cup sugar
– 1 cup heavy cream
– 1 tsp vanilla extract
– Fresh berries for garnish
Instructions:
1. Melt the chocolate using a double boiler or microwave. Let it cool slightly.
2. Whisk the egg whites in a bowl until soft peaks form. Gradually add sugar while whisking.
3. In another bowl, whip the heavy cream with vanilla until soft peaks form.
4. Fold the melted chocolate into the egg yolks. Then gently combine this mixture with the whipped egg whites and cream.
5. Spoon the mousse into serving cups and refrigerate for at least 2 hours before serving.
For the best flavor, always choose high-quality chocolate. You can experiment with milk chocolate if you want a sweeter version, but keep in mind it will change the taste.
This mousse is perfect for holiday gatherings or a cozy night in. It’s elegant yet easy to make, giving you the best of both worlds. Enjoy every rich, chocolatey bite!
• Choose high-quality chocolate for intense flavor
• Chill mousse for a perfect texture
• Garnish with seasonal berries for color
• Serve in decorative cups for a festive touch
3. Spring Berry Pavlova
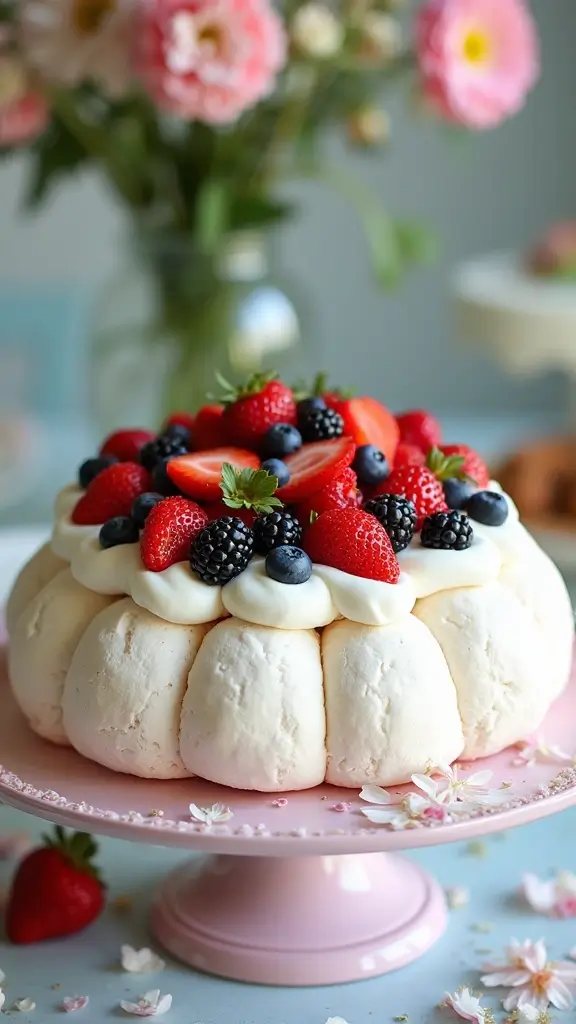
Spring is here, and it’s time to satisfy your sweet tooth with a delightful Spring Berry Pavlova! This dessert is not just beautiful; it’s a celebration of fresh, seasonal berries resting on a cloud-like meringue. Imagine biting into that crispy shell, revealing a soft interior that melts in your mouth. The burst of juicy berries adds a refreshing twist, while a drizzle of passion fruit or lemon curd brings a zesty finish. Perfect for gatherings or a sunny afternoon treat!
Here’s how to make your own Spring Berry Pavlova:
Recipe Overview:
– Servings: 8
– Prep Time: 15 minutes
– Cook Time: 1 hour
– Total Time: 1 hour 15 minutes
– Calories: 200 per serving
Ingredients:
– 4 large egg whites
– 1 cup granulated sugar
– 1 tsp white vinegar
– 1 tbsp cornflour
– 1 1/2 cups mixed fresh berries (like strawberries, blueberries, and raspberries)
– 1 cup heavy cream, whipped
– Passion fruit or lemon curd for drizzling
Instructions:
1. Preheat your oven to 275°F (135°C) and line a baking sheet with parchment paper.
2. In a mixing bowl, beat the egg whites until soft peaks form. Gradually add the sugar while continuing to beat until the mixture is glossy.
3. Carefully fold in the vinegar and cornflour until combined.
4. Spoon the meringue mixture onto the prepared baking sheet, shaping it into a nest form. Bake for 1 hour, then turn off the oven and let it cool inside.
5. Once cool, top with whipped cream and arrange the fresh berries on top. Just before serving, drizzle with passion fruit or lemon curd.
One tip for perfect meringue: avoid humidity! Fresh berries offer the best flavor and texture, so try to use them instead of frozen ones. Enjoy this beautiful dessert that brings spring to your table!
4. Summer Watermelon Sorbet
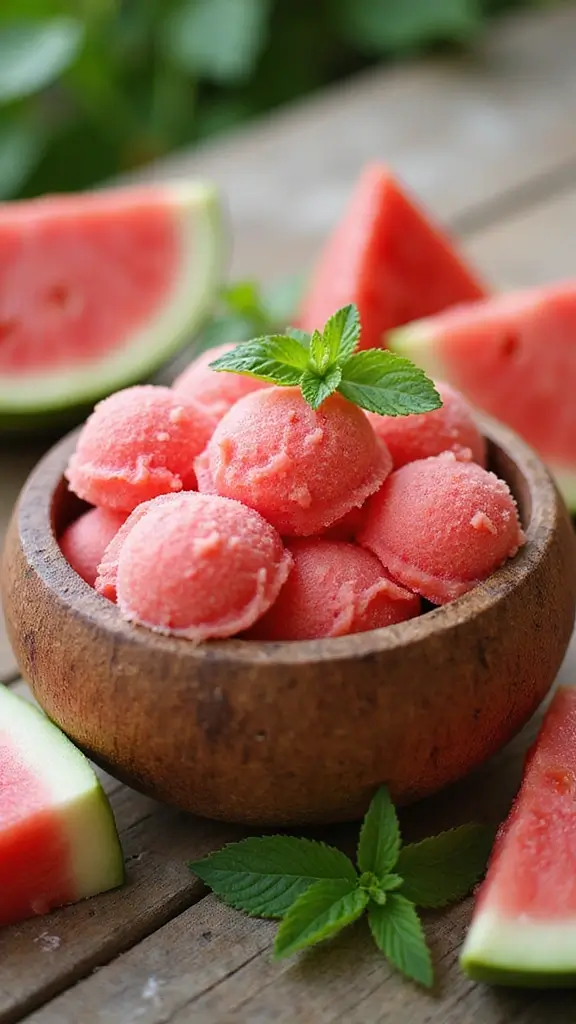
When summer sizzles, nothing cools you down like a homemade Watermelon Sorbet. This delightful dessert is super easy to whip up, and it’s packed with the sweet, juicy flavor of fresh watermelon. Imagine the refreshing taste melting in your mouth on a hot day! You can jazz it up with a splash of lime juice or a sprinkle of fresh mint. It’s a treat that brings smiles to everyone around.
Ready to dive into this deliciousness? Here’s what you’ll need:
Ingredients:
– 4 cups watermelon, cubed and seeded
– 1/4 cup sugar (optional)
– 1 tbsp lime juice
– Fresh mint for garnish
Instructions:
1. Blend the watermelon cubes in a blender until smooth.
2. If you want it sweeter, add sugar and lime juice, then blend again.
3. Pour the mixture into a shallow dish and freeze for at least 2 hours.
4. Scrape the sorbet with a fork every 30 minutes for a fluffier texture. Serve it in bowls, topped with fresh mint.
Feel free to experiment! You can swap watermelon for other fruits like berries or mangoes for a different twist.
With just a few ingredients and no baking needed, this sorbet is your go-to solution for hot summer days. It’s a fun kitchen project that kids can help with too. Perfect for backyard barbecues or a simple family dessert night, it will definitely impress your guests!
• Blend watermelon for a smooth base
• Freeze for at least 2 hours for best results
• Scrape every 30 minutes for fluffy texture
• Garnish with mint for a fresh finish
5. Autumn Maple Pecan Pie
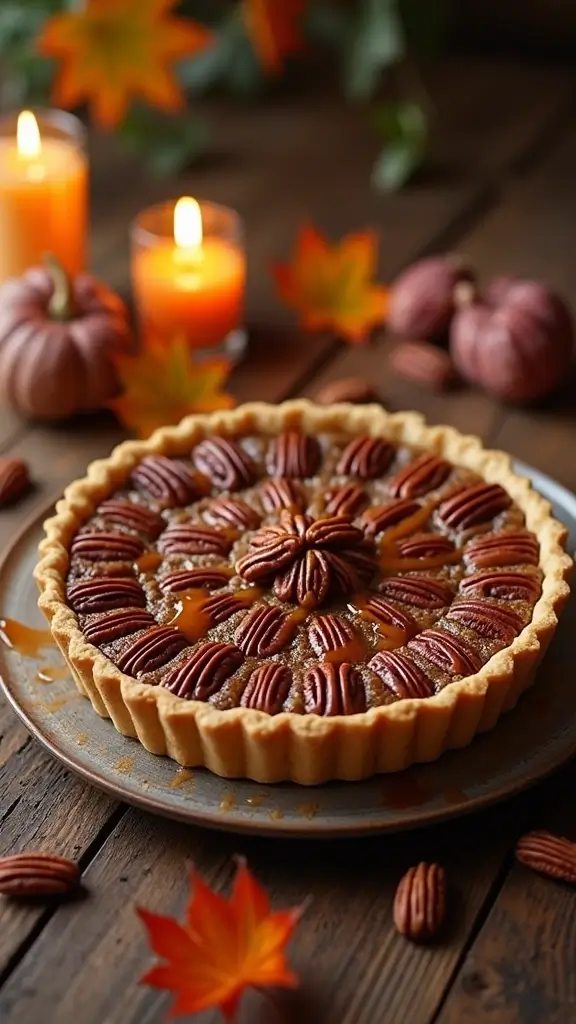
Embrace the cozy flavors of fall with an Autumn Maple Pecan Pie! This delightful dessert brings together the earthy crunch of pecans and the rich sweetness of maple syrup. Imagine slicing into a golden, flaky crust to reveal a warm, gooey filling that wraps you in comfort. Whether you serve it at Thanksgiving or a casual family dinner, this pie is sure to impress. Add a scoop of vanilla ice cream on top, and you’ll create a dessert experience that feels like a warm hug.
Let’s dive into the recipe so you can bring this sweet treat to your table!
Recipe Overview:
– Servings: 8
– Prep Time: 20 minutes
– Cook Time: 50 minutes
– Total Time: 1 hour 10 minutes
– Calories: 400 per slice
Ingredients:
– 1 pie crust
– 1 cup maple syrup
– 1 cup brown sugar
– 1/4 cup unsalted butter, melted
– 3 large eggs
– 1 tsp vanilla extract
– 2 cups pecan halves
Instructions:
1. Preheat your oven to 350°F (175°C).
2. Fit the pie crust into a pie dish, making sure it covers the edges.
3. In a bowl, whisk together the maple syrup, brown sugar, melted butter, eggs, and vanilla until smooth.
4. Gently fold in the pecans, then pour this delicious mixture into the prepared crust.
5. Bake for 50 minutes, or until the filling is set and slightly puffed. Let it cool before slicing.
For an extra touch, sprinkle a pinch of sea salt on top before serving to enhance the flavors.
FAQs:
– Can I use a store-bought crust? Yes! It saves time and still tastes great!
– Can I make this ahead of time? Absolutely! Just bake it a day before and warm it up before serving.
6. No-Bake Strawberry Shortcake Cups
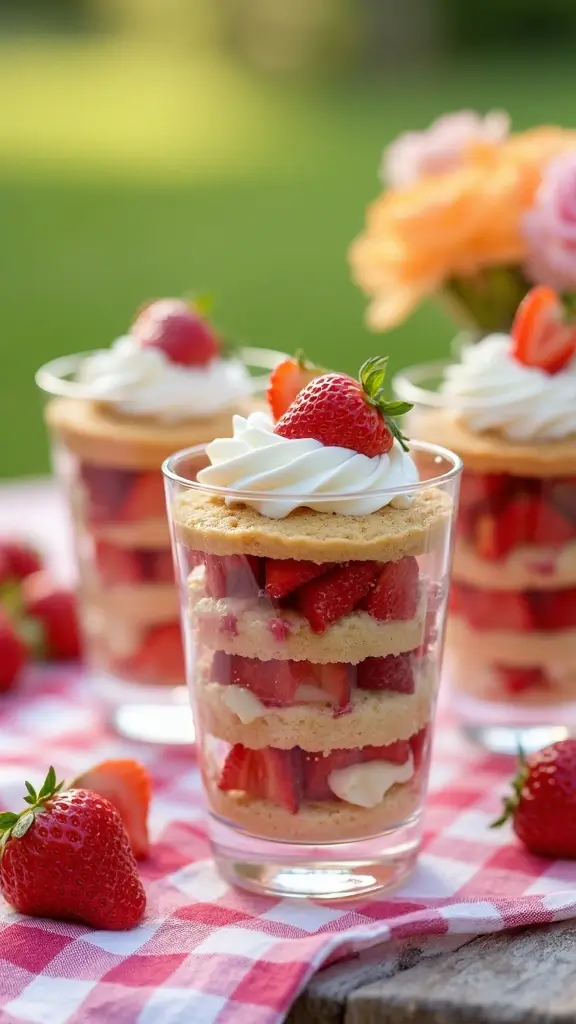
Treat yourself to these No-Bake Strawberry Shortcake Cups, the perfect summer dessert that doesn’t require any baking! You’ll enjoy the sweet combination of fluffy whipped cream, buttery shortcake, and fresh strawberries, all layered beautifully in a clear cup. This dessert is not just easy to make; it’s also a stunning centerpiece for your gatherings or a delightful treat for yourself. Let’s dive into how you can create this refreshing dessert!
You can whip these up in just 15 minutes. Start by gathering your ingredients and clear cups. Fresh strawberries are key, so pick the ripest ones for the best flavor. If you want to impress, try garnishing with mint leaves for a pop of color. This dessert not only looks elegant but also tastes divine, making it perfect for summer picnics, backyard barbecues, or even a cozy night in.
Here’s how to make No-Bake Strawberry Shortcake Cups:
Ingredients:
– 2 cups strawberries, sliced
– 1 cup heavy cream
– 1/2 cup powdered sugar
– 1 tsp vanilla extract
– 12 shortcake biscuits
Instructions:
1. In a mixing bowl, whip the heavy cream with powdered sugar and vanilla until soft peaks form.
2. In your clear cups, layer crumbled shortcake, followed by fresh strawberries, and then a generous scoop of whipped cream.
3. Repeat the layers until the cups are filled to the top.
4. Refrigerate for at least 30 minutes before serving to let the flavors meld.
A quick note: while you can use frozen strawberries in a pinch, fresh ones will always give you the best taste. Enjoy this delightful dessert that captures the essence of summer in every bite!
• Use fresh strawberries for the best flavor.
• Choose clear cups to show off the beautiful layers.
• Add mint leaves for a beautiful garnish.
• Refrigerate before serving for a refreshing treat.
7. Chocolate-Dipped Coconut Macaroons
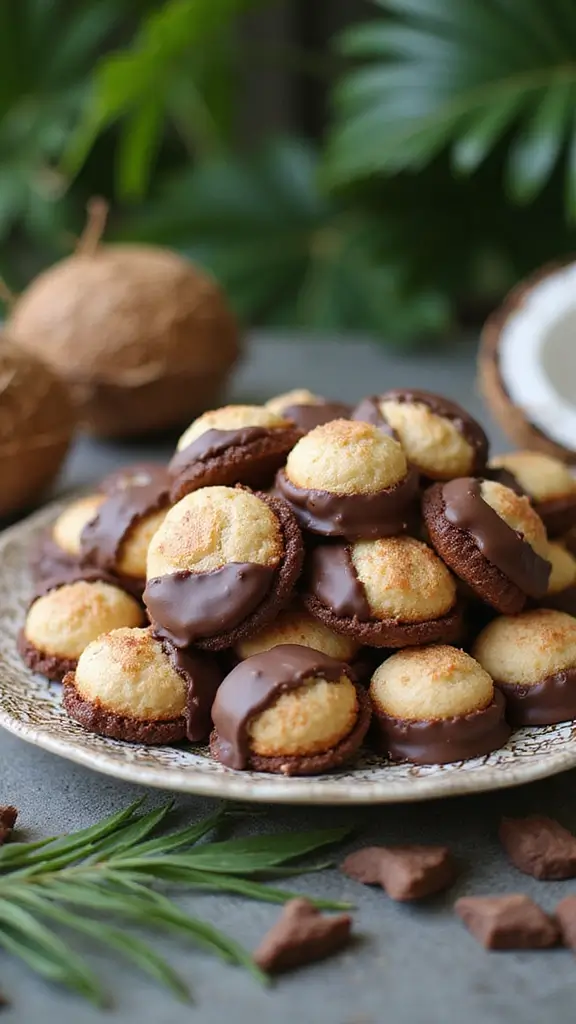
Indulge in the delightful world of Chocolate-Dipped Coconut Macaroons! These treats are a perfect blend of crunchy and chewy, making every bite feel like a little piece of paradise. The toasted coconut interior pairs beautifully with rich chocolate, turning a simple dessert into a crowd favorite. Whether you’re hosting a party or enjoying a quiet afternoon snack, these macaroons will impress everyone. Plus, they are easy to whip up, ensuring you spend less time in the kitchen and more time enjoying.
Let’s dive into the details of making these delicious bites. Here’s what you’ll need:
Ingredients:
– 2 1/2 cups shredded coconut
– 1/2 cup sweetened condensed milk
– 1 tsp vanilla extract
– 6 oz dark chocolate, melted
Instructions:
1. Preheat your oven to 325°F (165°C) and line a baking sheet with parchment paper.
2. In a mixing bowl, combine the shredded coconut, sweetened condensed milk, and vanilla extract until everything is well mixed.
3. Shape the mixture into small balls and place them onto the baking sheet.
4. Bake for 20 minutes, or until they turn a lovely golden brown.
5. After they cool, dip the bottoms in the melted chocolate and set them on parchment paper to harden.
For an extra touch, sprinkle a bit of sea salt on top before the chocolate sets. This adds a delightful contrast to the sweetness.
FAQs:
How do I store them? Keep your macaroons in an airtight container. They stay fresh for up to a week!
These Chocolate-Dipped Coconut Macaroons are not just tasty; they’re an easy way to bring a touch of sweetness to any occasion. Enjoy making and sharing them!
8. Lemon Blueberry Layer Cake
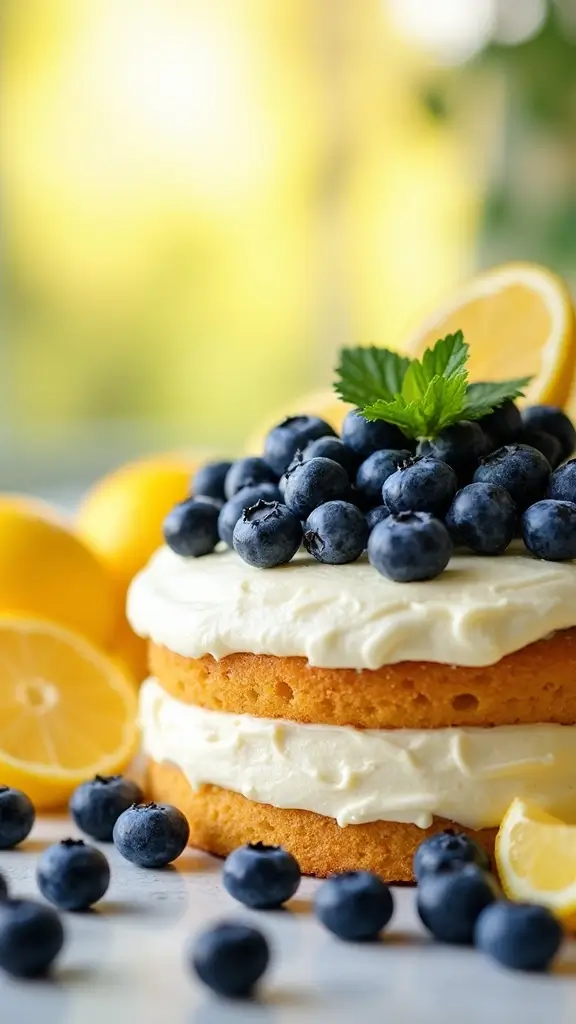
Brighten your table with a stunning Lemon Blueberry Layer Cake! This dessert strikes the perfect balance between sweet and tangy. With moist lemon sponge, luscious blueberry filling, and creamy lemon frosting, it’s sure to be a hit at any spring or summer gathering. Just watch as everyone eagerly reaches for that last slice!
Here’s how to make it yourself:
Recipe Overview:
– Servings: 10
– Prep Time: 30 minutes
– Cook Time: 25 minutes
– Total Time: 55 minutes
– Calories: 350 per slice
Ingredients:
– 2 cups all-purpose flour
– 1 1/2 cups sugar
– 1/2 cup unsalted butter, softened
– 3 large eggs
– 1 cup buttermilk
– 1/4 cup fresh lemon juice
– 1 tsp baking powder
– 1 cup blueberries
– 1 cup heavy cream
– 1 cup powdered sugar
– Zest of one lemon
Instructions:
1. Preheat your oven to 350°F (175°C). Grease and flour three 8-inch round cake pans.
2. In a large bowl, cream together the softened butter and sugar until fluffy. Add eggs one at a time, mixing well.
3. Stir in buttermilk, lemon juice, and zest. Gradually mix in flour and baking powder until just combined.
4. Gently fold in the blueberries to keep them whole.
5. Divide the batter evenly between the prepared pans. Bake for 25 minutes or until a toothpick comes out clean. Let the cakes cool completely.
6. For the frosting, whip the heavy cream and powdered sugar until stiff peaks form. Frost the cooled cake layers generously.
Top with fresh blueberries and lemon slices for a beautiful touch!
Looking for a quick tip? You can use frozen blueberries too—just make sure to thaw and drain them first.
This Lemon Blueberry Layer Cake is not only delicious but also a delightful centerpiece for any occasion, making it a perfect addition to your dessert repertoire.
9. Gingerbread Cookies for the Holidays

Get ready to embrace the holiday spirit with delightful Gingerbread Cookies! These treats fill your home with a warm, spicy-sweet aroma that instantly brings back memories of family gatherings and cozy evenings by the fire. Whether you enjoy them plain or deck them out with colorful icing, these cookies are a festive favorite. Plus, they make perfect gifts when you pack them in a cheerful tin!
Here’s how to whip up a batch that serves 24, ready in just 30 minutes. You’ll need:
Ingredients:
– 3 cups all-purpose flour
– 1 tsp baking soda
– 1 tbsp ground ginger
– 1 tbsp cinnamon
– 1/2 tsp ground cloves
– 1/2 tsp salt
– 3/4 cup unsalted butter, softened
– 3/4 cup brown sugar
– 1 egg
– 1/2 cup molasses
Instructions:
1. Preheat your oven to 350°F (175°C). In a bowl, mix together the flour, baking soda, and spices.
2. In another bowl, cream the softened butter and brown sugar until fluffy. Then add the egg and molasses, mixing until well combined.
3. Gradually stir in the dry ingredients, blending until you form a dough.
4. Roll out the dough to about 1/4 inch thick and cut into fun shapes with cookie cutters. Place them on a baking sheet.
5. Bake for 10 minutes or until the edges are firm. Let cool before adding your favorite decorations.
For an extra kick of flavor, chill the dough for a few hours before rolling it out.
FAQs:
– How do I store them? Keep in an airtight container for up to a week.
– Can I freeze them? Yes, freeze them in a single layer, then store in a container for up to three months.
These cookies are not only delicious but also a wonderful way to spread holiday cheer! Enjoy baking and sharing!
10. No-Bake Chocolate Chip Cookie Dough Bites
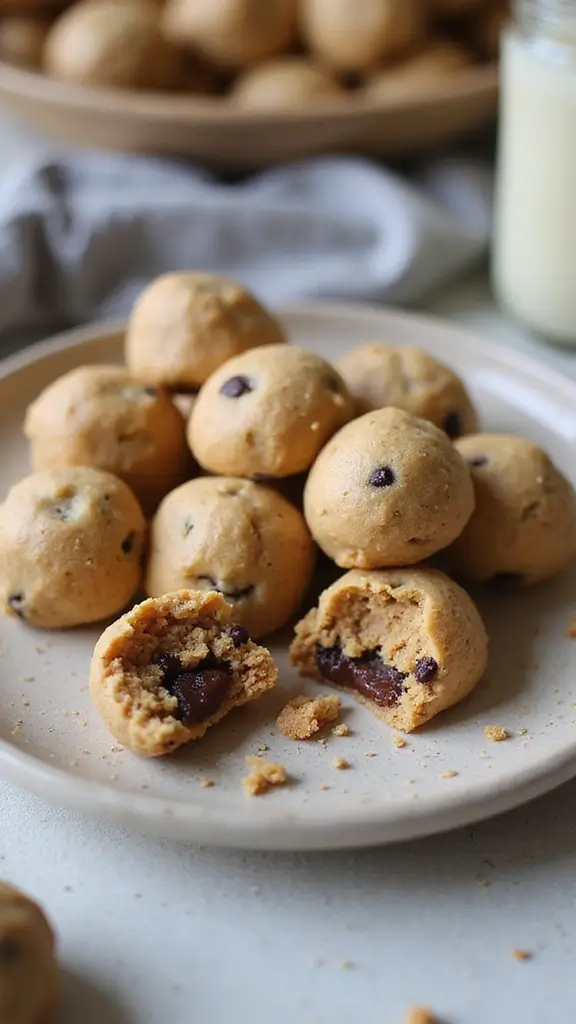
Looking for a quick sweet treat without turning on the oven? No-Bake Chocolate Chip Cookie Dough Bites are just what you need! These delightful bites are easy to make and packed with the comforting flavors of chocolate and cookie dough. Perfect for satisfying cravings on a whim, they’re a crowd favorite, loved by kids and adults alike. Just mix, roll, and chill—it’s that simple!
Recipe Overview:
– Servings: 12
– Prep Time: 15 minutes
– Total Time: 15 minutes
– Calories: 150 per bite
Ingredients:
– 1 cup almond flour
– 1/4 cup maple syrup
– 1/4 cup almond butter
– 1/2 cup mini chocolate chips
– 1/2 tsp vanilla extract
Instructions:
1. In a mixing bowl, blend the almond flour, maple syrup, and almond butter until smooth.
2. Gently fold in the chocolate chips and vanilla extract.
3. Roll the mixture into bite-sized balls and place them on a plate.
4. Chill in the refrigerator for at least 30 minutes before serving.
For a fun twist, try coating these bites in melted chocolate before chilling. It adds a delicious crunch!
FAQs:
– Can I use other nut butters? Yes! Peanut butter is a tasty alternative.
– How long do they last? Store them in the fridge for up to a week.
These no-bake bites are not just tasty; they’re also a great way to impress guests at gatherings or enjoy a quick snack any time. Enjoy the rich flavor without the hassle of baking!
11. Chocolate Lava Cake for Special Occasions
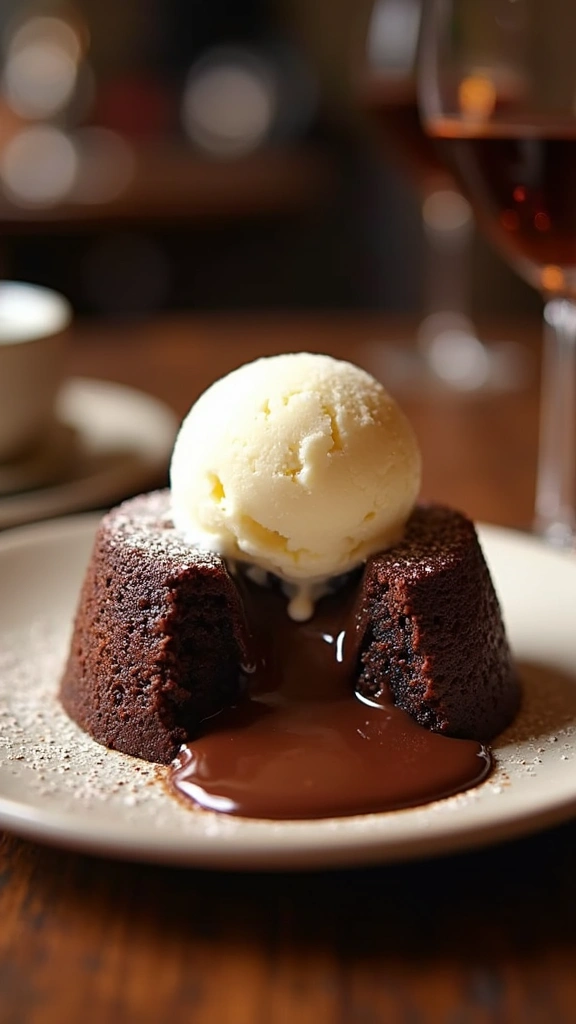
Looking to wow your guests at your next gathering? A warm, gooey Chocolate Lava Cake is the answer. This indulgent dessert oozes rich chocolate as you slice into it, making it perfect for special occasions. Pair it with a scoop of vanilla ice cream for a delightful contrast. Your friends and family will rave about it!
Ready to make your own Chocolate Lava Cake? Here’s a quick overview:
– Servings: 4
– Prep Time: 15 minutes
– Cook Time: 12 minutes
– Total Time: 27 minutes
– Calories: About 400 per serving
Ingredients:
– 1/2 cup unsalted butter
– 1 cup dark chocolate, chopped
– 2 large eggs
– 2 large egg yolks
– 1/4 cup sugar
– 2 tablespoons all-purpose flour
Instructions:
1. Preheat your oven to 425°F (220°C) and grease 4 ramekins.
2. In a bowl over simmering water, melt the butter and chopped chocolate together.
3. In a separate bowl, whisk the eggs, egg yolks, and sugar until thick and pale.
4. Stir the melted chocolate mixture into the eggs. Gently fold in the flour.
5. Divide the batter among the ramekins and bake for 12 minutes. Let them cool for 1 minute before inverting onto plates.
Watch the baking time closely to keep that delicious, molten center.
FAQs:
– Can I prepare the batter ahead of time? Yes, you can refrigerate it before baking.
Now you’re all set to impress! Enjoy the deliciousness of this dessert and the smiles it brings.
12. Fruity Summer Trifle
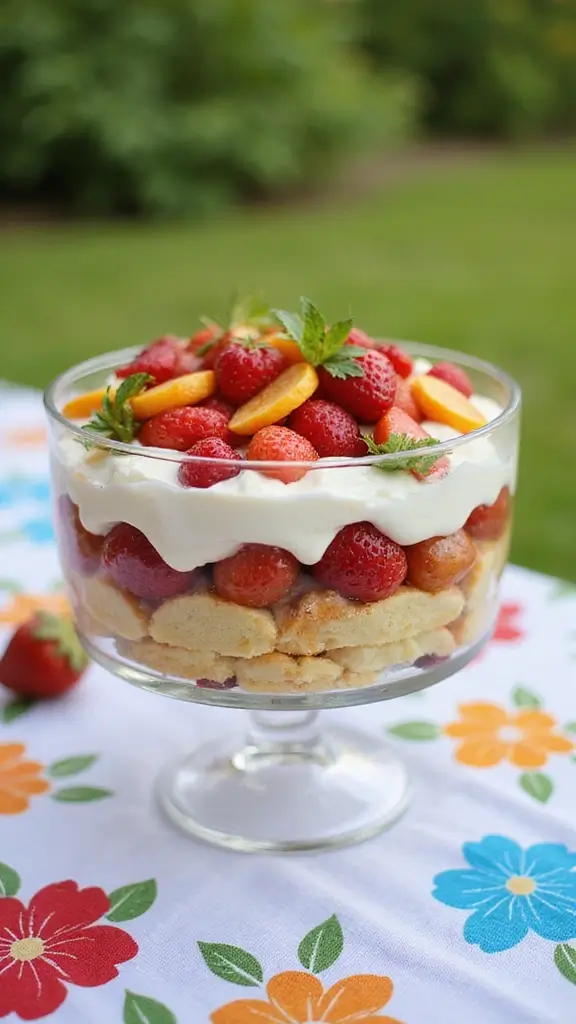
Beat the summer heat with a delightful Fruity Summer Trifle! This dessert is not just a treat for your taste buds but also a colorful centerpiece for any gathering. Layered with soft sponge cake, creamy vanilla pudding, and a medley of fresh seasonal fruits, each spoonful bursts with flavor. It’s a fantastic way to celebrate summer berries, making it a must-have for your next picnic or barbecue.
Recipe Overview:
– Servings: 8
– Prep Time: 20 minutes
– Total Time: 20 minutes
– Calories: 250 per serving
Ingredients:
– 1 loaf pound cake, sliced
– 2 cups strawberries, sliced
– 2 cups blueberries
– 1 cup whipped cream
– 1 cup vanilla pudding
Instructions:
1. In a large glass bowl, start by layering your ingredients: place a layer of pound cake at the bottom.
2. Spread a layer of vanilla pudding over the cake.
3. Add a layer of sliced strawberries, followed by fresh blueberries.
4. Top it off with a generous layer of whipped cream.
5. Repeat the layers until you’ve used all your ingredients.
6. Cover the bowl and refrigerate for at least 2 hours before serving.
Feel free to mix and match fruits based on your favorites! This trifle can be made a day in advance, allowing the flavors to meld together beautifully.
Quick Tips:
– Choose seasonal fruits for the best flavor.
– Add a splash of lemon juice to berries to brighten their taste.
– Use store-bought whipped cream for convenience.
– Layer creatively for a stunning visual effect.
This Fruity Summer Trifle is not only easy to make, but it also brings joy to any summer gathering. Enjoy every refreshing bite!
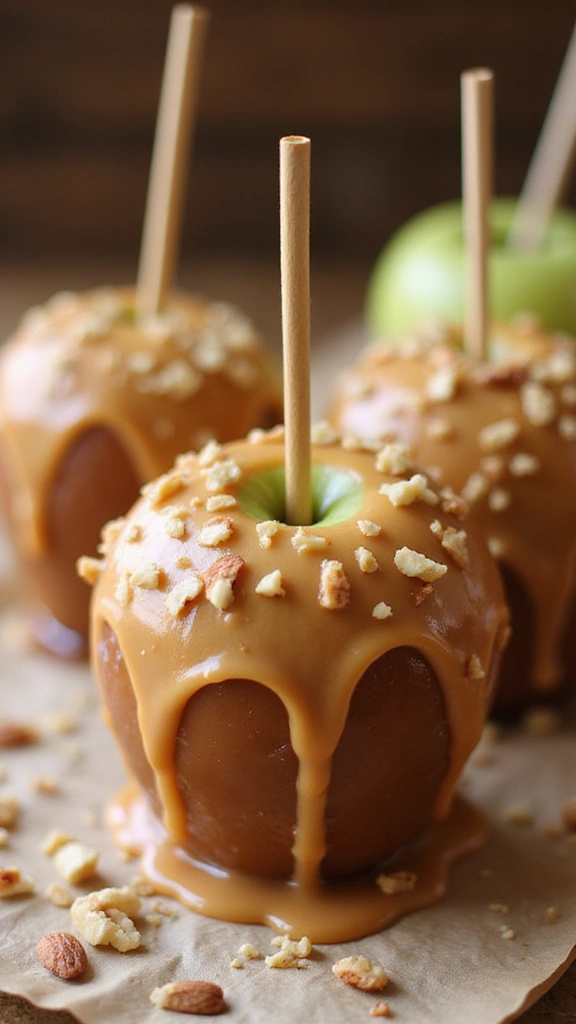
13. Caramel Apple Crisp for Cozy Nights
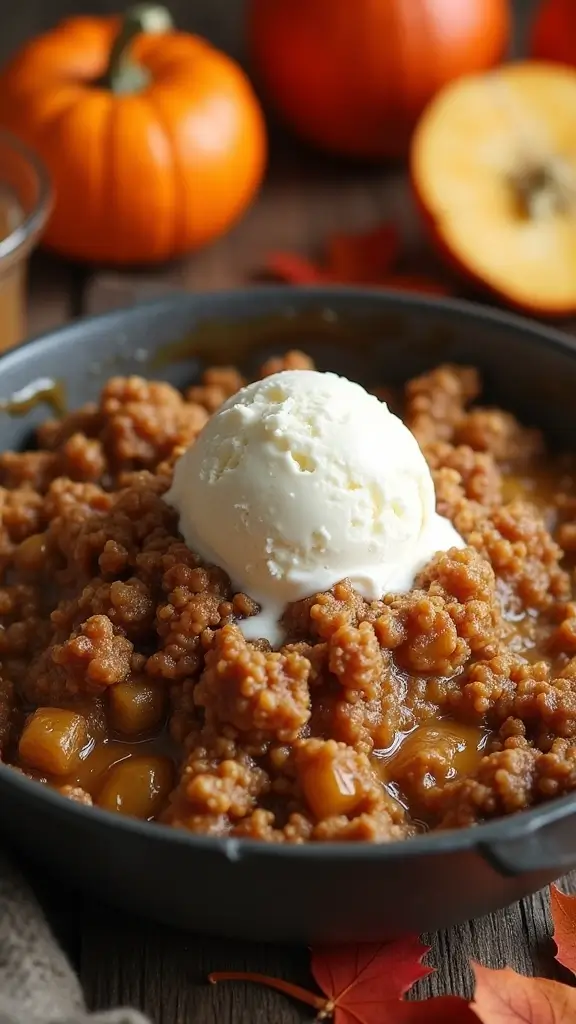
There’s something magical about autumn nights. The air turns crisp, leaves crunch underfoot, and you crave a warm dessert that wraps you in comfort. Enter the Caramel Apple Crisp. This delightful treat combines tart apples with a crunchy brown sugar and oat topping, all drizzled with velvety caramel sauce. Imagine enjoying a bowl of this warm goodness topped with a scoop of vanilla ice cream—it’s pure bliss!
Let’s whip up this cozy dessert! Here’s what you need to make it shine in your kitchen:
Ingredients:
– 6 cups apples, peeled and sliced
– 1/2 cup brown sugar
– 1/2 cup oats
– 1/4 cup flour
– 1/4 cup melted butter
– 1 tsp cinnamon
– 1 cup caramel sauce
Instructions:
1. Preheat your oven to 350°F (175°C).
2. In a bowl, toss the sliced apples with brown sugar and cinnamon until well coated.
3. In another bowl, mix oats, flour, and melted butter until crumbly.
4. Layer the sweetened apples in a baking dish and sprinkle the oat mixture on top.
5. Drizzle caramel sauce generously over everything, and bake for 45 minutes. Serve warm for the best experience!
Feeling adventurous? Add some chopped nuts for a delightful crunch.
FAQs:
Can I use frozen apples? It’s best to stick with fresh apples for the best texture.
Enjoy this Caramel Apple Crisp as a perfect end to any autumn meal, or simply as a sweet treat to warm your heart on chilly nights!
14. No-Bake Chocolate Peanut Butter Bars
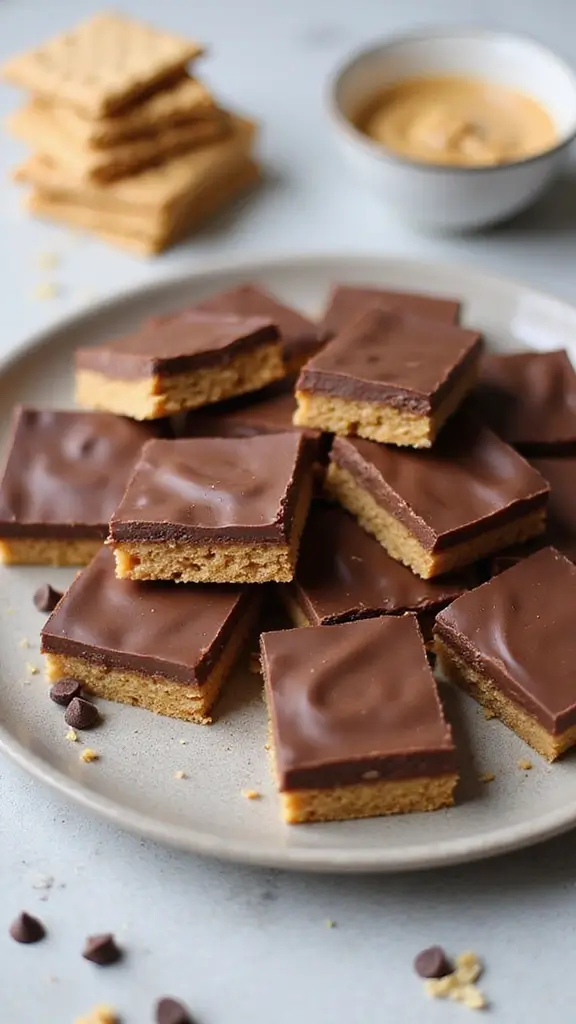
Satisfy your sweet tooth with No-Bake Chocolate Peanut Butter Bars! These rich, creamy bars blend the irresistible flavors of chocolate and peanut butter in a quick, easy treat. With no baking required, you’ll whip them up in just 15 minutes, making them perfect for busy days when you crave something special.
Ready to dive into the recipe? Here’s what you need:
Ingredients:
– 1 cup graham cracker crumbs
– 1/2 cup peanut butter
– 1/4 cup honey
– 1 cup chocolate chips
Instructions:
1. In a mixing bowl, stir together the graham cracker crumbs, peanut butter, and honey until everything is smooth.
2. Transfer the mixture to a lined square baking dish and press it down firmly so it holds together well.
3. Melt the chocolate chips in the microwave or on the stove, then pour the melted chocolate over the top, spreading it evenly.
4. Chill in the refrigerator for at least one hour. Once set, cut into bars.
For an extra crunch, sprinkle some chopped peanuts on top before chilling!
Storing Tips: Keep your bars fresh by placing them in an airtight container in the fridge. They’ll stay delicious for up to a week, making them a fantastic grab-and-go snack or dessert option!
Quick Tips:
– Use creamy peanut butter for smooth texture.
– Choose dark chocolate for a richer flavor.
– Add a pinch of salt to enhance sweetness.
– Experiment with toppings like coconut flakes or mini marshmallows.
Try these bars today—they’re sure to be a hit with family and friends!
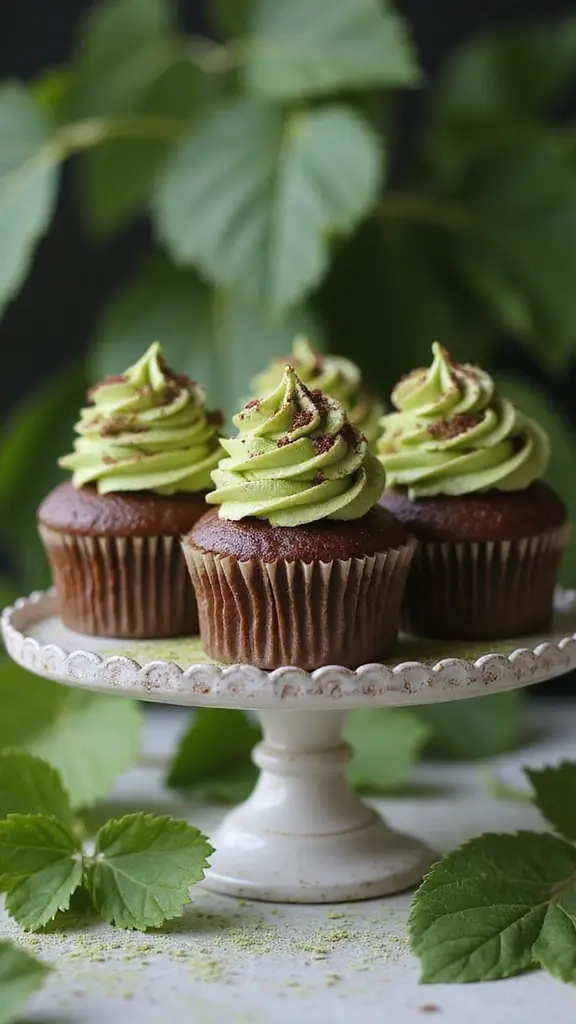
15. Choco-Matcha Cupcakes for a Unique Twist
Get ready to impress your guests with Choco-Matcha Cupcakes! This delightful treat combines the deep, rich flavor of chocolate with the earthy notes of matcha green tea. The result? A moist chocolate cupcake topped with a fluffy matcha frosting. It’s an unexpected blend that will have everyone asking for seconds at your next gathering!
Recipe Overview:
– Servings: 12
– Prep Time: 20 minutes
– Cook Time: 20 minutes
– Total Time: 40 minutes
– Calories: 250 per cupcake
Ingredients:
– 1 cup all-purpose flour
– 1/2 cup unsweetened cocoa powder
– 1 tsp baking powder
– 1/2 tsp baking soda
– 1/2 cup sugar
– 1/2 cup unsalted butter, softened
– 2 large eggs
– 1/4 cup buttermilk
– 1 tbsp matcha powder
– 1 cup powdered sugar
– 1/4 cup heavy cream
Instructions:
1. Preheat your oven to 350°F (175°C) and line a cupcake tin with paper liners.
2. In a mixing bowl, whisk together the flour, cocoa powder, baking powder, and baking soda.
3. In another bowl, cream the softened butter and sugar until fluffy. Add the eggs and buttermilk, mixing until smooth.
4. Gradually add the dry ingredients to the wet mixture until just combined. Fill the cupcake liners about two-thirds full and bake for 20 minutes. Let them cool completely.
5. For the frosting, beat the heavy cream until it starts to thicken. Slowly add the powdered sugar and matcha powder, mixing until the frosting is smooth. Frost the cooled cupcakes generously.
Top with chocolate shavings for a beautiful finish!
FAQs:
Can I use green tea instead of matcha?
Matcha gives the best flavor and vibrant color for these cupcakes.
These Choco-Matcha Cupcakes are not just desserts; they’re a conversation starter and a delicious way to surprise your friends and family. Enjoy baking and sharing this unique treat!
16. Classic Tiramisu for a Touch of Elegance

Elevate your dessert game with a Classic Tiramisu that will make your taste buds sing! This Italian delight combines rich, creamy mascarpone cheese with coffee-soaked ladyfingers, all dusted with cocoa. It’s a sophisticated treat that’s surprisingly easy to whip up. Serve it at your next dinner party or as a sweet surprise at home. Pair it with a robust espresso for the ultimate Italian experience!
Recipe Overview:
– Servings: 8
– Prep Time: 30 minutes
– Cook Time: 0 minutes
– Total Time: 30 minutes (plus chilling time)
– Calories: 350 per serving
Ingredients:
– 2 cups strong brewed coffee, cooled
– 24 ladyfingers
– 1 cup mascarpone cheese
– 1 cup heavy cream
– 1/2 cup sugar
– 1/4 cup cocoa powder
Instructions:
1. In a bowl, whip the heavy cream with sugar until soft peaks form.
2. Gently fold in the mascarpone until smooth and creamy.
3. Dip each ladyfinger in the cooled coffee and arrange them in a dish.
4. Spread a layer of the mascarpone mixture over the ladyfingers.
5. Repeat the layers until all ingredients are used, finishing with the mascarpone.
6. Dust the top with cocoa powder and refrigerate for at least 4 hours before serving.
For the best flavor, prepare your Tiramisu a day in advance.
FAQs:
How long can I keep tiramisu? It stays fresh in the fridge for up to 3 days.
This Classic Tiramisu is not just a dessert; it’s an experience. Treat yourself and your guests to this indulgent dessert that never fails to impress!
17. Sweet Potato Pie for a Southern Comfort

Indulge in the warm, comforting flavors of a Sweet Potato Pie, a beloved Southern treat that steals the show at any gathering! Imagine a velvety filling made from roasted sweet potatoes, infused with fragrant spices and a touch of vanilla. This delightful dessert offers a twist on traditional pumpkin pie, bringing a unique flavor that will have everyone asking for seconds. Top it off with a dollop of whipped cream for an irresistible finish!
Here’s how you can make this crowd-pleaser at home. Start by gathering your ingredients, which are simple and budget-friendly. This pie is perfect for holidays or cozy family dinners, making your table feel extra special without much fuss.
Recipe Overview:
– Servings: 8
– Prep Time: 20 minutes
– Cook Time: 50 minutes
– Total Time: 1 hour 10 minutes
– Calories: 320 per slice
Ingredients:
– 2 cups sweet potatoes, baked and mashed
– 1 cup sugar
– 1/2 cup milk
– 2 eggs
– 1/2 tsp cinnamon
– 1/4 tsp nutmeg
– 1/4 tsp ginger
– 1 pie crust
Instructions:
1. Preheat your oven to 350°F (175°C).
2. In a bowl, combine the mashed sweet potatoes, sugar, milk, eggs, and spices. Mix until smooth.
3. Pour this creamy filling into the pie crust.
4. Bake for 50 minutes or until the center is set. Allow it to cool before slicing.
Want a little extra flair? Sprinkle brown sugar on top before baking for a caramelized finish!
FAQs:
– Can I use canned sweet potatoes? Yes, but fresh ones provide the best flavor!
Enjoy this Sweet Potato Pie and watch it become a favorite in your home. It’s not just dessert; it’s a heartwarming tradition!
18. Raspberry Lemon Bars for a Tart Delight
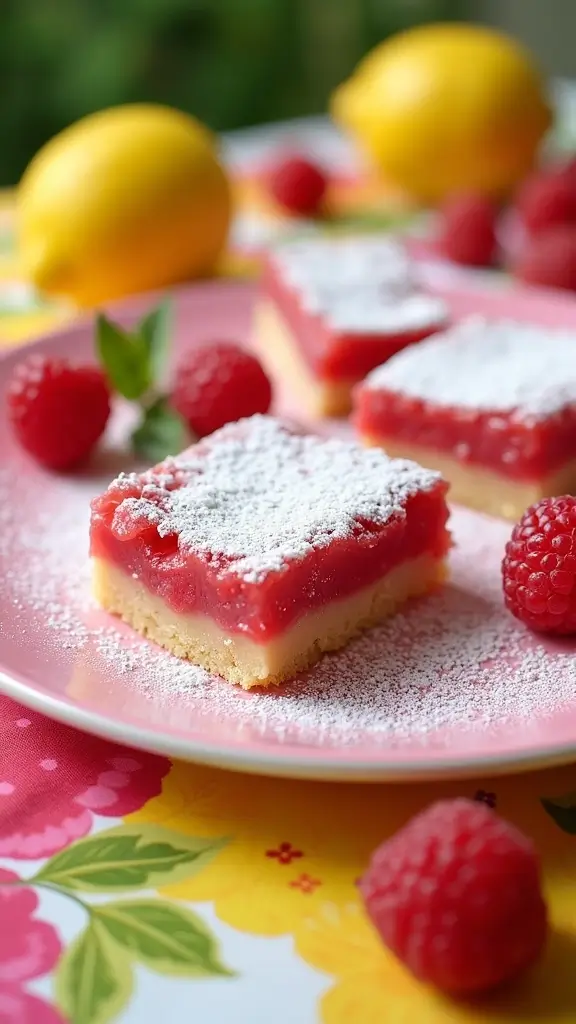
Add a burst of sunshine to your dessert lineup with Raspberry Lemon Bars. These treats balance zesty lemon with sweet, juicy raspberries, creating a delightful flavor explosion. Perfect for summer gatherings or picnics, they not only taste fantastic but also look stunning on your table. Serve them chilled for a refreshing bite that will leave everyone wanting more!
Recipe Overview:
– Servings: 16
– Prep Time: 20 minutes
– Cook Time: 25 minutes
– Total Time: 45 minutes
– Calories: 180 per bar
Ingredients:
– 1 1/2 cups graham cracker crumbs
– 1/2 cup sugar
– 1/2 cup butter, melted
– 3 large eggs
– 1 cup granulated sugar
– 1/4 cup fresh lemon juice
– 1 cup fresh raspberries
– Powdered sugar for dusting
Instructions:
1. Preheat your oven to 350°F (175°C). Grease a baking dish with cooking spray.
2. In a bowl, combine graham cracker crumbs, sugar, and melted butter. Press this mixture firmly into the bottom of the baking dish to create a crust.
3. In another bowl, whisk together the eggs, granulated sugar, lemon juice, and fresh raspberries until well blended.
4. Pour the lemon-raspberry filling over the crust.
5. Bake for 25 minutes. Once done, let the bars cool completely. Cut into squares and dust with powdered sugar for a pretty finish.
For an extra touch, garnish with more fresh raspberries. These bars store well in the fridge for up to 5 days, so you can enjoy them throughout the week! Perfect for sharing or savoring solo, they are a seasonal favorite that everyone will love.
19. Chocolate Chip Banana Bread for a Cozy Treat
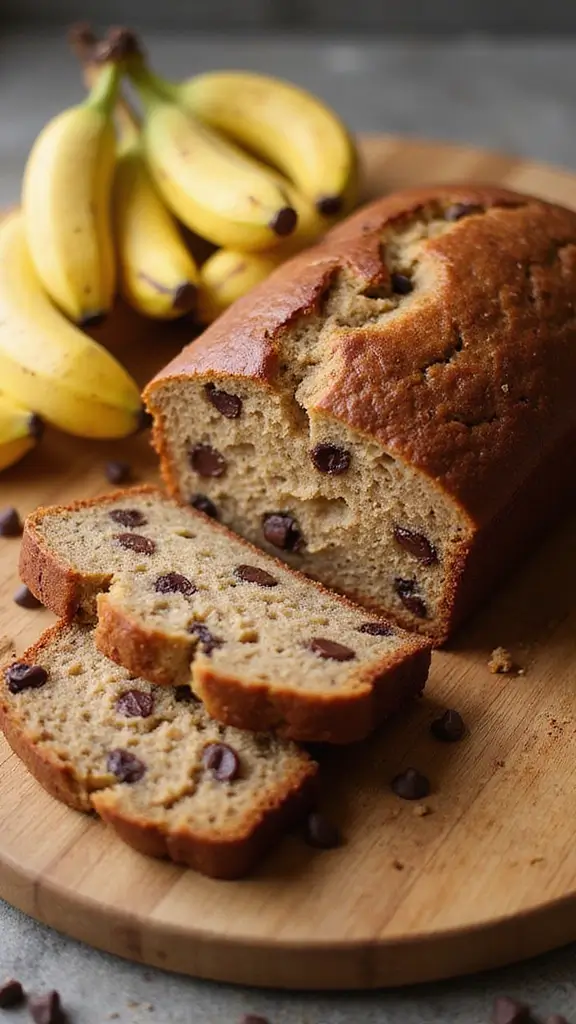
Wrap up your dessert adventure with a slice of warm Chocolate Chip Banana Bread—a classic that never disappoints! This sweet and moist bread not only makes a delightful breakfast but also serves as a cozy dessert. Using ripe bananas and rich chocolate chips, it’s a fantastic way to rescue those overripe bananas. Enjoy it fresh out of the oven or toasted with a pat of butter for that extra touch of comfort.
Recipe Overview:
– Servings: 10
– Prep Time: 15 minutes
– Cook Time: 60 minutes
– Total Time: 1 hour 15 minutes
– Calories: 250 per slice
Ingredients:
– 3 ripe bananas, mashed
– 1/2 cup sugar
– 1/4 cup unsalted butter, melted
– 2 large eggs
– 1 tsp vanilla extract
– 1 1/2 cups all-purpose flour
– 1 tsp baking soda
– 1/2 cup chocolate chips
Instructions:
1. Preheat your oven to 350°F (175°C) and grease a loaf pan.
2. In a large bowl, mix the mashed bananas, sugar, melted butter, eggs, and vanilla until smooth.
3. Gradually add the flour and baking soda, stirring until just combined.
4. Fold in the chocolate chips gently.
5. Pour the batter into the prepared pan and bake for 60 minutes. Let it cool before slicing.
For an extra crunch, add some chopped walnuts or your favorite nuts.
FAQs:
– Can I freeze banana bread? Yes! Just wrap it tightly, and it will stay fresh for up to 3 months.
This Chocolate Chip Banana Bread is perfect for gatherings or simply enjoying at home. The aroma filling your kitchen will make everyone feel at ease. Enjoy every bite!
Chocolate Chip Banana Bread for a Cozy Treat
Editor’s Choice

Amazon Basics Rectangular Baking Bread Loaf Pan, 9.5 x 5 Inch, Set of 2,…

KitchenAid Gourmet Stainless Steel Wire Masher, 10.24-Inch, Black

Silicone Baking Mat, 3 Pack Reusable Baking Mat, Non-Stick, Food Safe Si…
Conclusion
From rich chocolate treats to refreshing fruit desserts, these 19 crowd-pleasing desserts showcase the best flavors each season has to offer. Whether you opt for a no-bake creation in summer or a comforting pie in autumn, there’s always a delicious treat to end your meal with a smile. So gather your ingredients, invite your friends over, and celebrate the sweetness of every season! Which dessert are you eager to try next?
Note: We aim to provide accurate product links, but some may occasionally expire or become unavailable. If this happens, please search directly on Amazon for the product or a suitable alternative.
This post contains Amazon affiliate links, meaning I may earn a small commission if you purchase through my links, at no extra cost to you.
Frequently Asked Questions
What Are Some Seasonal Desserts Perfect for Fall?
Fall is a wonderful time for dessert lovers! You can’t go wrong with pumpkin pie, apple crisp, or spiced pecan tarts. These dishes capture the essence of the season with their warm flavors and comforting aromas. They’re sure to be crowd-pleasers for any gathering during the fall months!
What Are the Best No-Bake Desserts for Summer Gatherings?
Summer is all about keeping things cool, and no-bake desserts are the perfect solution! Consider making a no-bake cheesecake, fruit parfaits, or a refreshing icebox cake. These desserts are not only easy to prepare but also delightful and light, making them perfect for hot summer days!
How Can I Make Delicious Desserts Healthier Without Losing Flavor?
You can definitely create delicious desserts that are healthier! Try substituting sugar with natural sweeteners like honey or maple syrup, use whole grain flour instead of all-purpose, and incorporate fruits or nuts for added flavor and nutrition. Experimenting with these alternatives can help you enjoy guilt-free treats while still satisfying your sweet tooth!
What Are Some Unique Dessert Ideas for Spring Celebrations?
Spring is a time for fresh flavors and vibrant colors! Consider making lemon meringue tarts, strawberry shortcake, or lavender-infused cupcakes. These unique desserts not only celebrate the season but also impress your guests with their delightful taste and beautiful presentation!
Can I Prepare Desserts Ahead of Time for a Party?
Absolutely! Preparing desserts ahead of time can take the stress out of hosting. Many delicious desserts like brownies, cookies, or puddings can be made a day or two in advance. Just store them properly to maintain freshness. Your guests will appreciate your effort, and you’ll enjoy the party without the last-minute rush!