The hustle and bustle of hosting a gathering can be thrilling, but it often comes with the pressure of preparing something delicious for your guests. This time of year has me craving sweet treats that are easy to whip up and sure to please a crowd. If you’re someone who enjoys bringing people together over good food but might not have hours to spend in the kitchen, this post is for you.
I pulled together a list of 12 easy desserts that are perfect for a crowd, featuring both sheet pan and no-bake options. These desserts are not only quick and simple but also require minimal ingredients, making them ideal for anyone who loves minimalist cooking. Whether you are hosting a party, a potluck, or simply want a tasty treat to share, these dessert ideas will have you covered. Each recipe is designed to be straightforward, allowing you to enjoy your time with guests rather than being stuck in the kitchen.
Get ready to impress your friends and family with these delightful, fuss-free desserts that taste incredible. You’ll find recipes that cater to all tastes, ensuring everyone leaves happy and satisfied. Let’s dive into these easy dessert options that make entertaining a breeze!
Key Takeaways
– Discover a variety of easy dessert options that require minimal ingredients, making them perfect for busy hosts.
– Enjoy 12 delicious recipes, including both sheet pan desserts and no-bake treats, suited for any occasion.
– Learn how to make crowd-pleasing sweets like Chocolate Chip Cookie Bars and No-Bake Strawberry Cheesecake Bars that everyone will love.
– Find desserts that are simple to prepare, allowing you to spend more time with your guests and less time in the kitchen.
– Explore dessert ideas that offer a mix of flavors, textures, and presentations to cater to all tastes and preferences.
Contents
- 1. Sheet Pan Chocolate Chip Cookie Bars
- 2. No-Bake Strawberry Cheesecake Bars
- 3. Chocolate Peanut Butter Rice Krispie Treats
- 4. Lemon Bars with Shortbread Crust
- 5. Easy Fudge Brownies
- 6. Coconut Macaroons
- 7. Peanut Butter and Banana Ice Cream
- 8. S’mores Dip
- 9. Cinnamon Roll Casserole
- 10. No-Bake Chocolate Oatmeal Cookies
- 11. Fruit Pizza
- 12. Chocolate Bark
1. Sheet Pan Chocolate Chip Cookie Bars
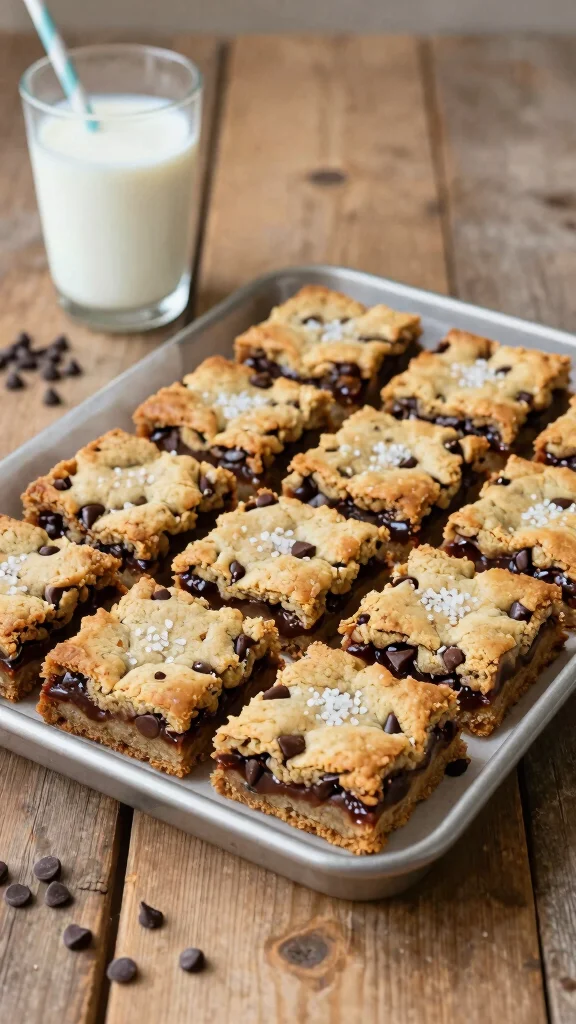
Craving chocolate chip cookies but want to keep things simple? These sheet pan cookie bars deliver all the gooey, chocolatey goodness you love without the fuss of individual cookies. Perfectly chewy in the center and slightly crispy around the edges, they’re a crowd-pleaser that fills the room with an irresistible aroma while baking.
With just a handful of ingredients, you can create a dessert that feels special yet takes minimal effort. These bars are highly customizable too; toss in some nuts, dried fruits, or a sprinkle of sea salt for a gourmet twist!
Recipe Overview:
– Servings: 24 bars
– Prep Time: 15 minutes
– Cook Time: 25 minutes
– Total Time: 40 minutes
– Calories: 200 per bar
Nutrition Information (per bar):
– Total Fat: 10g
– Saturated Fat: 5g
– Carbohydrates: 28g
– Sugars: 14g
– Protein: 2g
Ingredients:
– 2 1/4 cups all-purpose flour
– 1 tsp baking soda
– 1/2 tsp salt
– 1 cup unsalted butter, softened
– 3/4 cup granulated sugar
– 3/4 cup packed brown sugar
– 1 tsp vanilla extract
– 2 large eggs
– 2 cups chocolate chips
Instructions:
1. Preheat the oven to 350°F (175°C) and grease a 13×18-inch sheet pan.
2. In a bowl, mix flour, baking soda, and salt. Set aside.
3. In another bowl, cream the softened butter, granulated sugar, and brown sugar until light and fluffy.
4. Beat in the eggs one at a time, then add vanilla.
5. Gradually blend in the flour mixture and stir in the chocolate chips.
6. Spread the dough evenly in the prepared pan and bake for 20-25 minutes or until golden brown.
7. Let cool before cutting into bars.
For clean cuts, use a pizza cutter or sprinkle flaky sea salt before baking for an extra crunch!
FAQs: Can these bars be frozen? Absolutely! Slice them up and freeze in an airtight container for a sweet treat on demand.
2. No-Bake Strawberry Cheesecake Bars
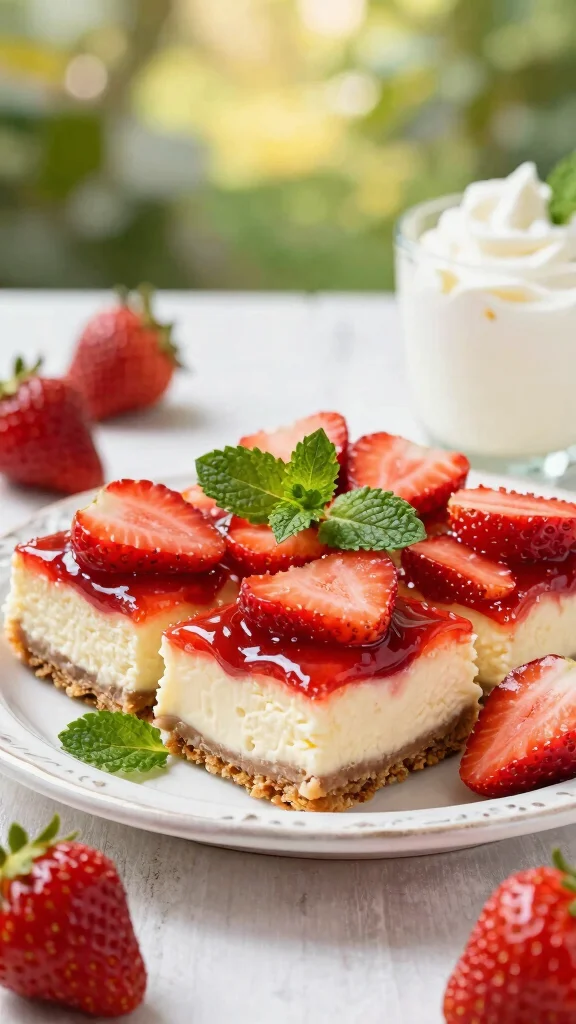
Looking for a refreshing dessert that screams summer? These no-bake strawberry cheesecake bars are just what you need! With a buttery graham cracker crust and a creamy cheesecake filling topped with fresh strawberries, they’re not only easy to make but also a treat for the eyes.
Perfect for warm days, these bars eliminate the need for baking, freeing up your oven for other delicious dishes. The vibrant strawberries on the creamy filling create a stunning visual that’s sure to impress at any gathering.
Recipe Overview:
– Servings: 12 bars
– Prep Time: 20 minutes
– Chill Time: 4 hours
– Total Time: 4 hours 20 minutes
– Calories: 250 per bar
Nutrition Information (per bar):
– Total Fat: 16g
– Saturated Fat: 10g
– Carbohydrates: 24g
– Sugars: 12g
– Protein: 3g
Ingredients:
– 1 ½ cups graham cracker crumbs
– 1/3 cup sugar
– 1/2 cup unsalted butter, melted
– 8 oz cream cheese, softened
– 1 cup powdered sugar
– 1 tsp vanilla extract
– 2 cups whipped topping
– 2 cups fresh strawberries, sliced
Instructions:
1. In a bowl, mix graham cracker crumbs, sugar, and melted butter until well combined.
2. Press the mixture firmly into the bottom of a greased 9×9-inch pan to form the crust.
3. In another bowl, beat cream cheese, powdered sugar, and vanilla until smooth.
4. Fold in whipped topping until well blended.
5. Spread the cheesecake mixture over the crust evenly.
6. Top with sliced strawberries and refrigerate for at least 4 hours until set.
7. Cut into bars and serve cold.
For a beautiful presentation, use a glass pan and a buttered knife for easier cutting!
FAQs: How long can these bars be stored? They can last up to a week in the fridge, making them a fantastic make-ahead dessert option!
3. Chocolate Peanut Butter Rice Krispie Treats
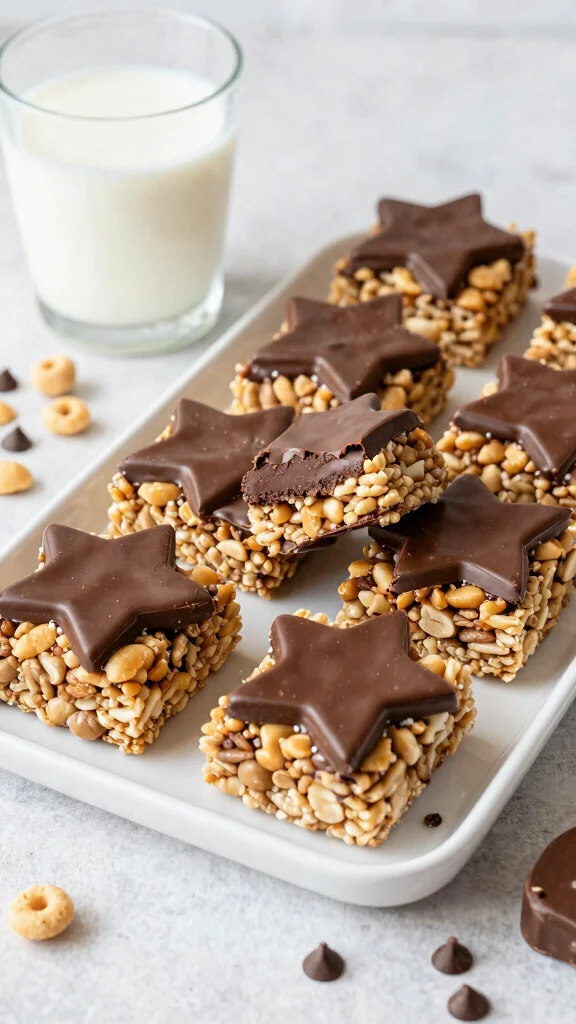
In the mood for a nostalgic treat everyone raves about? These chocolate peanut butter Rice Krispie treats are sure to hit the spot! Combining the classic crunch of Rice Krispies with rich chocolate and creamy peanut butter, they create a chewy, delightful bar everyone will love.
These treats are not just easy to whip up; they require minimal ingredients commonly found in your pantry. Plus, they maintain their shape at room temperature, making them fantastic for parties and gatherings. Whether you cut them into squares or use cookie cutters for fun shapes, they’re bound to impress!
Recipe Overview:
– Servings: 16 bars
– Prep Time: 15 minutes
– Chill Time: 30 minutes
– Total Time: 45 minutes
– Calories: 180 per bar
Nutrition Information (per bar):
– Total Fat: 8g
– Saturated Fat: 3g
– Carbohydrates: 25g
– Sugars: 10g
– Protein: 3g
Ingredients:
– 6 cups Rice Krispies cereal
– 1 cup creamy peanut butter
– 1 cup semi-sweet chocolate chips
– 1/2 cup unsalted butter
– 1/2 cup powdered sugar
Instructions:
1. In a saucepan over low heat, melt the butter and peanut butter together until smooth.
2. Stir in powdered sugar and mix until combined.
3. Remove from heat and fold in Rice Krispies cereal gently.
4. Press the mixture into a greased 9×13 inch pan evenly.
5. Melt the chocolate chips in the microwave and pour over the Rice Krispies mixture.
6. Spread evenly and refrigerate for 30 minutes to set.
7. Cut into squares and serve.
For an elevated taste, add crushed nuts or a sprinkle of sea salt on top of the chocolate!
FAQs: Can these treats be made ahead? Yes! They last for about a week when stored in an airtight container at room temperature.
4. Lemon Bars with Shortbread Crust
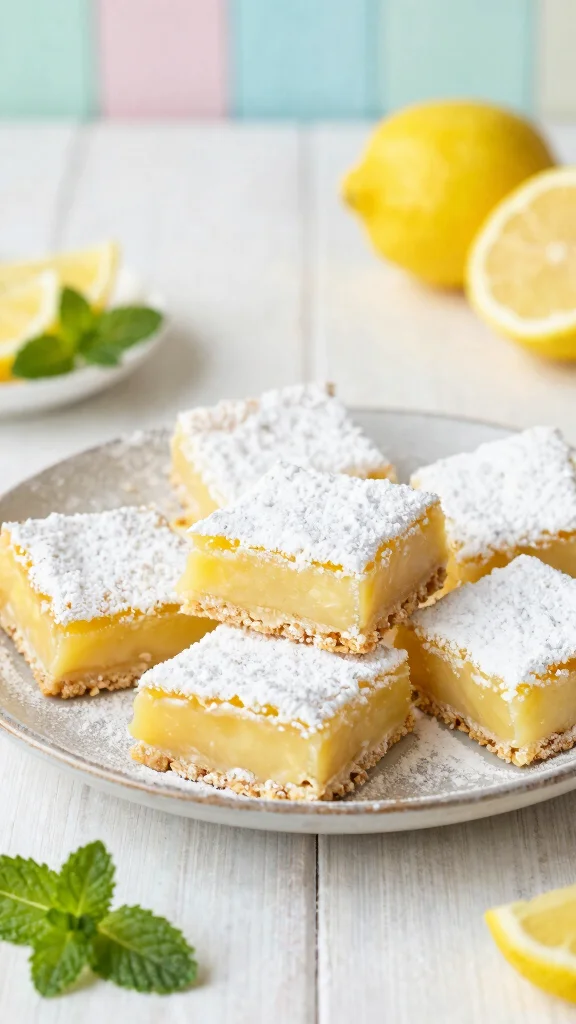
Looking for a refreshing dessert that’s perfect for gatherings? These zesty lemon bars have a buttery shortbread crust and a tangy filling that strikes a delightful balance of sweet and tart. The smooth texture and bright flavor make them a favorite year-round, especially in warmer months.
Best of all, they come together in a few simple steps and can be prepared ahead of time, making them ideal for potlucks or family get-togethers. A light dusting of powdered sugar adds a charming touch before serving!
Recipe Overview:
– Servings: 16 bars
– Prep Time: 15 minutes
– Cook Time: 30 minutes
– Total Time: 45 minutes
– Calories: 220 per bar
Nutrition Information (per bar):
– Total Fat: 10g
– Saturated Fat: 6g
– Carbohydrates: 32g
– Sugars: 12g
– Protein: 3g
Ingredients:
– 1 cup unsalted butter, softened
– 2 cups all-purpose flour
– 1/2 cup powdered sugar
– 1/4 tsp salt
– 4 large eggs
– 1 1/2 cups granulated sugar
– 1/2 cup fresh lemon juice
– Zest of 2 lemons
– Powdered sugar for dusting
Instructions:
1. Preheat oven to 350°F (175°C) and grease a 9×13-inch baking dish.
2. In a bowl, mix softened butter, flour, powdered sugar, and salt until crumbly.
3. Press the mixture into the bottom of the prepared dish to form the crust.
4. Bake for 15 minutes until lightly golden.
5. In another bowl, whisk together eggs, granulated sugar, lemon juice, and lemon zest.
6. Pour the lemon mixture over the crust and bake for an additional 20 minutes.
7. Let cool, then dust with powdered sugar before slicing.
Use fresh lemon juice for the most vibrant flavor and ensure the bars are fully cooled before slicing for clean edges!
FAQs: How can I store leftovers? Keep them in the refrigerator; they last up to a week when covered.
5. Easy Fudge Brownies
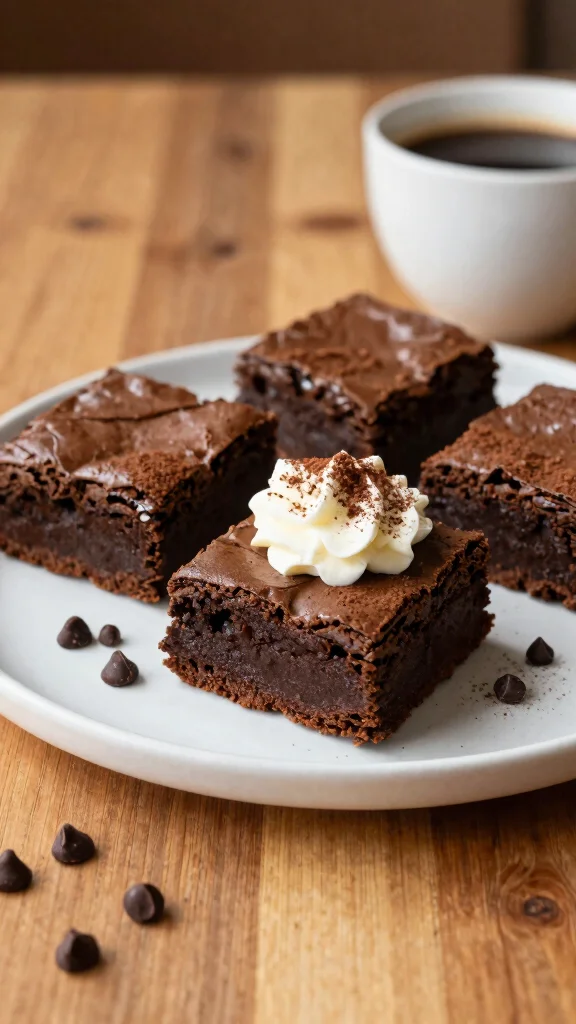
Indulge in the rich, fudgy goodness of these easy brownies that will quickly become your go-to recipe! With a deep chocolate flavor and a perfectly chewy texture, these brownies come together in just one bowl, making them a breeze to prepare.
Whether you enjoy them plain or topped with a scoop of ice cream, they are sure to be a hit at any gathering. Feel free to personalize them with nuts, chocolate chips, or even a swirl of peanut butter for an extra treat!
Recipe Overview:
– Servings: 16 brownies
– Prep Time: 10 minutes
– Cook Time: 25 minutes
– Total Time: 35 minutes
– Calories: 220 per brownie
Nutrition Information (per brownie):
– Total Fat: 12g
– Saturated Fat: 7g
– Carbohydrates: 30g
– Sugars: 18g
– Protein: 3g
Ingredients:
– 1 cup unsalted butter
– 2 cups granulated sugar
– 4 large eggs
– 1 cup unsweetened cocoa powder
– 1 cup all-purpose flour
– 1 tsp vanilla extract
– 1/2 tsp salt
Instructions:
1. Preheat the oven to 350°F (175°C) and grease a 9×13-inch baking pan.
2. In a large mixing bowl, melt the butter and stir in the sugar until combined.
3. Add the eggs one at a time, mixing well after each addition.
4. Stir in cocoa powder, flour, vanilla, and salt until just combined.
5. Pour the batter into the prepared pan and smooth it out evenly.
6. Bake for 20-25 minutes until a toothpick comes out with moist crumbs.
7. Let cool before cutting into squares.
For an extra decadent treat, top with chocolate ganache or serve with whipped cream!
FAQs: Can I use a different pan size? Yes, but baking time may vary, so keep an eye on them.
6. Coconut Macaroons

Love coconut? These chewy coconut macaroons are a delightful treat that will satisfy your cravings! With just a few simple ingredients, these sweet bites are crispy on the outside and soft on the inside. The tropical flavor of coconut pairs beautifully with sugar, making them an ideal dessert for any occasion.
Not only are they easy to make, but they’re also gluten-free, which is great for those with dietary restrictions. Drizzle them with chocolate for a touch of indulgence!
Recipe Overview:
– Servings: 24 macaroons
– Prep Time: 10 minutes
– Cook Time: 20 minutes
– Total Time: 30 minutes
– Calories: 100 per macaroon
Nutrition Information (per macaroon):
– Total Fat: 6g
– Saturated Fat: 4g
– Carbohydrates: 10g
– Sugars: 8g
– Protein: 2g
Ingredients:
– 2 2/3 cups sweetened shredded coconut
– 2/3 cup sweetened condensed milk
– 1 tsp vanilla extract
– 2 large egg whites
– A pinch of salt
Instructions:
1. Preheat the oven to 325°F (160°C) and line a baking sheet with parchment paper.
2. In a bowl, combine shredded coconut, condensed milk, vanilla extract, and salt.
3. In another bowl, beat egg whites until stiff peaks form, then gently fold into the coconut mixture.
4. Scoop tablespoons of the mixture onto the prepared baking sheet.
5. Bake for 18-20 minutes until golden brown.
6. Let cool before serving.
For an extra treat, dip the bottoms in melted chocolate before cooling!
FAQs: Can these be frozen? Yes! They freeze well and can last for up to a month in the freezer.
7. Peanut Butter and Banana Ice Cream
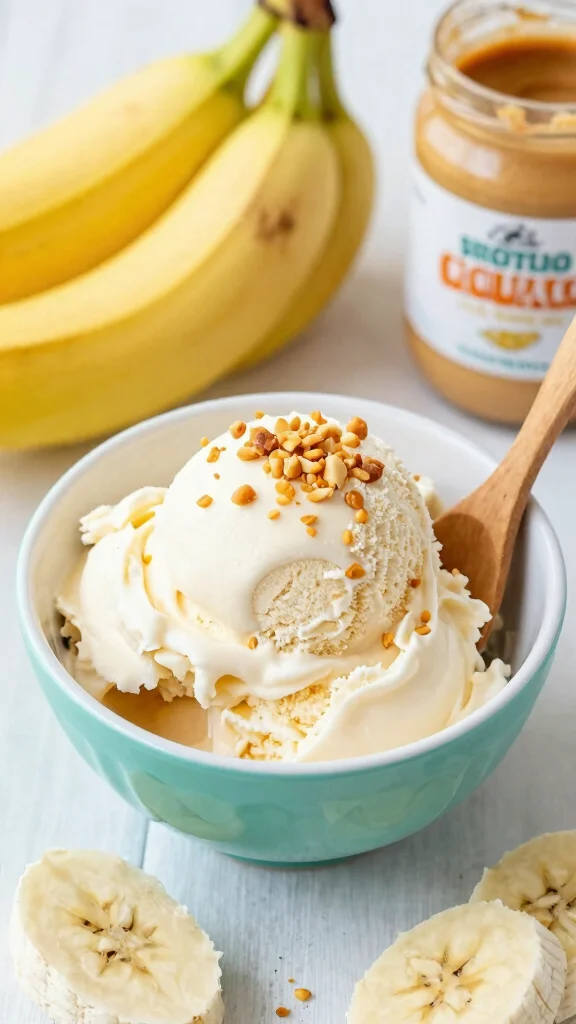
Looking for a cool treat to beat the heat? This homemade peanut butter and banana ice cream is as easy as it gets! With just two main ingredients, this creamy dessert is not only delicious but also guilt-free. The natural sweetness of ripe bananas combined with the rich flavor of peanut butter creates an irresistible dessert everyone will love.
This no-churn recipe means no ice cream maker is needed, making it perfect for using up those overripe bananas that might otherwise go to waste. Serve it in cones or bowls and watch your friends and family delight in this smooth, creamy treat!
Recipe Overview:
– Servings: 4 servings
– Prep Time: 10 minutes
– Total Time: 10 minutes
– Calories: 150 per serving
Nutrition Information (per serving):
– Total Fat: 6g
– Saturated Fat: 1g
– Carbohydrates: 25g
– Sugars: 12g
– Protein: 3g
Ingredients:
– 4 ripe bananas
– 1/2 cup peanut butter
Instructions:
1. Slice the bananas and place them in a blender or food processor.
2. Add the peanut butter and blend until smooth.
3. Transfer the mixture to a bowl and freeze for at least 2 hours until firm.
4. Scoop and serve in cones or bowls.
Add a splash of vanilla extract or chocolate chips for an added twist!
FAQs: How long can I keep this ice cream? It will stay good in the freezer for about a week.
8. S’mores Dip

Bring the joy of camping indoors with this easy s’mores dip! This delightful dessert combines melted chocolate and toasted marshmallows, served warm and perfect for dipping with graham crackers. It captures all the flavors of classic s’mores without needing an outdoor fire!
This dip is a hit at any gathering and requires minimal ingredients and effort to whip up. Serve it in a cast-iron skillet or a baking dish, and watch everyone gather around to dig in! Skip the mess of traditional s’mores and enjoy this easy alternative instead.
Recipe Overview:
– Servings: 8 servings
– Prep Time: 10 minutes
– Cook Time: 10 minutes
– Total Time: 20 minutes
– Calories: 180 per serving
Nutrition Information (per serving):
– Total Fat: 8g
– Saturated Fat: 3g
– Carbohydrates: 25g
– Sugars: 15g
– Protein: 2g
Ingredients:
– 1 cup chocolate chips
– 1 cup mini marshmallows
– 1/2 cup graham cracker crumbs
– 1 tbsp unsalted butter
Instructions:
1. Preheat the oven to 450°F (230°C).
2. Grease a baking dish or cast-iron skillet with butter.
3. Spread chocolate chips in an even layer at the bottom of the dish.
4. Top with mini marshmallows and sprinkle graham cracker crumbs over the top.
5. Bake for 5-10 minutes, or until the marshmallows are golden brown and melted.
6. Serve immediately with graham crackers for dipping.
For an extra twist, drizzle some caramel or add sliced fruit for dipping!
FAQs: Can I make this ahead of time? It’s best enjoyed fresh, but you can prepare the layers in advance and bake at the last minute.
9. Cinnamon Roll Casserole

Craving a sweet breakfast treat that doubles as dessert? This delightful cinnamon roll casserole is like a giant cinnamon roll you can share with everyone! The gooey, warm cinnamon rolls are baked together, making them perfect for family brunches or dessert nights.
With just a few ingredients, you can whip up a dish that looks impressive yet is super simple to prepare. Top it off with a drizzle of cream cheese icing, and you’ve created a dessert that’s hard to resist!
Recipe Overview:
– Servings: 12 servings
– Prep Time: 15 minutes
– Cook Time: 30 minutes
– Total Time: 45 minutes
– Calories: 300 per serving
Nutrition Information (per serving):
– Total Fat: 15g
– Saturated Fat: 6g
– Carbohydrates: 40g
– Sugars: 20g
– Protein: 4g
Ingredients:
– 2 cans refrigerated cinnamon rolls
– 4 eggs
– 1 cup milk
– 1 tsp vanilla extract
– 1 tsp ground cinnamon
– 1/2 cup maple syrup
– Cream cheese icing (included with rolls)
Instructions:
1. Preheat the oven to 350°F (175°C) and grease a 9×13-inch baking dish.
2. Cut the cinnamon rolls into quarters and place them in the prepared dish.
3. In a bowl, whisk together eggs, milk, vanilla, and ground cinnamon until smooth.
4. Pour the egg mixture over the cinnamon rolls and drizzle with maple syrup.
5. Bake for 25-30 minutes until golden brown and cooked through.
6. Drizzle with cream cheese icing before serving.
Serve warm with a scoop of vanilla ice cream for an indulgent treat!
FAQs: Can I make this the night before? Yes! Prepare everything, cover it, and bake in the morning for a fresh breakfast treat.
10. No-Bake Chocolate Oatmeal Cookies
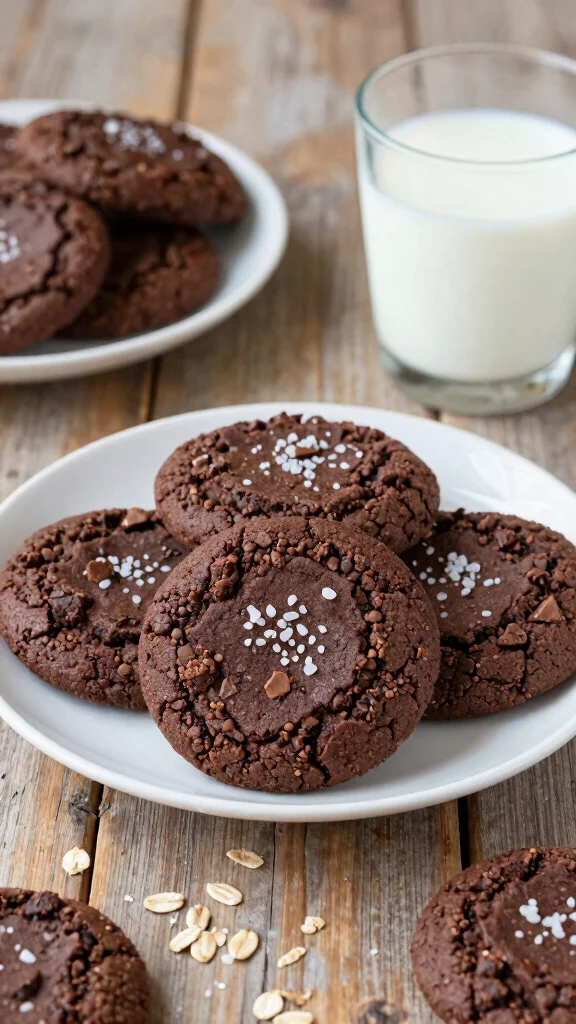
In the mood for something sweet but don’t want to turn on the oven? These no-bake chocolate oatmeal cookies are the perfect solution! With just a handful of ingredients, you can create delightful cookies that satisfy your chocolate cravings without any baking involved. Chewy, chocolaty, and packed with rolled oats, they’re not just a dessert but also a tasty snack!
Ideal for parties or after-school treats, these cookies hold their shape well and can be made in under 30 minutes. Plus, they’re gluten-free when you use certified gluten-free oats. Enjoy them straight from the fridge for a refreshing bite!
Recipe Overview:
– Servings: 24 cookies
– Prep Time: 10 minutes
– Chill Time: 15 minutes
– Total Time: 25 minutes
– Calories: 150 per cookie
Nutrition Information (per cookie):
– Total Fat: 7g
– Saturated Fat: 3g
– Carbohydrates: 21g
– Sugars: 10g
– Protein: 2g
Ingredients:
– 1/2 cup unsweetened cocoa powder
– 1 cup granulated sugar
– 1/2 cup milk
– 1/2 cup unsalted butter
– 3 cups rolled oats
– 1 tsp vanilla extract
Instructions:
1. In a saucepan, bring cocoa powder, sugar, milk, and butter to a boil.
2. Remove from heat and stir in vanilla and oats until well combined.
3. Drop spoonfuls of dough onto wax paper and let cool at room temperature for about 15 minutes until set.
4. Store in an airtight container in the fridge.
For extra flavor, add a pinch of salt or some chopped nuts into the mix!
FAQs: How long will these cookies last? They can last up to a week in the fridge, though they’re best fresh!
11. Fruit Pizza
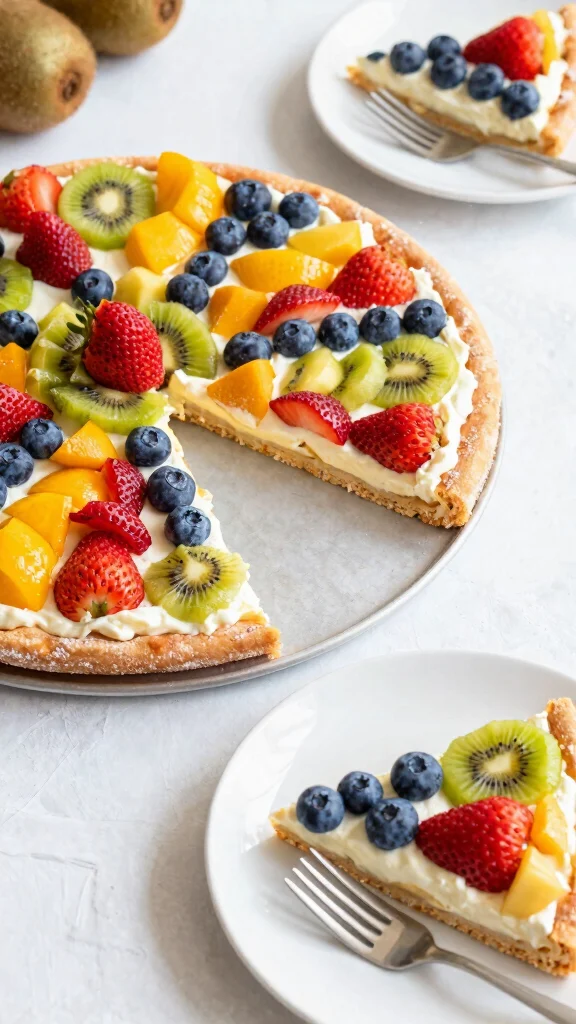
Want to impress your guests with a stunning dessert? Brighten up your table with a delightful fruit pizza! This show-stopping treat features a soft sugar cookie crust topped with creamy frosting and an array of colorful fruits. The contrast of flavors and textures makes this dessert both fun and refreshing, appealing to kids and adults alike.
What’s great about fruit pizza is its versatility; you can customize the toppings based on seasonal fruits or personal preferences, making it a wonderful choice for gatherings any time of year. Plus, it’s easy to make and requires no baking, just chilling!
Recipe Overview:
– Servings: 12 slices
– Prep Time: 15 minutes
– Chill Time: 1 hour
– Total Time: 1 hour 15 minutes
– Calories: 220 per slice
Nutrition Information (per slice):
– Total Fat: 10g
– Saturated Fat: 5g
– Carbohydrates: 30g
– Sugars: 15g
– Protein: 2g
Ingredients:
– 1 package refrigerated sugar cookie dough
– 8 oz cream cheese, softened
– 1/2 cup powdered sugar
– 1 tsp vanilla extract
– Assorted fresh fruits (strawberries, blueberries, kiwi, etc.)
Instructions:
1. Preheat the oven to 350°F (175°C) and press the sugar cookie dough onto a greased pizza pan to form a crust.
2. Bake for 10-12 minutes or until golden brown.
3. Let cool completely.
4. In a bowl, beat together cream cheese, powdered sugar, and vanilla until smooth.
5. Spread the cream cheese mixture over the cooled crust.
6. Top with assorted fruits and chill for 1 hour before slicing.
7. Serve cold.
For the best flavor and presentation, use seasonal fruits!
FAQs: Can I make this ahead of time? Yes, but it’s best assembled on the day you plan to serve it for fresh fruit.
12. Chocolate Bark
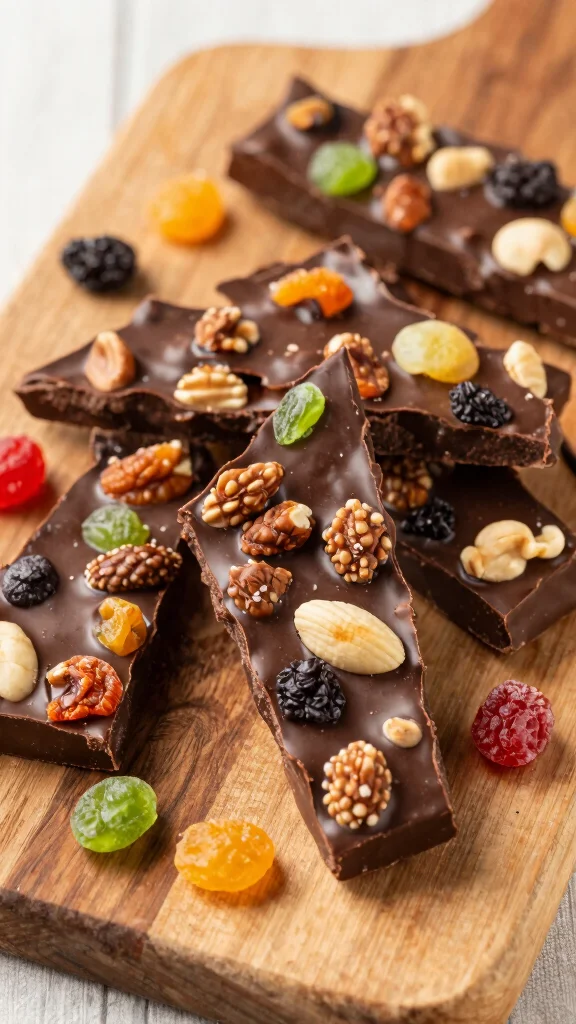
Satisfy your chocolate cravings with homemade chocolate bark! This easy dessert lets you unleash your creativity with toppings, making it a fun option for everyone. Melt chocolate and spread it out on a baking sheet, then sprinkle your favorite nuts, dried fruits, or even crushed candy on top. Once it hardens, break it into pieces for a delicious treat!
This dessert is not only simple to make but also perfect for gifting during holidays or special occasions. You can customize it to suit your taste buds, making it a versatile option for any gathering.
Recipe Overview:
– Servings: 16 pieces
– Prep Time: 10 minutes
– Chill Time: 30 minutes
– Total Time: 40 minutes
– Calories: 150 per piece
Nutrition Information (per piece):
– Total Fat: 10g
– Saturated Fat: 6g
– Carbohydrates: 12g
– Sugars: 8g
– Protein: 2g
Ingredients:
– 2 cups dark chocolate chips
– 1 cup mixed nuts (almonds, walnuts, pistachios)
– 1 cup dried fruit (cranberries, apricots)
Instructions:
1. Melt chocolate chips in a microwave or double boiler until smooth.
2. Spread the melted chocolate onto a parchment-lined baking sheet.
3. Sprinkle with mixed nuts and dried fruits before the chocolate sets.
4. Let cool in the refrigerator until hardened, about 30 minutes.
5. Once set, break into pieces and serve.
Experiment with toppings like crushed pretzels or sprinkle some sea salt for a sweet and salty combo!
FAQs: How long does chocolate bark last? It can last up to two weeks in an airtight container at room temperature.
Conclusion

With these 12 easy desserts at your fingertips, entertaining a crowd just got a whole lot sweeter! From decadent chocolate treats to light and fruity options, there’s something here for everyone to enjoy. Impress your friends and family with minimal effort, all while creating delightful memories around the table.
These minimalist cooking dessert ideas not only save time but also ensure that you can focus on what really matters – spending quality moments with loved ones. So whip up a batch of these treats and get ready to share some smiles and sweet moments!
Frequently Asked Questions
What are the best easy dessert ideas for feeding a crowd with sheet pan or no‑bake options?
For a crowd, sheet pan desserts and no‑bake treats are a genius way to serve lots of people with minimal effort.
Start with 2–3 crowd‑approved flavors that travel well, like chocolate brownie bars, lemon bars, or a no‑bake cheesecake bar.
Scale recipes to your pan size, line the pan with parchment for easy removal, and cut into even portions so everyone gets a fair share.
Make ahead, keep refrigerated or chilled, and let guests serve themselves to reduce workload. These are classic easy dessert winners that fit perfectly with minimalist cooking and dessert ideas for a crowd.
How can I tailor sheet pan or no‑bake desserts for different dietary needs?
With a crowd, dietary needs are common. Choose options that can be easily adapted: gluten‑free, dairy‑free, nut‑free, or vegan swaps.
Pick no‑bake or sheet‑pan ideas that are naturally friendly, and check every ingredient for allergens. Offer 1–2 clearly labeled options and keep separate utensils to avoid cross‑contact.
Substitute dairy with coconut or almond milk, use dairy‑free chocolate, and opt for gluten‑free oats if needed. Clear labeling helps everyone enjoy safely.
What are some tips for keeping desserts simple with minimalist ingredients?
Aim for 3–5 ingredients per recipe, which is perfect for minimalist cooking. Think chocolate, butter or coconut oil, sugar, and a base like crackers or oats.
Use pantry staples to build quick options, such as 3‑ingredient chocolate bars or no‑bake oats bars. Line up 2–3 variations to cover different tastes, then chill and cut into even portions for a neat crowd presentation.
These approaches deliver easy dessert ideas without sacrificing flavor or crowd appeal.
Can these crowd desserts be made ahead of time and still taste fresh?
Absolutely. No‑bake options are especially forgiving and great for advance prep.
Prepare desserts a day or two in advance and store them covered in the fridge. No‑bake bars and sheet‑pan treats often taste better after chilling as flavors meld.
For baked bars, bake, cool completely, then refrigerate. If needed, you can freeze individual portions and thaw before serving. This keeps your serving plan stress‑free and tasty.
What are the best ways to serve and transport sheet pan desserts to a party?
Use the sheet pan you baked in for easy display, or transfer to a portable tray with a lid for transport.
Cut into even bars or squares before leaving home so guests can grab a piece without awkward slicing at the party. Place parchment between layers if stacking, and carry a simple serving kit (knife, spatula, plates, and napkins). Keep desserts chilled if needed and use a cooler or insulated bag for longer transport to maintain texture and freshness.